In this WordPress tutorial for beginners, we’ll show you how to make a WordPress website step-by-step.
We’ll cover the fundamentals of what you’ll need to do to get your website up and running. We’ll provide an introduction to the WordPress content management system or CMS so that you’re familiar with creating and managing the content and design of your website.
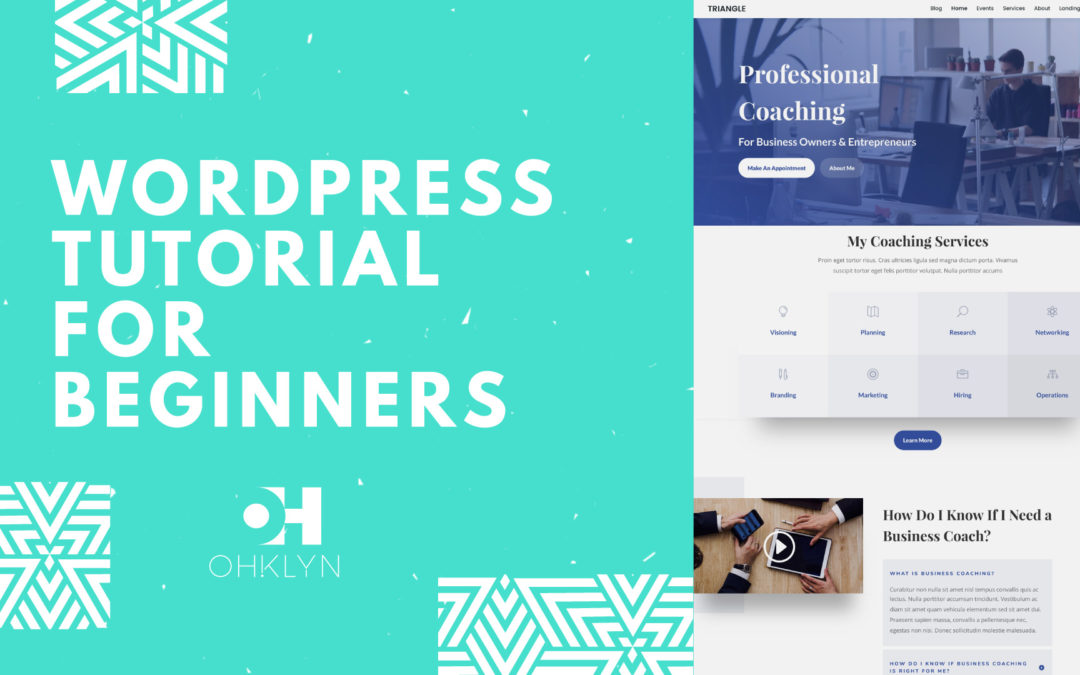
For this tutorial, we’ll use the Divi WordPress theme, and hosting via Bluehost. As part of the OHKLYN community, you can access discounts below.
BLUEHOST DISCOUNTDIVI THEME DISCOUNTFREE LAYOUTS
Here’s what we’ll cover:
- WordPress fundamentals for beginners – how to create a website
- Next Steps
We’ll show you how to set up your hosting account and give you access to discount hosting and a free domain. We’ll use a premium WordPress theme that gives you access to over a hundred free website layouts
The website we’ll create will be:
- Search Engine Optimization (SEO) friendly,
- Feature an optimized UX design,
- 100% mobile responsive, and
- Include an intuitive, beginner friendly, drag and drop page builder.
Step 1 | Preparation
A big mistake beginners often make is forgetting to plan out what they want their website to look like before getting started.
By taking a couple of moments upfront to consider the user experience, as well as brand and content design, you’ll save yourself a bunch of time, and produce a much better result.
Introduction to website and user experience (UX) design
User experience or UX design is the process of planning the content and structure of your website to optimize the user experience.
For this, take out a sheet of paper, or open your favorite drawing tool. Then sketch out the pages you want to include on your website and how they relate to each other. Some of our favorite free tools for this include sketch.io, and if you need to collaborate with others, check out InVision.
The most common include a:
- Homepage
- About page
- Contact page
- Gallery or client work page
- Blog page (including the individual post pages, and category pages),
- And a privacy or terms of use page.
Next, for each page, create a rough guide for what will be on the page in terms of text, images, videos, and other elements. You can use the layout pack you want to use as a guide.
Give some thought on how you structure your content.
- Does the flow of information you’re presenting make sense?
- Does it logically take them through a process, or tell a story?
If it does, this will dramatically improve engagement on your website.
Introduction to brand design and content planning
Once you’ve outlined the pages you want to include on your website and put together the rough layout for each page, you’ll then need to start writing the copy, sourcing or designing the images and graphics, and planning the navigational elements.
Go through each page layout, write the content for each section and decide on the media elements you want to use.
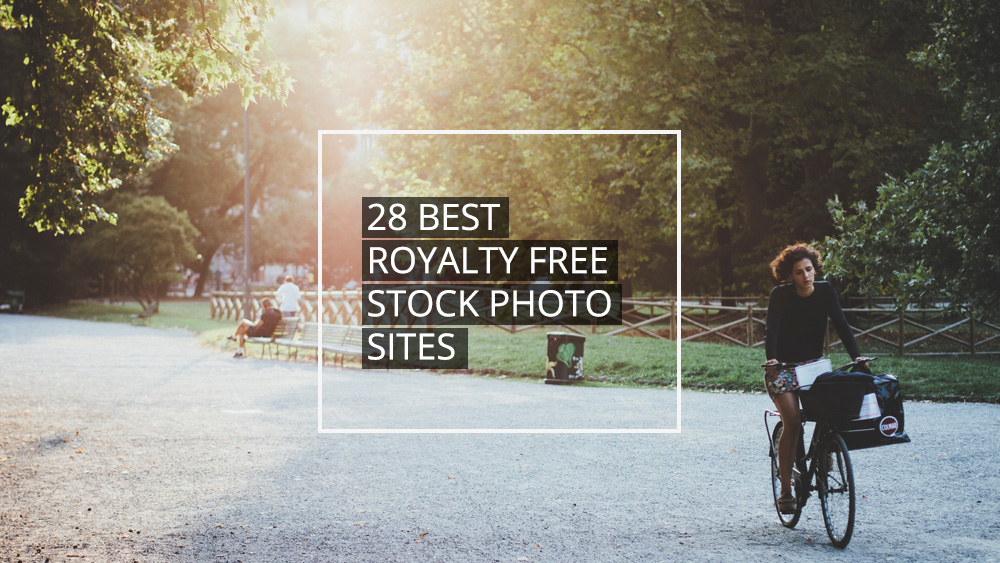
Sourcing great images for your website will an important aspect, to assist with this check out our Best royalty free stock photo sites article. Here you will find a list of free high-quality photo sites where you can download images that you can use on your website for free.
From a branding perspective, you will need:
- A logo,
- A Favicon (which is the icon that appears in the browser tab when a user visits your website),
- And your brand color palette, including the hexadecimal color codes. We’ll show you how to customize your website with these colors later in this tutorial.
There are a number of great tools like paletton.com, Adobe color, or color-hex.com that can be useful.
If you need help with copywriting or graphic design, consider using a third-party platform like:
Setting a budget for your website
In this tutorial, we’ll show you how to make a website that would typically cost two to three thousand dollars. For this, you’ll need a small budget of around $100 – $300.
This will cover the cost of items such as:
- Your website hosting: at about $3 – $10 per month depending on your hosting term
- A Premium WordPress theme: which is typically around $50 – $100
- Premium images, if you want to use them
- Or, a graphic designer, if you want to create some custom graphics
Step 2 | Register your domain, set up hosting, and install WordPress
The first step is to register your domain (if you haven’t already), set up your website hosting account, and install WordPress. So we’re all on the same page, let me quickly explain what they are.
Your domain, or URL – is the web address for your website, and is what users will type into their browsers to access your site. For OHKLYN it’s OHKLYN.com. Pick something that works for you.
Hosting, is what allows your website to be accessible to users 24/7. It’s the process of storing the content and data for your website on a web server and serving it to users.
For this tutorial, we’ll walk you through getting started with Bluehost, as we believe it’s the best option for beginners.
Ok, so let’s go through the steps for setting up hosting for your website and registering your free domain.
Bluehost – Getting started
Steps to register your domain & set up hosting:
- Head to the bluehost website (massive hosting discount up to 54% + FREE domain). The free Bluehost domain extensions included are (.com, .online, .site, .website, .space, .tech, .store, .net, .org, .info, .co, .us, .biz, .club).Note: If you want a specific top level domain (TLD) or country specific domain not listed above, you will need to purchase it through a domain registrar like GoDaddy or CrazyDomains. You will also need to change the domain nameservers or (DNS) records to point at Bluehost’s servers. Here are the steps on how to change domain nameservers to point at bluehost.
- Select ‘get started now’ for the plan you want (shared hosting will be fine for most users & you can always upgrade later).

- Choose the hosting plan that’s right for you, hit ‘select’.
- Either use your existing domain, or type in the domain that you want (it’s free), then hit ‘next’.
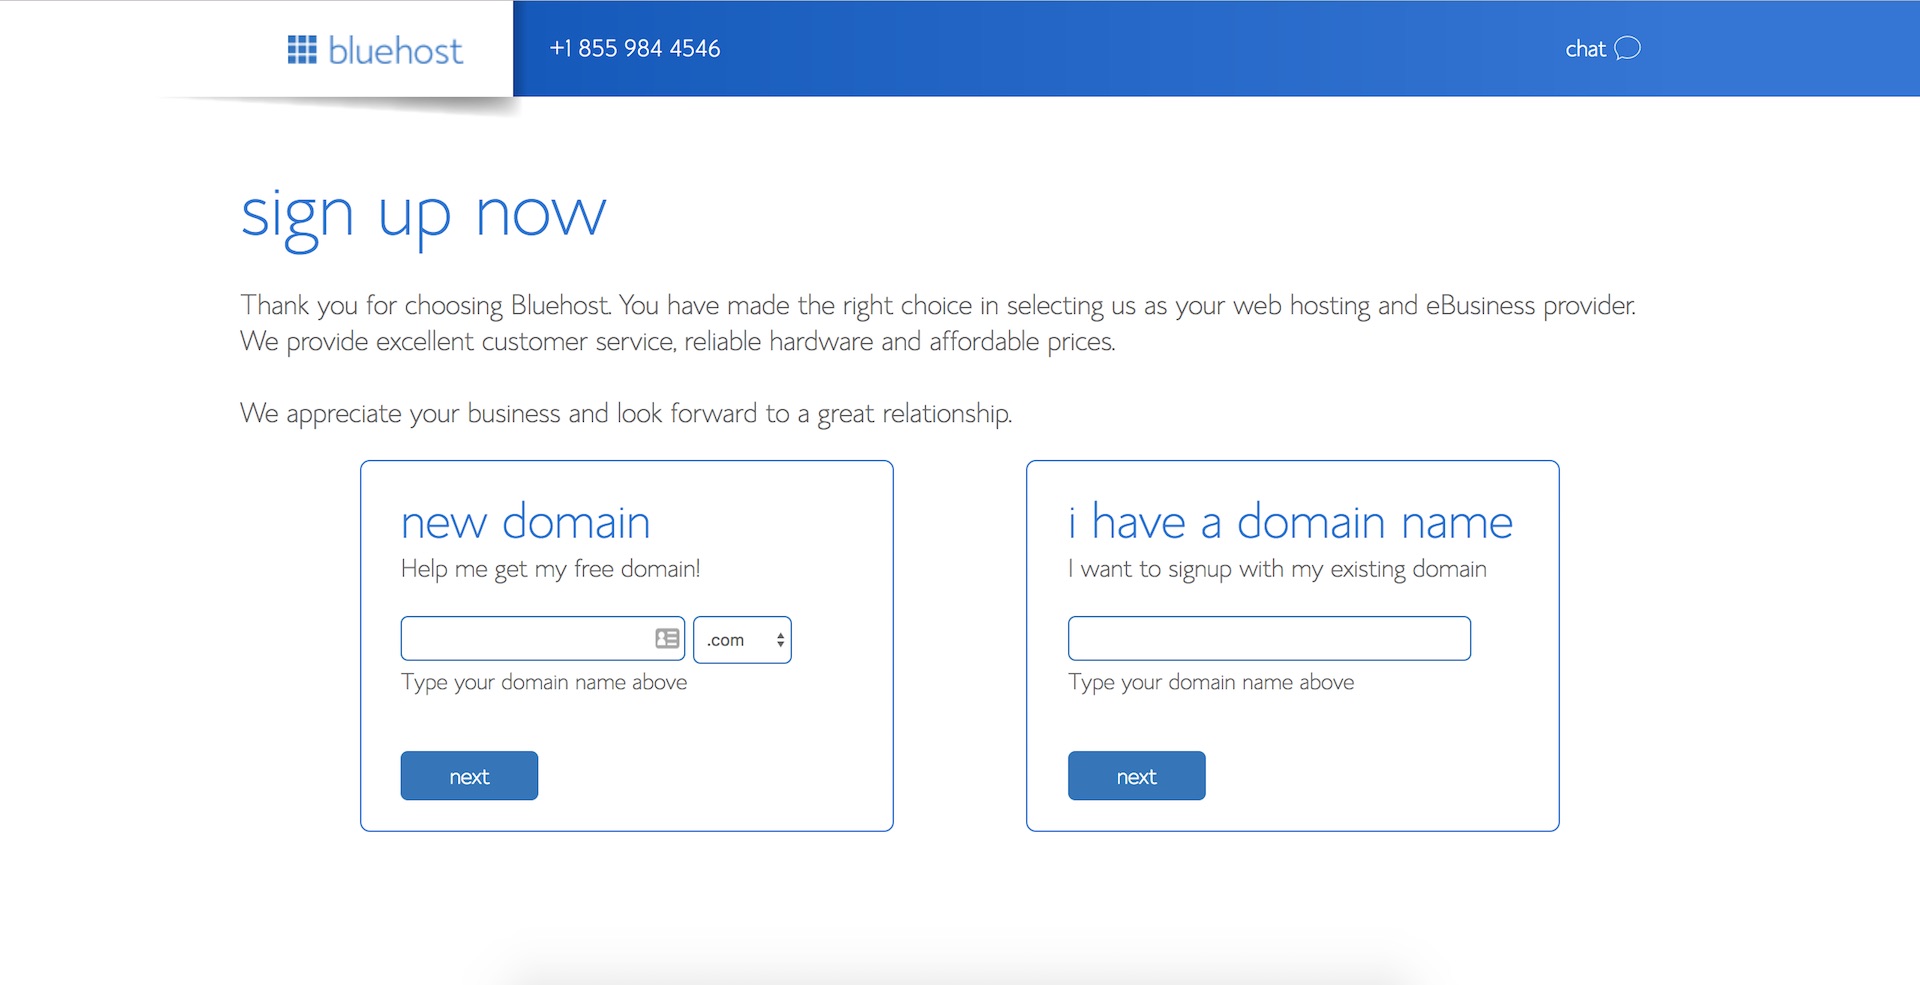
- Choose your desired hosting term and domain add-on preferences. We recommend selecting ‘domain privacy protection’ so that the personal information associated with your domain, isn’t publicly available (optional).
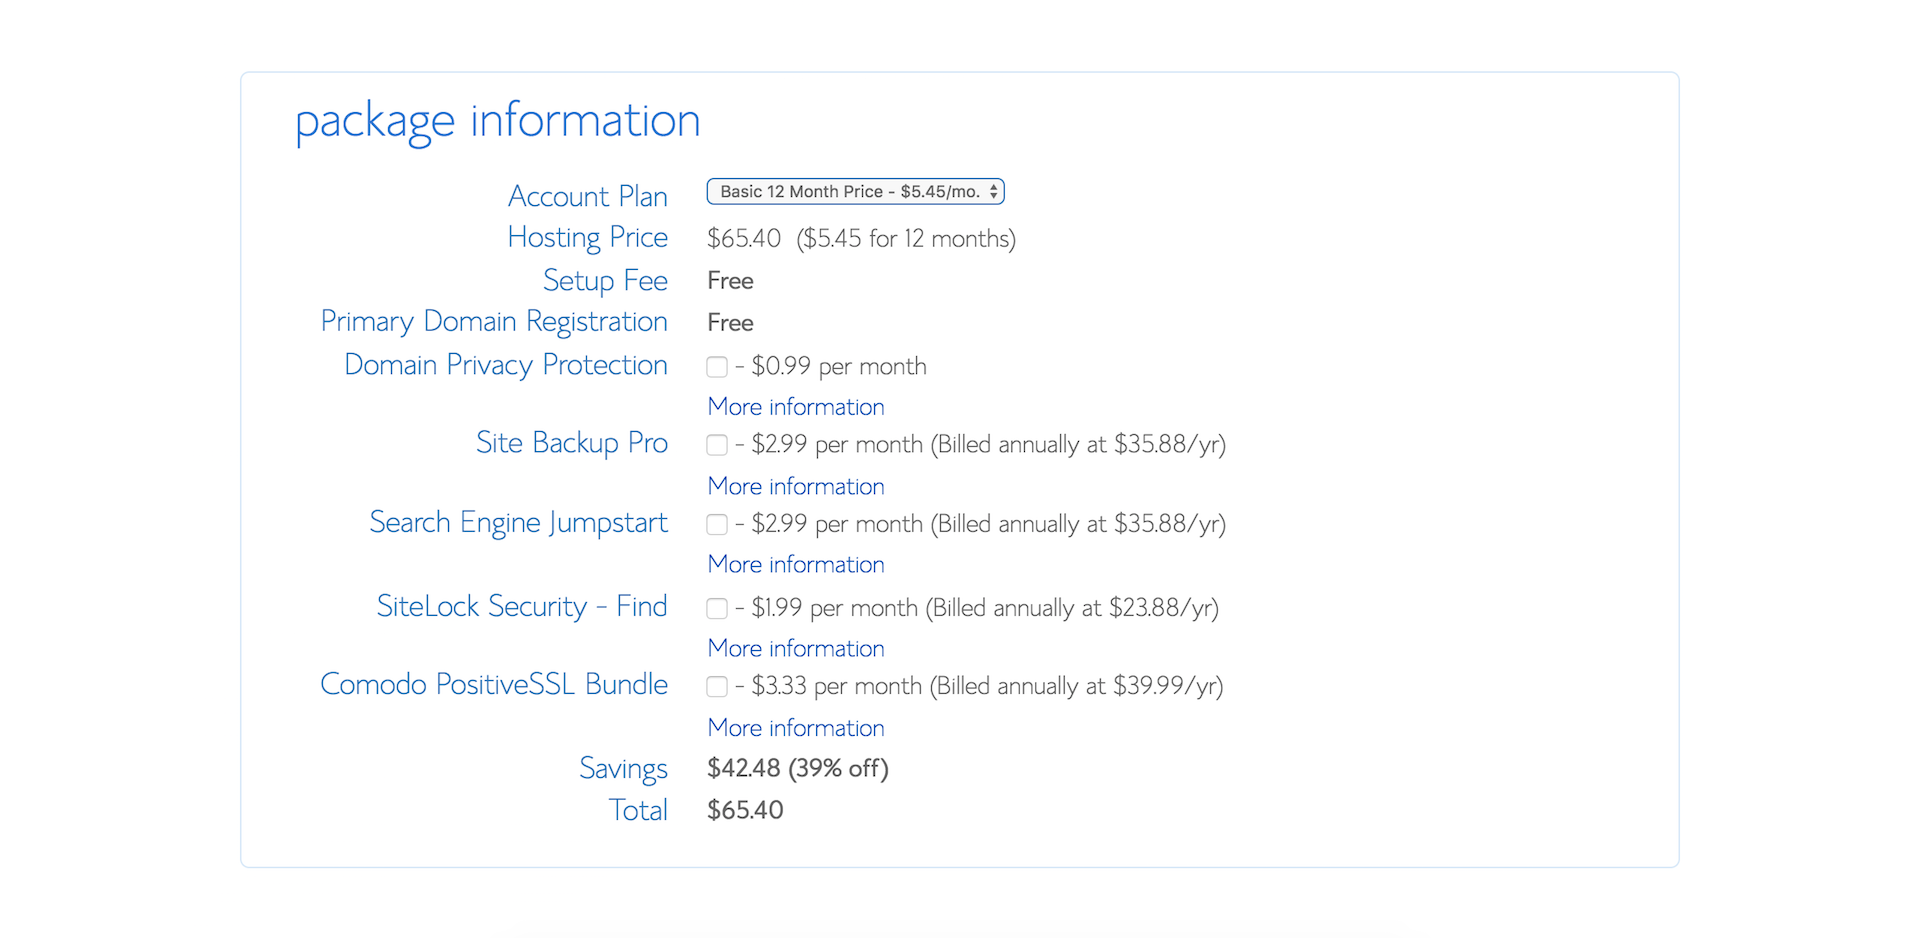
- Once you’ve chosen your desired options, enter your personal information, payment details, review the terms of use, and click ‘submit’ to move on to the installing WordPress.
Steps to install WordPress:
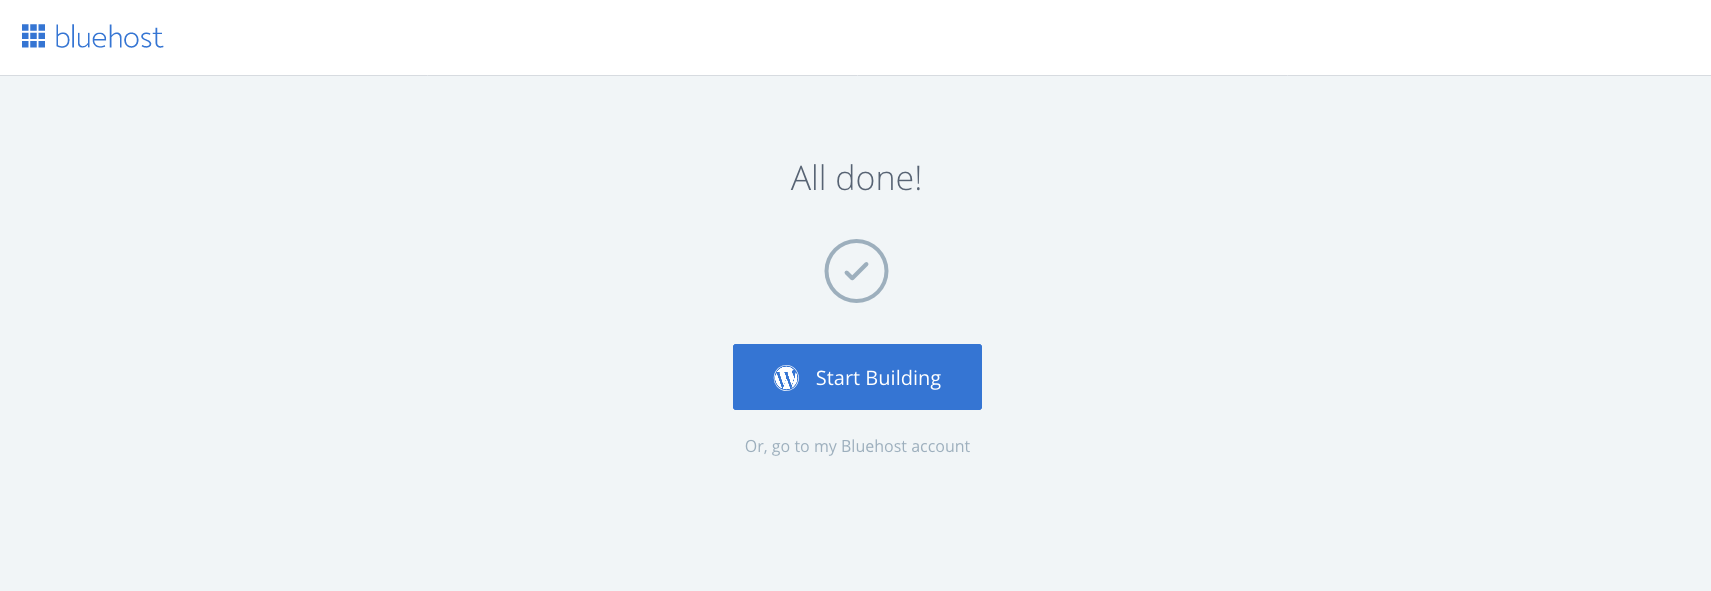
One of the reasons we love Bluehost is their easy to use One-click WordPress installation feature. In September 2017, Bluehost made the process of getting started with WordPress even easier. For new domains, WordPress is automatically installed for you so you can start building your site right away.
- When you see the ‘Congratulations’ message, click on login.
- You will be sent a verification email to the nominated email address for the account, which you will need to confirm.
- You can then set your password for your hosting account.
- Once you’ve done that, you will then be given the option to either ‘Start Building’, which will take you to the backend of your WordPress dashboard, or you can select to go to your Bluehost account.
Install WordPress for an existing domain via Bluehost
If you’ve purchased your domain elsewhere, you will need to change the DNS records for your domain via the domain registrar where you purchased your domain. Check out one of our detailed tutorials that walk you through this process:
- How to change GoDaddy nameservers to point at Bluehost
- How to change Domain Name Server (DNS) records to point at Bluehost
Congratulations! You officially have a new website! It’s not much at the moment, but you’re well on your way.
If you’re new to WordPress, we’d recommend reviewing our How to use WordPress article which is a free introduction to WordPress tutorial for beginners.
We recommend that you add your free SSL certificate which will encrypt the data on your website. This is good practice as it improves the security of your website, improves your search rankings as Google prefers secure sites, and allows you to take payments on your website as well, in the event that you want to include an online store as part of your website.
Step 3 | WordPress fundamentals
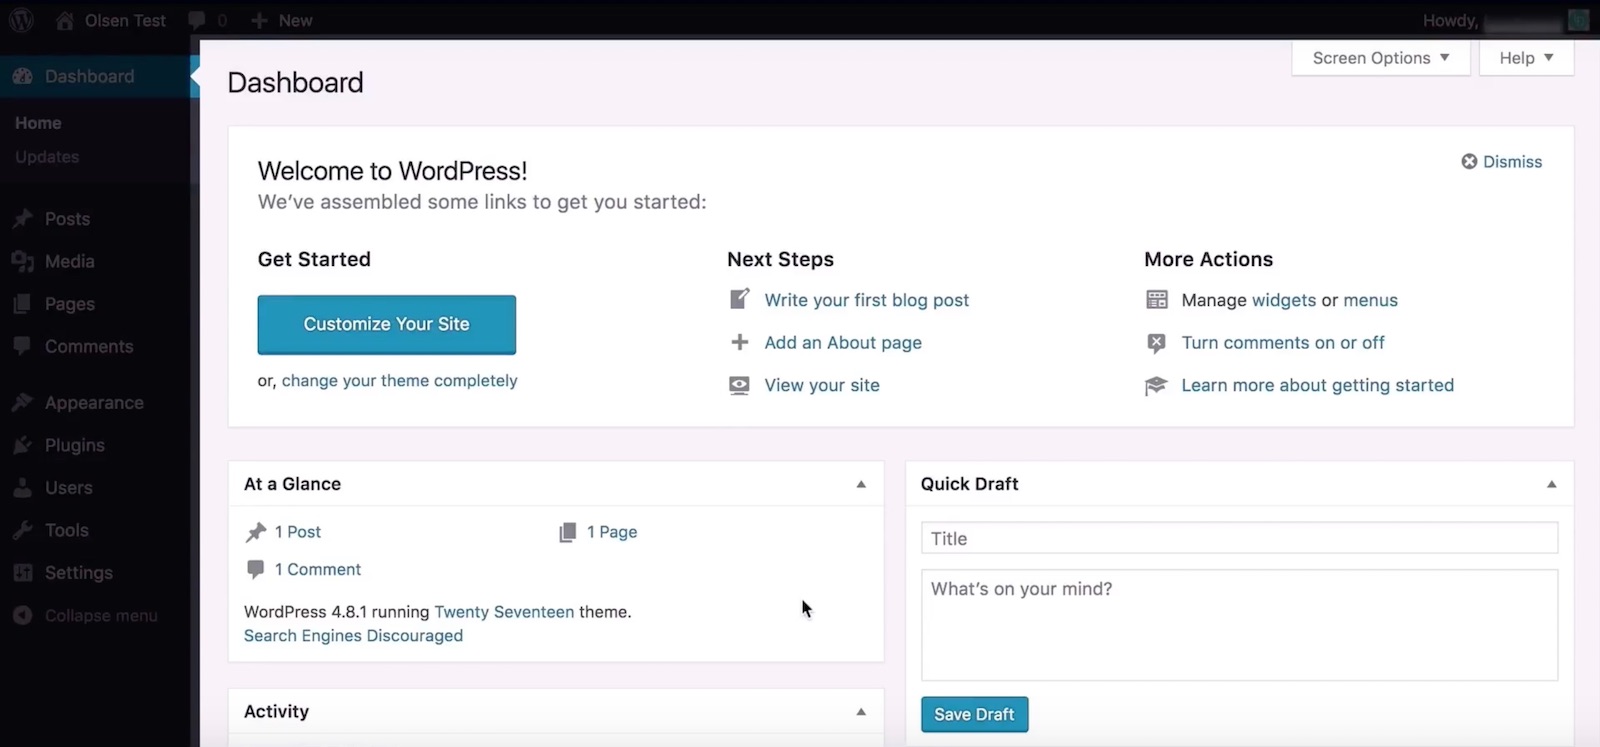
Whenever you want to log into your WordPress website, enter your domain and add /wp-admin to the end (i.e example.com/wp-admin). Then enter your username and password that you set up in the prior step. You’ll then be taken to your WordPress dashboard.
The WordPress dashboard or admin panel is broken down into 3 main sections: at the top, we have the WordPress toolbar, the menu or admin menu is located on the left-hand side, and the main admin area is in the middle, where we’ll do most of our work.
We’ll give you a brief overview of each section now – however, for a more detailed overview, watch our free how to use WordPress tutorial, which is an introduction to WordPress for Beginners. This is intended to get you up to speed on the fundamentals of how WordPress works in about an hour.
WordPress toolbar
The WordPress toolbar at the top is dynamic and adjusts the available options depending on which page you’re on, and if you’re viewing the page from the front or backend.

WordPress admin menu
The Admin menu located to the left of your dashboard is separated into 3 main sections, these are: The Dashboard section, the Content Management section, and the Site Administration section.
- The Dashboard section provides easy access to the Dashboard, updates, and additional plugin features.
- The Content Management section is where you create and manage Posts, Pages, Media items, Comments and additional plugin features.
- The Site Administration section is where you configure the design and appearance settings for your website (including selecting the active theme for your website, creating and managing menus, widgets, and customizing your website’s theme). It’s also where we manage plugins, users, control global WordPress settings, and activated theme and plugin extensions like SEO, Social sharing, theme specific settings, and security.
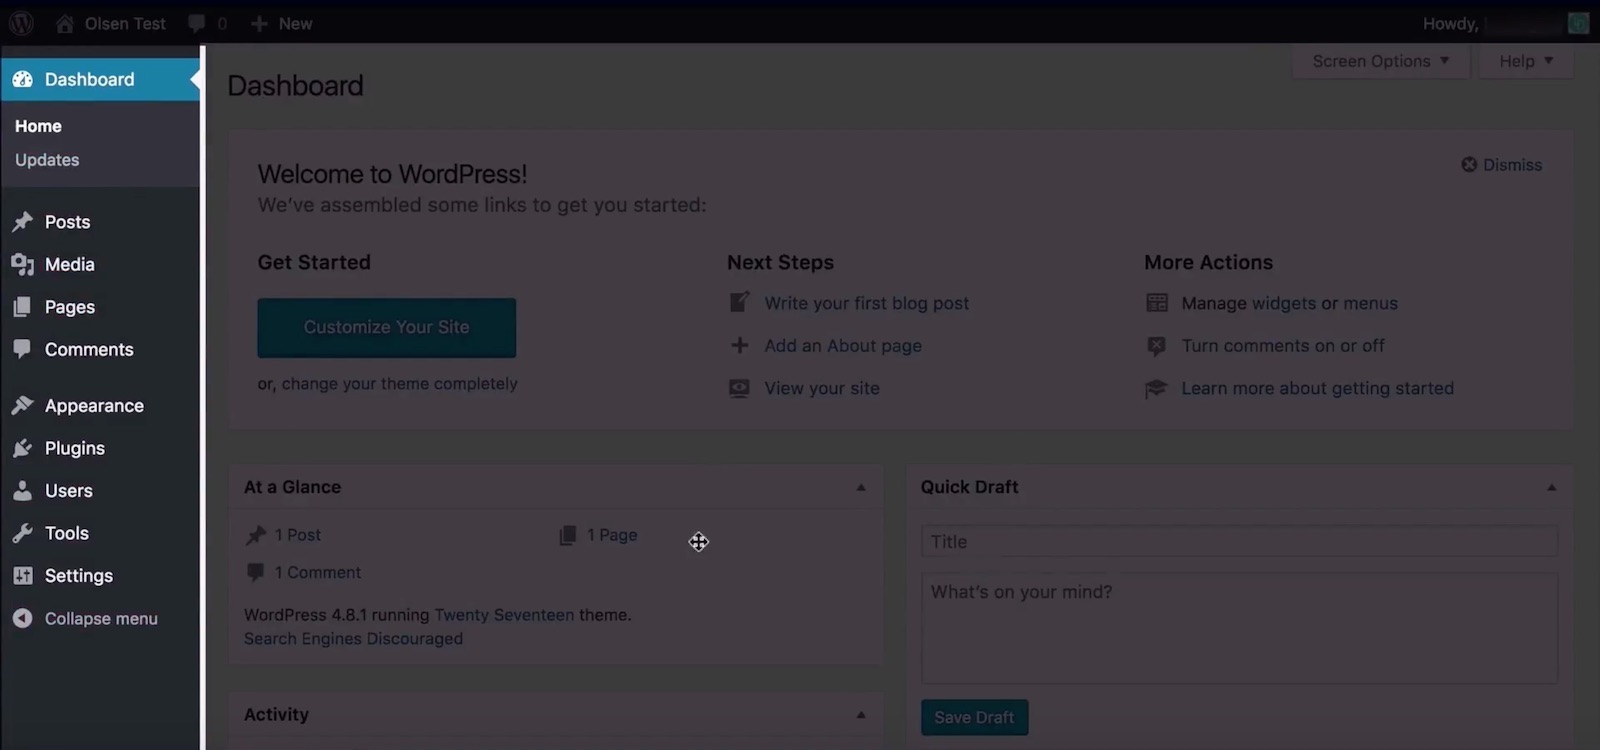
WordPress admin panel
Lastly, the main Admin area serves as our primary workspace, and adjusts depending on what’s selected from the admin menu.
We’ll go through some practical examples for each of these in the coming sections once we upload our theme and start working with content.
Permalink settings
One thing we recommend doing before we move on is updating the permalink structure for your website. This will impact how your URL strings will be created for pages, posts, etc.
To do this:
- Hover over ‘settings’ in the admin menu, then select ‘permalinks’.
- The default option, leverages a more journal approach featuring the date in the permalink. However, the more common option and what we’d recommend from an SEO and UX perspective is post name. So we’ll select that option.
- Then save changes.
Managing users on your website
If you want to update your user profile or add users to your website, you can do this by hovering over ‘users’ in the admin menu on the left, and selecting from the options there.
Once again, for a detailed walkthrough of WordPress, we recommend watching our how to use WordPress tutorial.
Step 4 | How to upload and install your WordPress theme
A WordPress theme is a group of files that work with the underlying WordPress software to enhance the design and functionality of your WordPress website. For a more detailed overview, check out our What is a WordPress theme article.
For this tutorial, we’ll use on of the highest rated WordPress themes – Divi by Elegent Themes. To access an exclusive discount, follow the link below.
Create an Elegant Themes account
- Head to the Elegant Themes website, and click ‘Join to download’.
- You can either purchase a yearly access to all of their themes and plugins, or select their lifetime access option, which gives you access to all of their theme and plugin updates for life.
- Once you’ve chosen your access level, select ‘sign up’.
- Enter in your personal information.
- Select your payment method.
- Review the terms.
- And select ‘complete registration’.
- Then, log into your Elegant Themes dashboard.
Download the Divi WordPress theme
- From your Elegant Themes dashboard, scroll down to where you see ‘installing Divi’ and select ‘download’.
- This will download a copy of the Divi theme which will be a .zip file.
- You will upload the theme file as is, so there’s no need to unzip the file.
Next, we’ll upload the Divi WordPress theme. If you want to install a child theme you can either use our free child theme generator. Alternatively, you could also use a plugin called Child Theme Configurator to help set this up. This is best practice but not essential.
Upload and install the Divi WordPress theme
- Go to your WordPress dashboard. Hover over appearance in the admin menu on the left, and select ‘themes’.
- From here, select ‘Add new’.
- Then select, ‘Upload theme’.
- Select ‘choose file’.
- Navigate to the .zip file you downloaded earlier, and select ‘Open’.
- Click ‘Install now’. This will start the process to upload and install the Divi WordPress theme.
- Once the theme is successfully installed, click ‘activate’, and you’re new theme will now be live on your website.
Unlike other themes, Divi doesn’t require you to install any additional plugins to leverage all its features. However, if you want to include any additional plugins on your website, review our article and video on how to install a WordPress plugin, which you can find on our blog or YouTube channel.
One of the great things about the Divi theme (other than its industry-leading page builder), is the ability to access an unlimited number of layout packs that you can use on your website.
So, what exactly is a layout pack?
A layout pack is a group of JSON files that include a series of page layouts that can easily be imported into your new website. These include all the content, Divi settings, images, and other design elements, making it really easy to create a great looking website.
From there, you can update or amend the design to create the exact website you want. In a recent update, you can now access a number of these pre-designed layouts or layout packs directly from the Divi builder.
Step 5 | How to Customize your website
So far, we’ve gone through setting up your WordPress website, uploading the theme and required plugins, as well as how to leverage the demo content to get up and running quickly.
In this section we’ll look at:
- How to create pages and posts
- How to create and manage menus
- How to update your WordPress theme settings (including widgets)
- How to update your WordPress theme Customizer settings, and
- How to use the Divi Builder
How to create web pages and posts
For this tutorial, we’ll create a new page, and set this as the homepage for our website so that you’re aware of how the homepage is set for your website.
How to create a new page:
- From your WordPress dashboard, hover over ‘pages’ in the admin menu on the left. To view all the pages on your website, click on ‘all pages’
- Alternatively to create a new page, click ‘add new’
- You could also hover over the ‘+ new’ option at the top of the page and select ‘page’
- Or, from the All pages tab, click on the ‘Add new’ button at the top
- The first thing you’ll want to do is give your page a name. If you’ve selected ‘post name’ as your permalink structure, this will be used to create the URL for this page. For this example, we’ll call this ‘Landing’
- If you’re new to WordPress, we recommend watching our How to Use WordPress tutorial, where we cover the default WordPress options available when creating pages
- On the right-hand side, you can select if you want to assign a parent page. This will impact the site hierarchy as well as permalink structure. In this case, we’ll leave the default of ‘no parent’
How to add a layout from Divi’s pre-designed layout packs
- To launch the Divi builder and leverage the pre-designed layouts, we’ll click on the ‘Use the Divi Builder’ button.
- We’ll go through how to use the Divi Builder to create and update pages on your website in the following section. However, to access the pre-designed layout for this page, we’ll click on ‘load from library’.
- Under the ‘premade layouts’ tab, you can access any of the pre-designed layouts by clicking on the layout you want to use. In this case, we’ll click on the ‘Divi for business’ Agency layout pack.
- Then navigate through the various pages, and choose the page layout you want to use. For this page, we’ll select the landing page layout.
- From here, you can either view the demo in a new tab or click ‘Use this layout’ to import the layout into your page.
- You’ll see that our Divi Builder is now populated with content. We’ll go through a practical example of using the page builder shortly.
- For now, we can save the page as a draft if we’re not ready to publish the page.
- Preview the page, which will preview what the page looks like from the front end.
- You’ll see that the layout has imported all the content from the demo, which is great.
- If we head to the back-end and we’re ready to publish the page, we can hit ‘publish’ and that will take the page live.
We’ll create the other six pages that we’ll use for this demo and import the content just like we did for this page. The pages we’ll create will be called ‘Home’, ‘About’, ‘Contact’, ‘Blog’, ‘Portfolio’, and ‘Pricing’.
How to upload and use a Divi layout pack
- From your WordPress dashboard, hover over ‘Divi’, and select ‘Divi Library’.
- This is where you’ll manage any saved page layouts, sections, rows, or modules that you can easily load into pages with a couple of clicks. Click on the ‘import/export’ option at the top of the page.
- Click on the ‘import’ tab, and select ‘choose file’.
- Navigate to the JSON file with the layout or layouts you want to upload and select ‘open’.
- Then, click on ‘import Divi Builder layouts’. You’ll then see a progress bar. Once it’s uploaded you’ll see that the layout or layouts have now been added to your Divi library.
- And that’s how you upload any Divi Layout that isn’t featured on the premade layouts tab.
How to set the homepage for your WordPress website
- Hover over ‘Settings’ in the admin menu and click on ‘reading’.
- Under the ‘Your homepage displays’ option, make sure that ‘a static page’ is selected and then choose the page you want to set as your homepage from the homepage dropdown list below.
- In this case, we’ll choose the page called ‘Home’.
- Then click ‘save’.
- If we go to the homepage of our website, we’ll see that the page we just created called ‘Home’ is now our homepage.
- Ok, so that’s how you’ll set the homepage for your website.
How to create posts and categories
If you want to include a blog on your website, you’ll create blog posts the same way. The only difference is that you’ll need to set up categories first.
How to add blog categories
- From your WordPress dashboard, hover over posts, and select categories
- Enter in the category name
- And selecting ‘add new category’
- Repeat this process for all the categories you want to include in your blog
How to create a blog post
Once you’ve created your categories, to create a new blog post:
- Hover over posts in the admin menu and select ‘add new’
- You’ll add a title
- And your content
- Select the category for the post on the right-hand side
- Assign a feature image by clicking on the ‘set feature image’ option on the right-hand side
- And either uploading an image or selecting one from the media library
- Then, preview or publish your post
The default blog page will feature your recent posts unless you create a custom blog page and set it as your blog page via the reading settings tab like we just did for the homepage.
For more information regarding the Divi WordPress theme or the Divi Builder, follow the button below to access 20+ hours of free video tutorials and documentation
How to create and manage menus
In WordPress, menus are managed in their own dedicted section. To create the menu structure for your website hover over ‘appearance’ in the admin menu, and select ‘menus’.
On the left, you have the available content that you can add to your menu, such as:
- Pages
- Posts
- Custom links
- Categories, etc
To add more options, click on the ‘screen options’ tab at the top and check the boxes next to the elements you want to add to your menu. For example, ‘tags’.
Under screen options, you can enable the ability to set the link target for a menu item, which means whether the link opens in a new tab or not, as well as assign CSS classes. We’ll check both boxes as we’ll show you how to use the link target option to open a menu link in a new tab and how to include a mega menu on your website by adding a CSS class to the menu item.
If you’re interested in learning some HTML and CSS fundamentals for WordPress, register for one of our courses at courses.ohklyn.com.
On the right, you have your menu structure.
How to create a new menu in WordPress
- To create a new menu click on ‘create a new menu’.
- Enter a name for the menu (this is for your reference).
- Then select ‘create menu’.
- Down the bottom, you can select where you want this specific menu to be displayed. The Divi theme includes three default menu locations:
- Main navigation,
- Secondary navigation (shown above the main navigation. This is where you can include a phone number or another call-to-action item),
- Footer navigation menu (located in the footer section of your website).
- We’ll set this menu as our main navigation menu.
How to add menu items to your WordPress menu
- Select the elements from the left
- Then click ‘add to menu’
- You can rearrange the order by clicking and dragging the menu items into place
- Similarly, you can create menu hierarchy by clicking and dragging the menu item across to sit underneath the item above
- Then save the menu
You can also add custom links to your website’s menu. To do this:
- Click on the custom menu link option on the left
- Add the URL for where you want the menu item to link to
- Add the link text that you want featured in the menu
- Then click ‘Add to menu’ and drag it to where you want it to be positioned in the menu
To amend the footer menu, you’ll approach it in the same way:
- By either selecting the footer menu that was created with the demo content and amending the menu items
- Or, creating a new footer menu following the steps we just went through
Divi also allows you to include mega menus which can be great from a UX perspective as they allow you to show large amounts of information in an efficient way.
How to add a mega menu with Divi
- Click on the blog menu item.
- If you’ve checked the ‘CSS classes’ box under the screen options at the top, you’ll notice there’s a field called ‘CSS Classes’. Add the class name of mega-menu to this field.
- Hit ‘save’.
- Then navigate to the front-end and refresh the page.
It will take some finessing, but this can be a powerful feature. Follow the button below and search for ‘Mega Menu’ for more info.
How to update your WordPress theme settings
In addition to what we’ve covered so far, within WordPress and for the Divi Theme, there are three places where you’ll control the global look and feel of your website. These are:
- Divi theme options: where you’ll set the logo and favicon for your website, control your default page and post layouts, amend the visibility of global elements like social icons and metadata, as well as integrations for things like Google maps, social media, etc.
- Theme Customizer: Where you’ll manage your global styling parameters, such as colors, fonts, menu styles, etc.
- Widgets: How you populate your sidebar with content and other widget enabled areas on your site.
Firstly, we’ll take a look at the Divi Theme options section. To access the Divi Theme options section, from your WordPress dashboard, hover over ‘Divi’, and select ‘Theme options’. In the theme options, you’ll notice that there’s a number of tabs along the top. To access the theme documentation for the Divi Theme Options section, follow the button above and search for ‘Divi theme options’.
Before we go through each of them, let’s cover some common vocabulary that relates to the basic architecture of WordPress so that these make more sense to you as we go through them.
Static pages are the pages of your website where the content is relatively static. For example, your homepage, about, contact page, etc.
Individual posts are the blog posts you create that are relevant to your business, industry, or niche. Individual posts are grouped by categories which serve as an organization tool and provide additional context and meaning to users. Tags can also be added to individual posts.
Individual portfolio posts are most commonly used to showcase examples of work, or case studies, etc. These function in a similar way to individual posts, where they are associated with a category.
Archive pages are typically the category pages and showcases the individual posts or portfolio posts associated with that specific category. Essentially, these pages act as an archive of associated posts.
For example, if you are a fashion brand and want to include a blog on your website, you may want to have a category called ‘Lifestyle’ with a number of individual posts related to ‘Lifestyle’ related keywords or topics related to your niche. If you were to click on the ‘Lifestyle’ category link on your website, you would be taken to the ‘Lifestyle’ category archive page, which would display all the posts related to the category of ‘Lifestyle’. This page is what’s referred to as an archive page.
Ok, so hopefully that makes sense and we can now go through the Divi Theme options.
Divi theme options – General tab
In the ‘Divi Theme Options’ section, the first tab is the ‘general’ tab and is the tab where we’ll spend most of our time. This is where we’ll upload our logo.
How to add your logo to the Divi WordPress theme
- To update your logo, go to the logo option and select ‘upload’.
- You can select your logo from your media library if you’ve already uploaded it. If you haven’t, you can drag in your logo, or navigate to ‘upload files’ and click ‘select files’ to upload your logo.
- Once your logo is added to the media library, select your logo and add an alt text like ‘your brand name and the word logo’. Adding alt text to all images used on your website is good practice and something we’d recommend doing.
- Then choose ‘set as logo’.
Next, we’ll follow the same process to add a favicon to your website. A favicon is the icon that appears in the browser tab when a user is on your website. Your favicon image will need to be square, however, it can be a .png image if you want to include a brand element that isn’t square.
How to add your favicon to the Divi WordPress theme
- To upload your favicon, go back to the WordPress dashboard.
- Go to Appearance -> Customize or Divi -> Theme Customizer.
- Go into the General Settings from the left hand menu and then Site Identity.
- Under the Site Icon section click Select Image.
- Select an image from your media library or navigate to the Upload Files tab and upload a new image.
For each of the available options in this section, you can hover over the question mark icon on the right-hand side to see more information about each specific option.
If you have a brand color palette, we recommend adding it to the ‘Color Pickers Default Palette’ section here, as this will make your color palette available anywhere throughout your site where you have the option to set a color.
How to add Google map to Divi WordPress theme
If you want to add a Google map to your website design, you’ll need to set up your Google Maps API key and paste it into the field on the general tab of the Divi Theme options. Follow the button below and search for ‘Google map’ for the step by step instructions.
Divi social media icons
Similarly, you can enable the default social media icons on your website here by enabling the options you want on the general tab, and add your social media links.
We find this feature from Divi limiting because of the limited options available without needing to amend the base code. We prefer to disable these and instead, import font awesome instead which enables us to add any social icon to our website and add the links anywhere on our site.
Lastly, from within the general tab, you’re able to set the number of default posts shown on the various types of pages. Underneath that is a number of options including a back to top button on your site that you may want to utilize. At the very bottom is where you can add custom CSS to your website. You can also add Custom CSS via the Theme Customizer panel which we’ll explore next.
Whenever you make changes, remember to hit the ‘save changes’ button at the bottom to commit your changes.
Divi theme options – Additional tabs
- Navigation – Here you can control the visibility of specific elements related to pages, categories, and your navigation menu features.
- Builder – the Divi Builder was recently upgraded to move away from adding what’s referred to as ‘inline CSS’ into your web pages when you make customizations to your page. This is huge, as many drag and drop builders add Inline CSS, and if you know anything about web design best practices, inline CSS is a major rookie move. In this tab, you have a few options that relate to how the CSS is generated on your site (which we wouldn’t recommend changing), as well as the ability to turn off the product tour feature.
- Layout – This allows you to control the look and visibility of elements included on individual posts and pages.
- Ads – As the name suggests, this allows you to integrate ads on your posts.
- SEO – We prefer to use the Yoast SEO plugin to optimize the on-page elements of our website, however, you have control over some of these elements here.
- Integrations – here you can add your Facebook pixel, Google Analytics code, or any additional code to your website.
- Updates – This allows you to add your Elegant Themes username and API key to enable Divi theme updates from within your WordPress dashboard as Divi improves and evolves.
Ok, so that’s an overview of the fundamentals everyone should know about the Divi Theme settings. Review the help (or question mark) icon next to each option for further definitions, or follow the link below to the Divi Documentation and search for ‘Divi Theme Options’ for a more detailed overview of each element.
Widgets
Before we take a look at the Theme Customizer which allows you to set global fonts, colors, and other styling attributes on your site, let’s quickly explore widgets. If you’re new to WordPress, we would recommend reviewing the documentation to get your head around widgets and widget-enabled areas as they are a powerful feature.
Widgets are managed in their own dedicated section which you can access by hovering over ‘Appearance’ in the admin menu on the left-hand side, and selecting ‘Widgets’.
- On the left, you have all the available widgets
- And on the right, are the widget enabled areas
- Divi has the sidebar widget area which appears on individual posts, archive pages, etc. As well as four footer widget areas that you can use depending on which footer layout option you choose in the Theme Customizer which we’ll cover off next.
By default, there may be some widgets added to your sidebar. Depending on the layout you’re using, this may or may not be displayed, however, this can very easily be added.
How to add a widget to the sidebar, or any widget enabled area
- Simply click on the widget on the left
- Select the widget enabled area you want to add the widget to
- And select ‘add widget’
- Once the widget has been added, you can drag it into place
- Click on the widget to amend its settings
- Once you’ve updated the widget, hit ‘save’
To delete a widget, click on the widget, then select ‘delete’
Pro tip – Search for the ‘Divi Sidebar Module’ from the Divi documentation section. This guide will show you how to use the Sidebar module which will be implemented on a number of the blog pages for the layout pages included in the free Divi layouts.
Ok, so we’ve covered the Divi Theme Options and had a quick look at widgets, let’s move on to the Theme Customizer options.
How to update your WordPress theme Customizer settings
The theme customizer is where you’ll have full control over the global styling options for your website. To access the theme customizer:
- Go to your website dashboard, hover over ‘appearance’, and select ‘customize’.
- You could also hover over ‘Divi’ and select ‘Theme Customizer’.
- On the left is the customization panel, and on the right is a live preview of your website.
One thing to note before we get started is that the module settings for the layouts and elements on each page will override the global settings that are set via the theme customizer.
Theme Customizer – General tab
The first thing we’ll take a look at is the ‘General’ settings:
- Under the site identity tab, is where you can add a ‘site title’ and ‘tagline’ for your website.
- If you haven’t uploaded your favicon via the Divi theme options, you could also upload it here.
- Next is the layout settings, here you can enable a boxed layout, adjust the default content widths and heights for your site, as well as set your website’s default accent color.
- For this example, we’ll set ours to #0ddadd, by clicking on the color picker. Because we added our brand color to the palette earlier we can easily select it from the pre-loaded options.
- Whenever you make any changes, remember to publish changes by clicking on ‘publish’ at the top.
- If we go back, the next option is ‘typography’.
- Here we can set our default header and body fonts. You can choose from a number of free web fonts and a number of Google fonts. In this case, we’ll set ours to ‘Raleway’ for both the header and the body.
- Below that you can set your body link color, which we’ll set to our brand color.
- Then there’s the default header text color and body text color, which we’ll leave as is but you could set this to suit your design.
- Remember, if you choose to use a layout from the library where the fonts are set at the module level, these will be overwritten. To ensure the font you set here is used throughout your site, you’ll need to reset the font option for the specific module via the Divi Builder which we’ll cover next. Let’s go back.
- The last option for this section is the background settings. Here you can set a default background color for your website or upload an image or texture.
Theme Customizer – Header and navigation tab
Let’s move on to the next group of settings which are the ‘Header and navigation’ settings:
- Here, we can set the header format by selecting a header style. This includes the default option where you can enable the vertical navigation option, or opt to hide the navigation until scroll. There is also the Centered logo option, Centered inline logo option, Slide-in option, or the Fullscreen overlay option.
- The Primary Menu Bar options allow you to control the height, width, and colors of your main navigation bar, as well as the size of your logo.
- Depending on which header style you go with, you’ll either have access to the secondary menu bar settings, or the Slide In and Fullwidth header settings. These will look similar to the settings in the primary menu and allow you to further customize your website.
- Next is the fixed navigation settings which refers to the sticky menu or the menu that sticks to the top of the browser when the user scrolls down the page. You can amend the fixed (or sticky) header options by following the same process. You’ll notice that the options are very similar to the settings we went through in the primary navigation panel.
- Lastly, is the Header elements tab. Here you can enable or disable the social icons (if you’ve populated these via the Divi Theme Options), and the search icon. You can also choose to show a phone number or email which will enable the secondary menu and feature this information above the primary menu.
Theme Customizer – Footer tab
- Under the footer options tab you can set you can set the global footer for your website. This requires choosing a column layout under the layouts option and using the Footer widget enabled areas that we covered before to populate your footer with content.
- This can be a little tricky for beginners and as such, we would recommend using one of the pre-designed footer layout packs which you can access the videos tutorials on below
Theme Customizer – Update the footer bottom bar
- To update the bottom bar of your website, from within the Footer options navigate to the ‘bottom bar’ tab.
- Here you can amend the background color, text color, etc.
- To amend the text, click on the ‘edit footer credits’ box and type in the information you want here.
The best way to get up to speed with all the available options is to have a play around, and see what works best for your design. Reviewing the documentation and video guide for this section is also a great way to explore your options further.
How to use the Divi Builder
The Divi Builder is Elegant Themes’ custom built drag and drop page builder, and is one of, if not the best in the industry. You’ve seen how easy it is to bring in modules, rows, sections, pages, and entire pre-built website designs in just a few clicks. And now, we’ll go through how to customize these designs to suit you. We’ll also go through how you can create your own designs from scratch.
As everyone’s needs will be different, it wouldn’t make sense for us to go through all of the options here. Instead, we’ll cover the fundamentals of how to use the builder, and get you up to speed with the most common features. If you want to dive deeper into anything along the way, refer back to the theme documentation that we’ve provided the links to.
How to launch the Divi Builder
The Divi Builder has both a back-end editor (which we prefer working with), and a front end editor which is great for beginners as it allows you to see exactly what you’re doing in real time.
- To launch the back-end version of the Divi builder, navigate to the back-end of any page and click the ‘Use the Divi Builder’ button
- Once the Divi Builder has been launched on a page or post, you can use the front-end builder or visual builder by clicking on the ‘Use visual builder’ button.
- This will take you to the front end version of the Divi Builder which allows you to view changes in real-time. Follow the button below to access the free video tutorial and documentation on using both versions of the Divi Builder.
Useful tutorial links
Next steps
That’s it for our WordPress tutorial for beginners 2020 series. We recommend the next steps