We’ll provide some resources to help you choose the best blogging platform for you, be it WordPress, Wix, Squarespace, Shopify, or blogger. No one platform is better than the others, it will just depend on your objectives as to which is the best option for you.
As part of the OHKLYN community, you’ll also be entitled to some discounts on hosting, a free domain, and discounts on website themes and templates by following the links below:
BLUEHOST DISCOUNTULTRA WORDPRESS THEME
Overview:
- Choosing the right platform for building your website
- Planning your blog
- Domain + hosting setup
- Block/unblock robots.txt, and set the permalink structure
- Install WordPress theme
- Create website pages
- Page builder overview
- Set homepage for website
- Create posts & categories
- How to create menus
- Theme customizer + theme options
- Popular videos & next steps
Step 1 | Choosing the right platform for building your website
The first thing you want to decide on is what platform is the best for your new website or blog?
With about 50 – 60% of the market, WordPress is by far the world’s most popular Content Management system (or CMS) and for that reason is the platform we’ll use for this tutorial. However, WordPress isn’t ideal for everyone and to help with your decision we’ve created a few short unbiased comparison videos for you to be able to make your own decision.
You can use the links below to find our comparisons of the most popular alternatives:
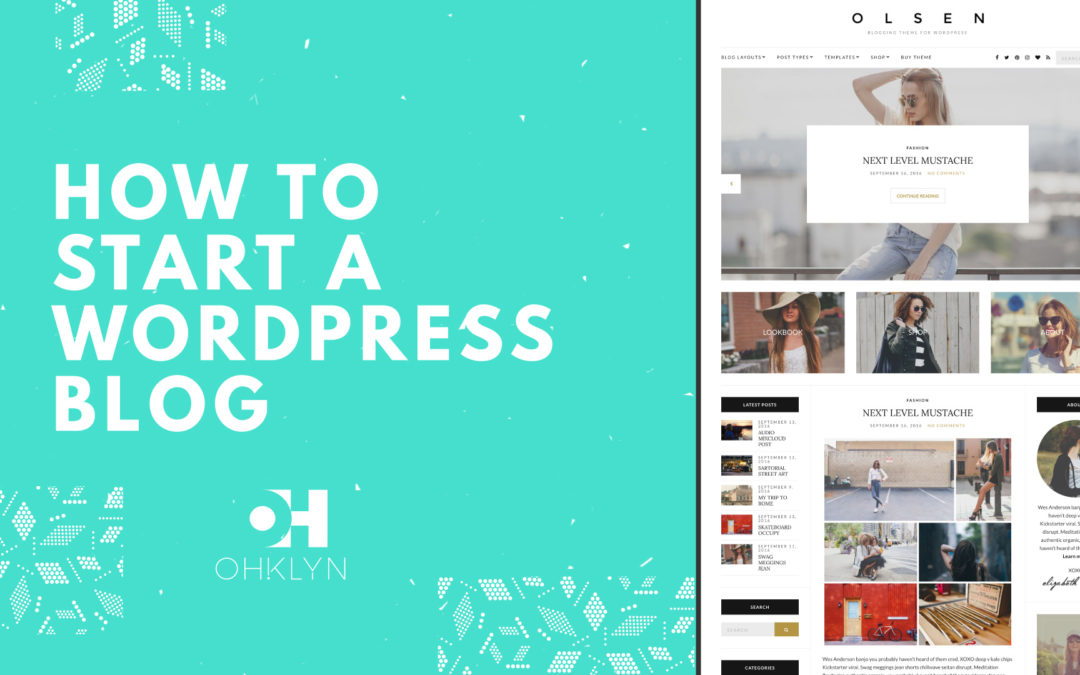
For this tutorial, we’ll show you how to make a blog using WordPress.
When it comes to WordPress there are two options:
- WordPress.com which is the hosted version of WordPress, or
- WordPress.org which is the self-hosted version of WordPress. As this is the industry standard for blogging and professional business websites we’ll show you how to set up a self-hosted version of WordPress for your website.
Step 2 | Planning your blog
To make sure the process of actually building out your blog goes as quickly and as smoothly as possible, you should do some preparation and planning beforehand.
Putting some time away upfront to think about the user experience you want to provide, the design of your website, and source your branding elements, will pay dividends later on and will help you produce a better result.
First, make sure you have all the branding elements you need, like:
- A logo,
- A Favicon (which is the icon that appears in the browser tab when a user visits your website),
- Your brand color palette, including the hexadecimal color codes.
- A small budget of $100 to $150. This will cover your hosting and premium WordPress theme. If you plan on hiring a designer for some of your branding assets, you might need to put aside another $100 to $150.
There are a number of great tools like paletton.com, Adobe color, or color-hex.com that you can use to choose a color palette.
If you want to hire a copywriter or graphic designer, consider using a third-party platform like:
Next, plan out which pages you want in your website as well as how it will fit into your navigation. You can do this by drawing out a simple sitemap that lists all the most important pages you want and organizes them in a hierarchy under their respective navigational menus.
Most websites have some or all of the following pages:
- Homepage
- About page
- Contact page
- Gallery or client work page
- Blog page (including the individual post pages, and category pages),
- And a privacy or terms of use page.
For a blog, you should also take some time top plan out your categories around the topics you will write about. For example, if you want to start a restaurant blog, you might organize your blog under specials, restaurant locations, Chef’s columns, or anything else. This will help readers find relevant information on your blog and with search engine listings.
Lastly, you can make designing your website even easier by first sketching out rough examples or wireframes of what your pages will look like. You can go into as much or as little detail as you want, however, the most important thing to do is make sure that the flow of information makes sense and that you take the user through a process or tell a story. My favourite tool for this is sketch.io, but if you need to collaborate with others, check out InVision.
You can go into as much or as little detail as possible, but make sure to consider the following:
- Does the flow of information you’re presenting make sense?
- Does it logically take them through a process, or tell a story?
Step 3 | Register your domain, set up hosting, and install WordPress
You’ll first need to set up a hosting account and register a domain so that your website can be hosted live on the internet. You’ll also need to install WordPress as this is what we’ll use.
For this tutorial, we’ll walk you through getting started with Bluehost, as we believe it’s the best option for beginners.
Bluehost provides a free domain with your hosting subscription as well as a one-click WordPress installation that will save you a lot of time.
Bluehost – Getting started
Steps to register your domain & set up hosting:
- Head to the bluehost website (massive hosting discount up to 54% + FREE domain). The free Bluehost domain extensions included are (.com, .online, .site, .website, .space, .tech, .store, .net, .org, .info, .co, .us, .biz, .club).Note: If you want a specific top level domain (TLD) or country specific domain not listed above, you will need to purchase it through a domain registrar like GoDaddy or CrazyDomains. You will also need to change the domain nameservers or (DNS) records to point at Bluehost’s servers. Here are the steps on how to change domain nameservers to point at bluehost.
- Select ‘get started now’ for the plan you want (shared hosting will be fine for most users & you can always upgrade later).

- Choose the hosting plan that’s right for you, hit ‘select’.
- Either use your existing domain, or type in the domain that you want (it’s free), then hit ‘next’.
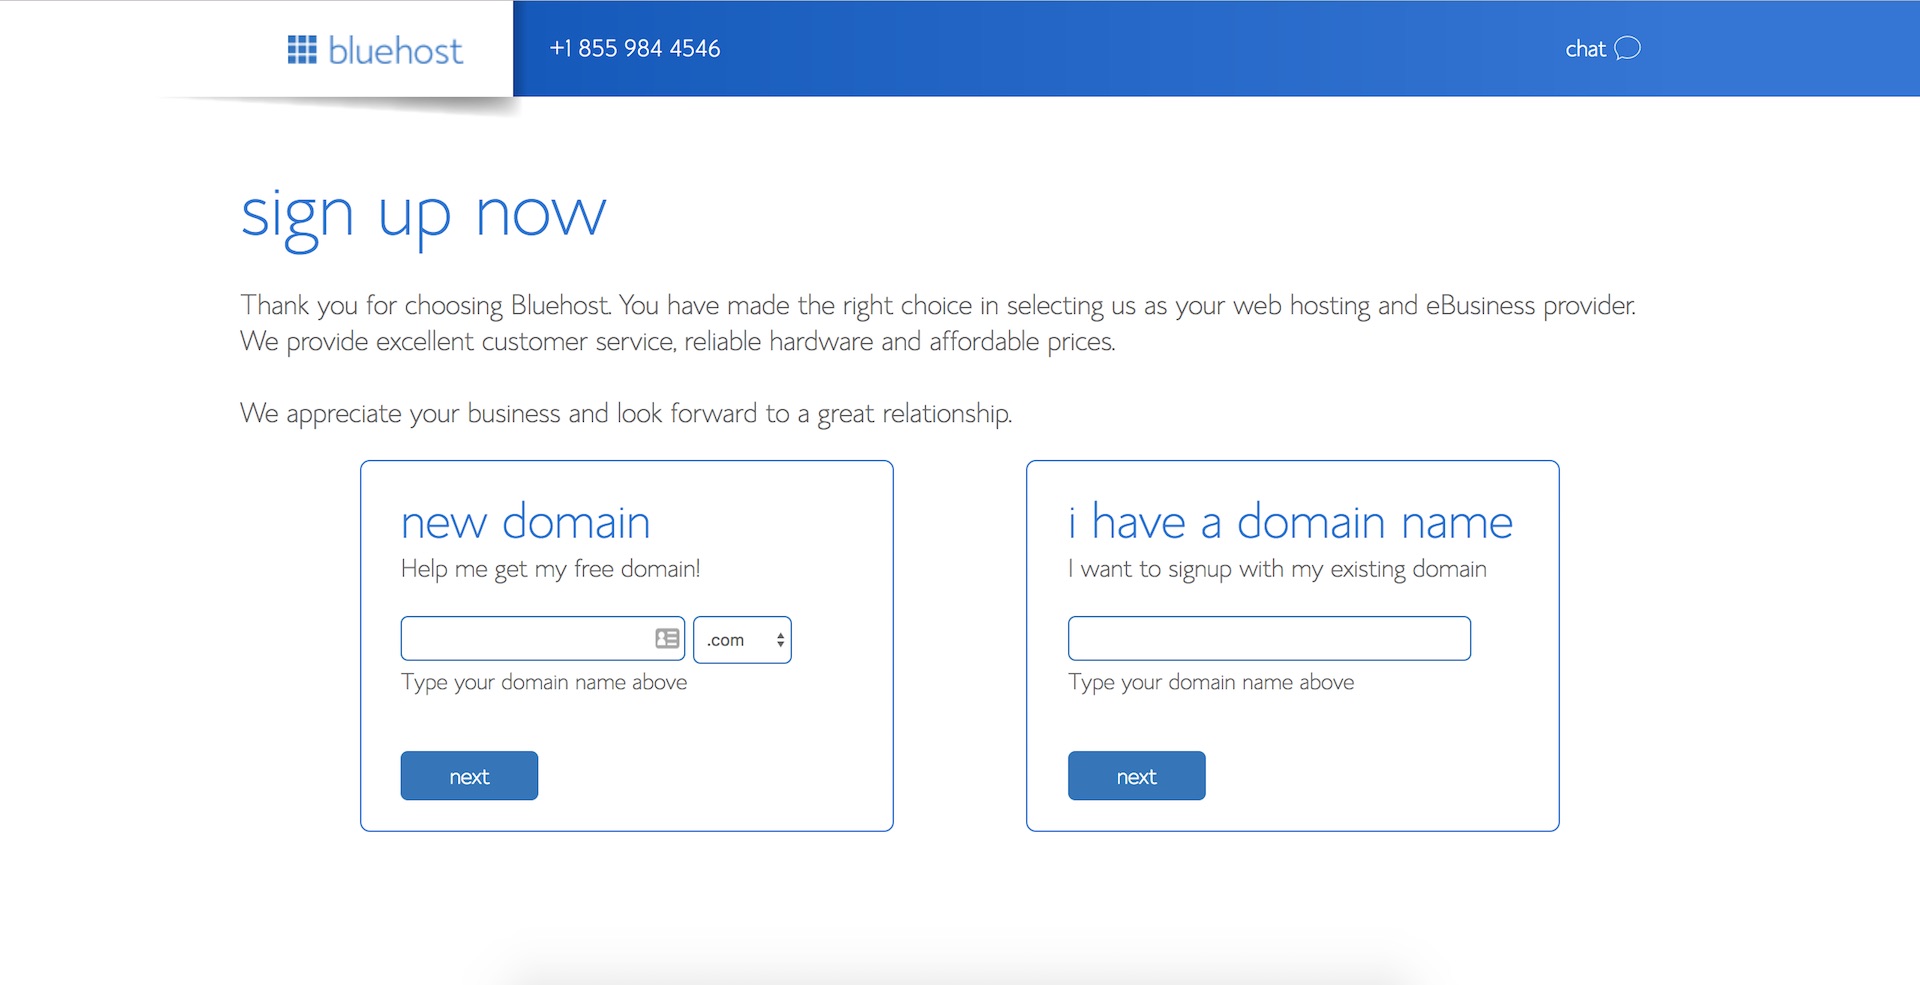
- Choose your desired hosting term and domain add-on preferences. We recommend selecting ‘domain privacy protection’ so that the personal information associated with your domain, isn’t publicly available (optional).
- Once you’ve chosen your desired options, enter your personal information, payment details, review the terms of use, and click ‘submit’ to move on to the installing WordPress.
Steps to install WordPress:
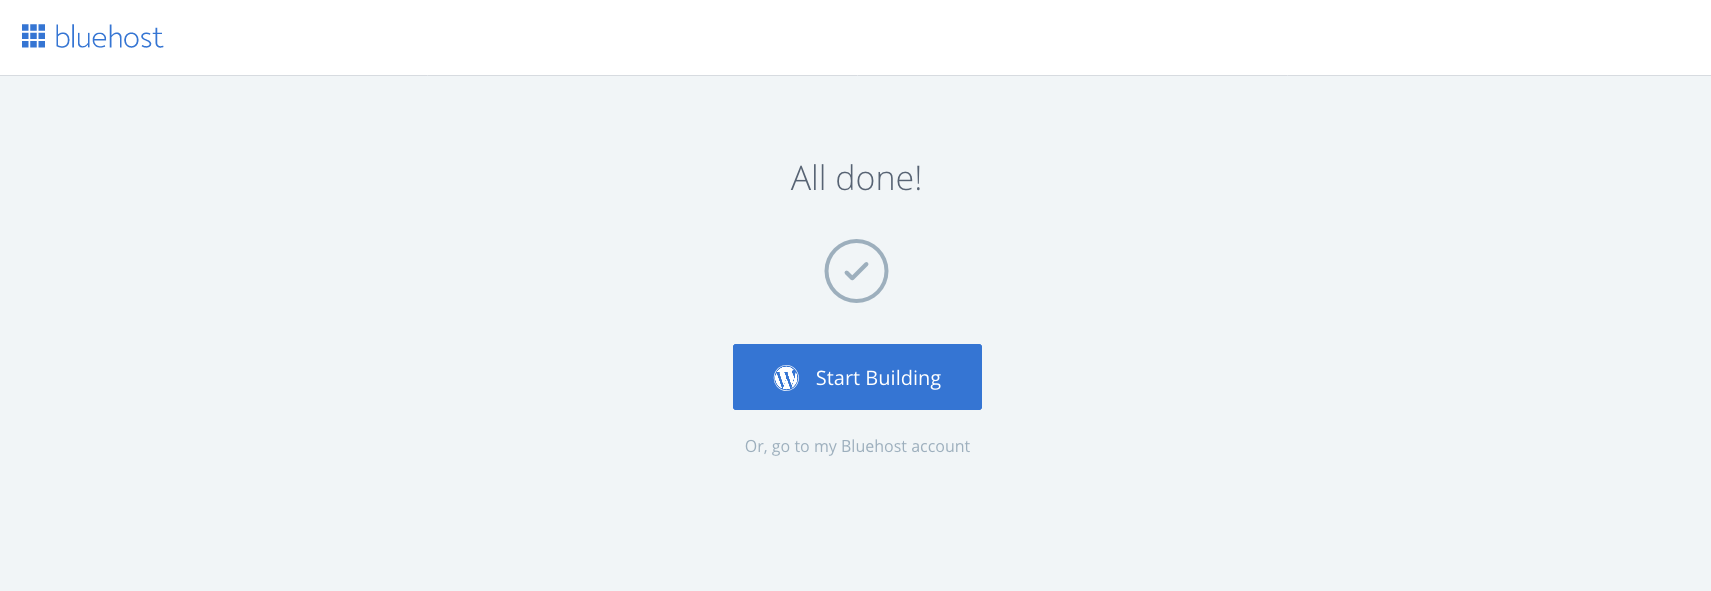
One of the reasons we love Bluehost is their easy to use One-click WordPress installation feature. In September 2017, Bluehost made the process of getting started with WordPress even easier. For new domains, WordPress is automatically installed for you so you can start building your site right away.
- When you see the ‘Congratulations’ message, click on login.
- You will be sent a verification email to the nominated email address for the account, which you will need to confirm.
- You can then set your password for your hosting account.
- Once you’ve done that, you will then be given the option to either ‘Start Building’, which will take you to the backend of your WordPress dashboard, or you can select to go to your Bluehost account.
Install WordPress for an existing domain via Bluehost
If you’ve purchased your domain elsewhere, you will need to change the DNS records for your domain via the domain registrar where you purchased your domain. Check out one of our detailed tutorials that walk you through this process:
- How to change GoDaddy nameservers to point at Bluehost
- How to change Domain Name Server (DNS) records to point at Bluehost
Congratulations! You officially have a new website! It’s not much at the moment, but you’re well on your way.
If you’re new to WordPress, we’d recommend reviewing our How to use WordPress article which is a free introduction to WordPress tutorial for beginners.
We recommend that you add your free SSL certificate which will encrypt the data on your website. This is good practice as it improves the security of your website, improves your search rankings as Google prefers secure sites, and allows you to take payments on your website as well, in the event that you want to include an online store as part of your website.
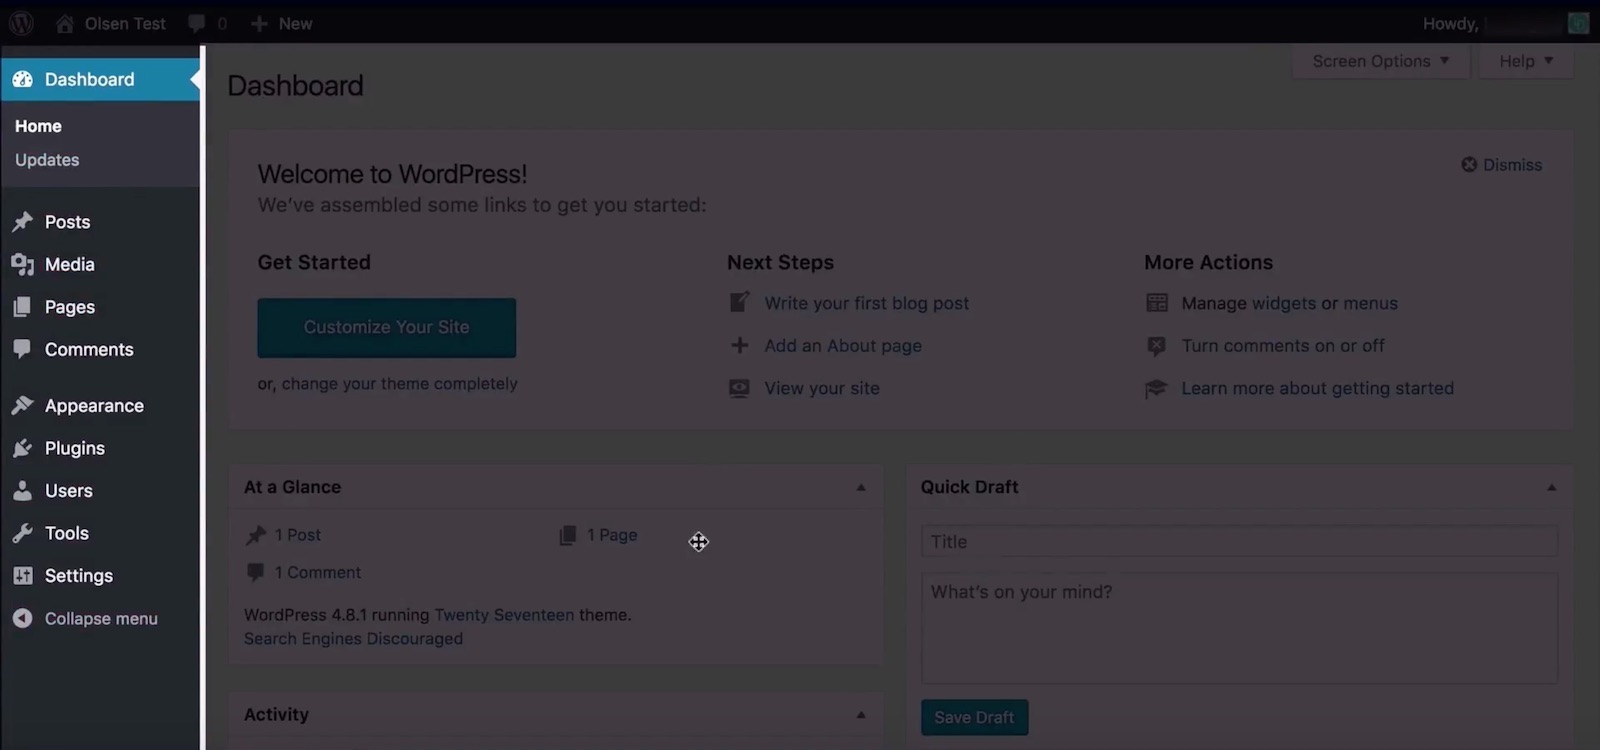
Overview of the WordPress dashboard
Whenever you want to log into your WordPress website, enter your domain and add /wp-admin to the end (i.e example.com/wp-admin). Then enter your username and password that you set up in the prior step. You’ll then be taken to your WordPress dashboard.
The WordPress dashboard or admin panel is broken down into 3 main sections: at the top, we have the WordPress toolbar, the menu or admin menu is located on the left-hand side, and the main admin area is in the middle, where we’ll do most of our work.
We’ll give you a brief overview of each section now – however, for a more detailed overview, watch our free how to use WordPress tutorial, which is an introduction to WordPress for Beginners. This is intended to get you up to speed on the fundamentals of how WordPress works in about an hour.
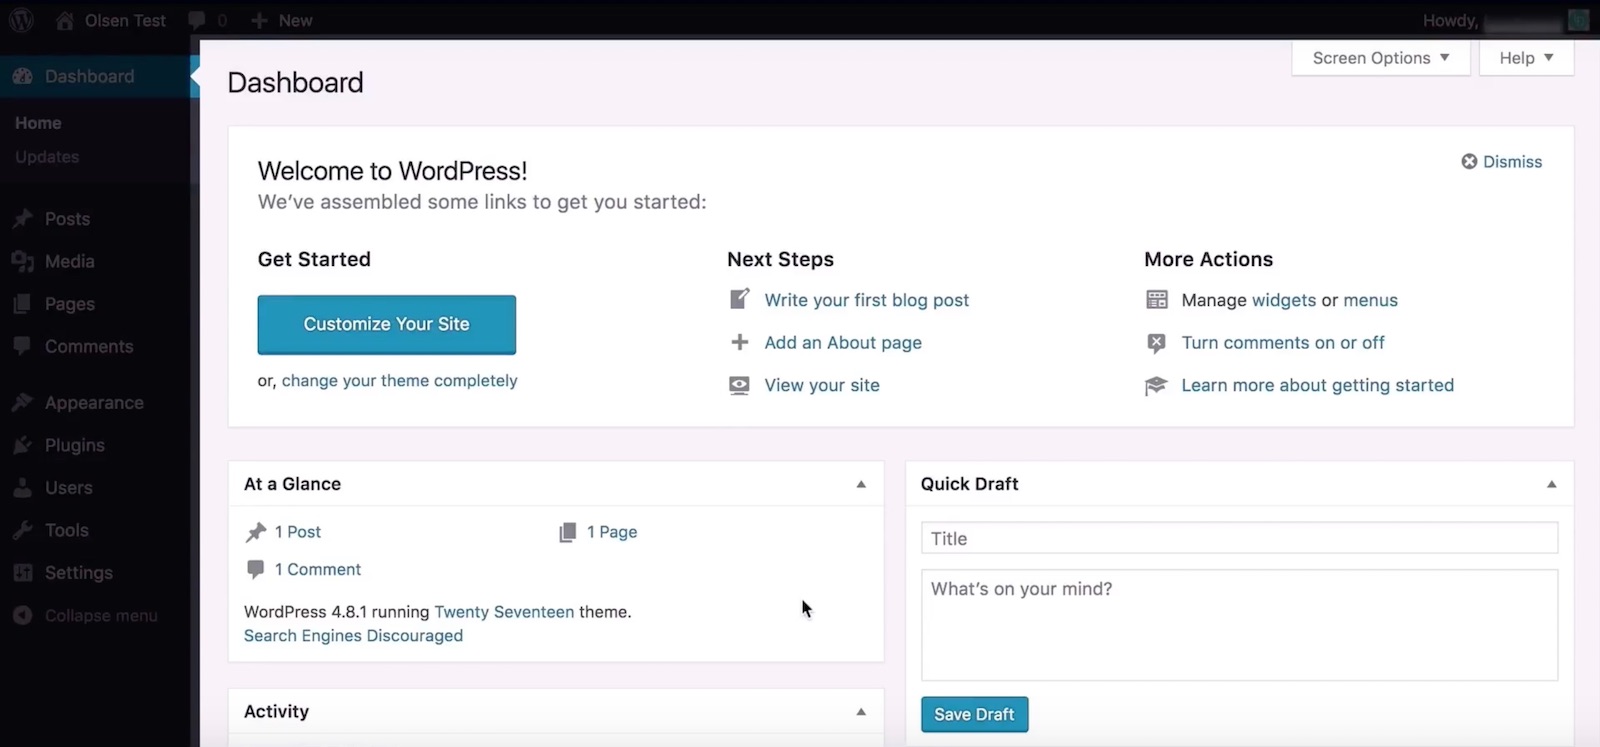
WordPress toolbar
The WordPress toolbar at the top is dynamic and adjusts the available options depending on which page you’re on, and if you’re viewing the page from the front or backend.

WordPress admin menu
The Admin menu located to the left of your dashboard is separated into 3 main sections, these are: The Dashboard section, the Content Management section, and the Site Administration section.
- The Dashboard section provides easy access to the Dashboard, updates, and additional plugin features.
- The Content Management section is where you create and manage Posts, Pages, Media items, Comments and additional plugin features.
- The Site Administration section is where you configure the design and appearance settings for your website (including selecting the active theme for your website, creating and managing menus, widgets, and customizing your website’s theme). It’s also where we manage plugins, users, control global WordPress settings, and activated theme and plugin extensions like SEO, Social sharing, theme specific settings, and security.
WordPress admin panel
Lastly, the main Admin area serves as our primary workspace, and adjusts depending on what’s selected from the admin menu.
Step 4 | Blocking or unblocking robots.txt and change your permalink structure
Blocking or unblocking robots.txt
While first building your website, you might not want search engines to direct visitors to your unfinished site. Conversely, you definitely want search engines to list your website once its launched. To make sure you have the correct option selected:
- From your WordPress dashboard, hover over settings in the admin panel and select ‘reading’
- Near the bottom of the page, you should see the Search Engine Visibility section
- Keeping this box checked will hide it from search engines, while unchecking it will allow search engines to index it and list it in search results. We recommend checking it if you’re only starting to build your website now
- Remember to always ‘save changes’ after adjusting WordPress settings
Permalink settings
Another thing we recommend doing before creating the content for your website is to choose the most suitable permalink structure. The permalink structure determines how URLs will be constructed for your website pages, categories and posts.
To change the permalink structure:
- Hover over ‘settings’ in the admin menu, then select ‘permalinks’.
- Sometimes WordPress by default uses a journal approach where the publish date is used in the URL. The more logical option, and the best for SEO, that we recommend is to use ‘post name’ which will use the post or page title as the URL.
- Then save changes.
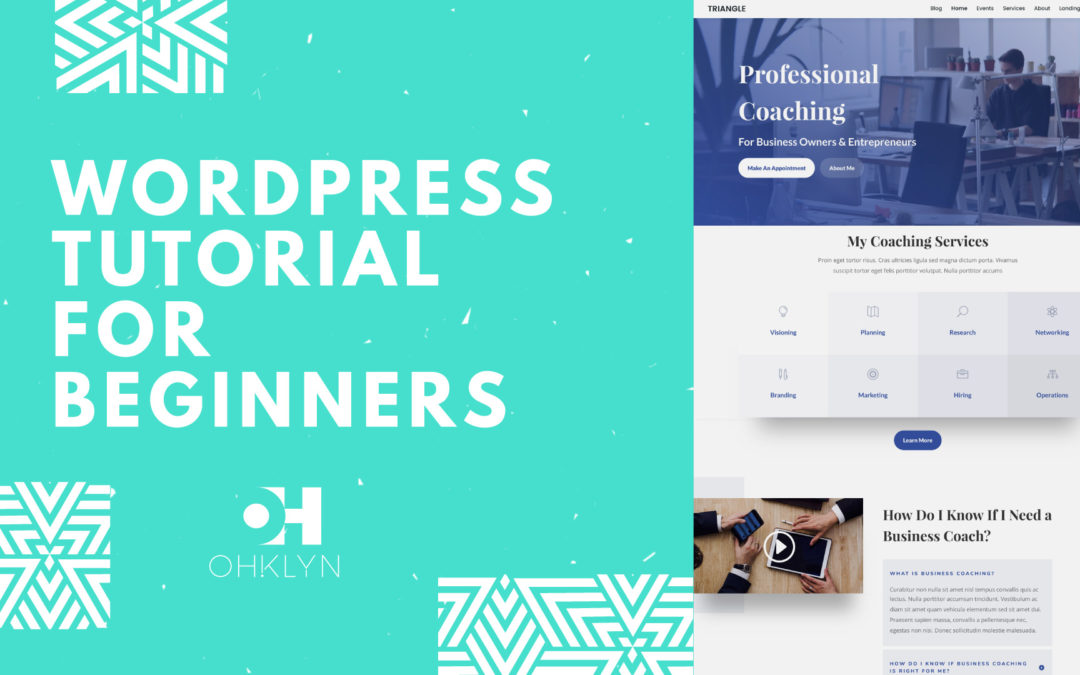
Step 5 | Install WordPress theme
A WordPress theme is a group of files that work with the underlying WordPress software to enhance the design and functionality of your WordPress website. For a more detailed overview, check out our What is a WordPress theme article.
For this tutorial, we’ll use the top rated business website theme – Ultra by Themify. For 30% OFF, subscribe to the OHKLYN blog and you’ll be sent a welcome email with an exclusive discount code.
Create a Themify account and download the Ultra theme
- Navigate to the Themify website
- You can either purchase just the Ultra theme (with or without the photoshop files)
- Or under pricing, you can select one of their club memberships, which gives you access to all of their themes
- Depending on which option you choose, you’ll get various inclusions for the year, or you can select their lifetime club, which gives you access to everything for life
- We have their lifetime club as we use a number of their themes, but pick what’s right for you
- Enter in your information
- If you’ve subscribed to the OHKLYN blog, add the discount code you received in the welcome email, and select ‘next’
- Add your payment information
- Then log into your Themify dashboard
Installing the Ultra WordPress theme
- From your WordPress dashboard, hover over appearance in the admin menu on the left, and select ‘themes’.
- Click the ‘Add new’ button at the top of the screen.
- Then click, ‘Upload theme’.
- Select ‘choose file’ from the upload box.
- A navigation window will pop up go to where you downloaded the .zip, select it, and click ‘open’.
- Then, click ‘Install now’. It may take a while to install as the entire theme with all the demo content need to be uploaded.
- Once the theme has been successfully installed, click the ‘activate’ link to make the theme live on your site.
You will now be taken to the Themify Settings page which we will cover later. However, if you go to the ‘Skins and Demos’ tab, you’ll see all the available theme templates and demo content for the Ultra theme. Click on one to set it as the active template for your website. Then click import below the activated skin to import the required plugins and addons.
If you preview your website, you should see it load with the template and demo content.
Step 6 | Create your website pages
Unless your creating a one-page website, your website will probably consist of multiple pages. A page consists of static content and is one of the main ways of organizing your website’s content.
Typical pages include a home, about, contact, gallery, and blog page. If you’ve created a sitemap, as per our suggestion, you can refer back to it to create all the pages on your website:
- From your WordPress dashboard, hover over ‘pages’ in the admin menu on the left. You can directly click ‘add new’ to create a page or go to ‘all pages’ where you’ll manage all the pages on your website
- Alternatively, you can also hover over ‘+new’ in the toolbar and select ‘page’ or click the ‘add new’ button on the ‘all pages’ dashboard
- Start by giving your page a name in the ‘add-title’ field.
- If you’re new to WordPress, we recommend watching our How to Use WordPress tutorial, where we cover the default WordPress options available when creating pages
- Save your page as a draft or publish it if you want it to go live on your site.
Step 7 | Page builder overview
A page builder allows you to create pages that look professionally made without any design or coding experience. It provides a easy to use drag-and-drop interface to add, edit, and reposition the content on your pages.
Ultra has one of the best page builders around, and this is also one of the reasons we chose it for this tutorial.
Even though you can easily build pages using the page builder, that doesn’t mean you need to start from scratch. Ultra comes with professionally designed layouts that you can leverage as a starting point for your pages.
To do this:
- Add a new page or edit an existing one. Then, view the page by clicking ‘View Page’ in the toolbar.
- Once you are viewing your page from the frontend, click the ‘Turn ON Builder’ button in the top toolbar.
- That will open the frontend Themify Ultra page builder.
- You can choose a page layout by clicking the ‘Layouts’ icon in the top toolbar and then ‘Load Layout’ from the drop-down menu.
- From here, you can view the live demo in a new tab. To add the layout to the page, just select it and then choose whether you want to append it to the end of the existing page or replace whatever is on the page currently.
- It might take some time to import as the entire design and all the demo content will be loaded onto the page. When it’s done, you’ll see the page refresh with the entire layout.
- Now, you can use the Themify Ultra page builder to customize the page to look exactly the way you want. Most page builders organize pages using sections (purple), which are big blocks of related content, and that can be divided using different row (green) and column structures. Modules make up the actual content (text, images, video, etc.) on your pages.
- You can add new sections, rows and columns or modules by hovering over the page until you see a plus icon in their respective colors pop up.
- When you hover over any of them, a small options bar will pop up where you can drag-and-drop, duplicate, delete or access the settings for that element.
- Once you’re done working on the page, you can either save it as a draft in the top right corner to continue working on later or save it as a revision.
- You can also preview the page by exiting the builder from the toolbar to view it as a visitor would.
- You can click the ‘X’ next to ‘Backend’ in the toolbar to close the builder and go back to view your page. Or, you can click ‘Backend’ to go back to the WordPress page editor.
That’s just a quick run-through of the Themify Ultra pagebuilder. Everyone following this tutorial will use the builder in a different way, which is why we won’t cover it in-depth. In the video for this tutorial, you can see the builder in action. Or, if you want to dive deeper into anything follow the button below to access hours of free video tutorials and documentation.
Step 8 | Set the homepage for website
Your home page is more often than not the first page visitors will see when navigating to your website. By default, WordPress sets a page that displays your blog posts in chronological order as your home page.
If you want to set the page of your choice as your home page, you’ll need to take the following steps:
- Hover over ‘Settings’ in the admin menu and click on ‘reading’.
- Under the ‘Your homepage displays’ option, make sure that ‘a static page’ is selected and then choose the page you want to set as your homepage from the homepage dropdown list below.
- Then, click ‘save’.
- If you know visit your site, you’ll now see that the page you just selected is now our homepage.
Step 9 | Create posts & categories
If you want to include a blog on your website, you’ll create blog posts the same way. The main difference is that you’ll need to set up categories to organize you posts under first.
How to add blog categories
- From your WordPress dashboard, hover over ‘posts’, and select ‘categories’.
- Enter in a name for the category.
- Then, click ‘add new category’.
- You’ll see the category created on the right, and can go through and can repeat these steps to create the rest.
How to create a blog post
Once you’ve created your categories, you can create a new blog post by:
- Hovering over posts in the admin menu and select ‘add new’.
- Add a post title in the ‘add title’ field.
- Add your content below that, or build out your post using the Themify Ultra page builder.
- You can organize your post under a category by choosing one from the ‘categories’ box on the right.
- Then, preview or publish your post.
Step | 10 How to create menus
Now that you have your pages and posts, you’ll need to create a menu for users to easily navigate between them. To create and manage menus:
- Hover over ‘appearance’ in the admin menu and select ‘menus’
- Click ‘create a new menu’.
- Enter a name for the menu (this is for your reference).
- Then select ‘create menu’.
- You should choose where you want this specific menu to be displayed from the two default menu locations:
- The Main navigation menu that is shown at the top of the page, or
- The Footer navigation menu that is located in the footer section at the bottom of the page.
How to add menu items to your WordPress menu
- You can select pages, posts, categories, custom links or other items to add to your menu from the left.
- Multiselect the items you want to add and click ‘add to menu’.
- You can rearrange the order by clicking and dragging the menu items into place
- To create a dropdown menu, just drag an item below and a little to the right of another item. For example, you can add blog categories underneath the blog menu item.
- Remember to save the menu when you’re done.
Step 11 | Using the theme customizer & theme options
There are two main ways in which you can change the settings and styling options for the Themify Ultra theme.
- Ultra theme settings: where you’ll set the logo and favicon for your website, control your default page and post layouts, amend the visibility of global elements like social icons and metadata, as well as integrations for things like Google maps, social media, etc.
- Theme Customizer: Where you’ll manage your global styling parameters, such as colors, fonts, menu styles, etc.
Most other premium themes also have a theme options or theme settings panel as well as custom options in the WordPress theme customizer. If you’re using a different theme, refer to its documentation to get to know all the settings that are available to you and how to use them.
How to use the Themify Ultra theme ettings
Firstly, we’ll take a look at the Themify Ultra settings. To access these settings:
- From your WordPress dashboard, hover over ‘Themify Ultra’, and select ‘Themify settings’.
- You’ll see a number of tabs at the top and to the left of the screen. You’ll probably spend most of your time in the ‘Settings’ tab where you can upload a favicon, add custom code, change theme settings, link your social media accounts, and change the Themify Builder settings.
- ‘Skins and Demos’ is another useful tab where you can switch the skin and demo content for your blog.
- The ‘Update’ tab is also important as this is where you’ll activate your Themify account and manage your theme versions.
- If you want to know more about any option, you can find out about it by clicking the tooltip to the left of it.
To learn more about the Themify Ultra theme settings, we recommend checking out the comprehensive documentation:
How to update your WordPress theme Customizer settings
The theme customizer is where you’ll have full control over the global styling options for your website. To access the theme customizer:
- Go to your website dashboard, hover over ‘appearance’, and select ‘customize’.
- You could also hover over ‘Themify Ultra’ and select ‘Customize’.
- On the left is the customization panel, and on the right is a live preview of your website.
One thing to note before we get started is that the module settings for the layouts and elements on each page will override the global settings that are set via the theme customizer.
The best way to get up to speed with all the available options is to have a play around, and see what works best for your design. Reviewing the documentation and video guide for this section is also a great way to explore your options further.
Step 12 | Watch our other popular videos & next steps
Next steps
Once you’ve gone through all the steps above, you’ve successfully created a website using WordPress (hopefully, in under 30 minutes). Now, there are a few best practices that you should follow to ensure you get the best results.
If you want your website to be searchable via search engines like Google, the first thing is to ensure that your WordPress settings aren’t blocking search engines from indexing your website following the same steps as above.
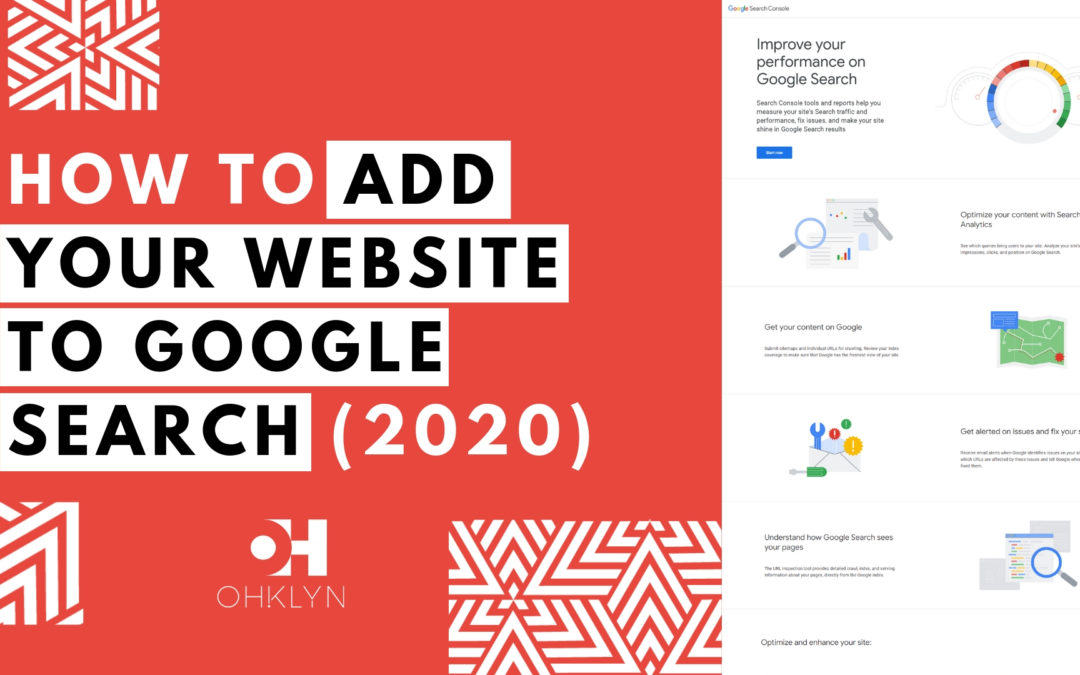
Once you’ve done that, we recommend watching our step by step video on how to add your website to Google Search. This will help make your website discoverable via search engines like Google.
We would also recommend installing Google Analytics on your website. Fortunately, we’ve created a free step-by-step video on how to do this as well. Using the Ultra theme, you can add the required tracking code within the Themify Settings ‘Settings’ tab, under ‘General’. We cover how to do this in the video.
And, that’s how to make a website in 30 minutes or less. We hope this tutorial helped you on your way to speedily launching your new website and look forward to seeing your results.