
- How to add Google Analytics to WordPress using a plugin
- How to install Google Analytics in WordPress by adding the code via your WordPress theme, and;
- How to install Google Analytics via the header.php file of your child theme
What is Google Analytics?
Google Analytics (GA) is a freemium website traffic analysis tool by Google. Google Analytics allows you to monitor website visitors and provides a wide range of reports and metrics on how users interact with your website. These metrics provide insights from how users find your website to the types of content users find most engaging, as well as events, sales, and conversion data.
You can easily view these reports by exporting the data via a variety of useful formats, or by tracking your metrics through GA’s intuitive user dashboard. For all website owners, it’s simply a must-have tool if you are serious about growing your website traffic, or improving your website engagement.
Primary Google Analytics metrics
Before we go through the process of installing Google Analytics, let’s take a quick look at some of the core metrics you’ll need to understand:
- Sessions – A session is created every time a user is actively engaged with your website, app, etc. A session expires after 30 minutes of inactivity, or at midnight. Therefore, a user can have multiple sessions.
- Users – Users counts the number of users who have initiated at least one session during the specified date range. It’s important to note that users will be reported in terms of ‘new’ and ‘returning’. This is important as it allows you to identify new traffic, as well as the number of repeat users.
- Pageviews – Pageviews is the total number of pages viewed by a user in a session. Repeated views of a single page are counted. Again, this can be important for a variety of reasons, as it can show you what pages visitors find the most interesting as well as the pages that don’t attract as much attention.
- Pages / Session – Pages/Session (Average Page Depth) is the average number of pages viewed during a session. Repeated views of a single page are counted. This is important because it shows how engaging your website content is to users. However, this could also mean that users can’t easily find what they’re looking for, so be careful how you interpret this data.
- Average Session Duration – The average length of a Session. Again, this can be used to determine how interesting users find your site. If the average duration is low and users only view one page of your website, this should raise some concerns about the quality of your content.
- Bounce Rate – This measures the percentage of users who view only one page of your website, then ‘bounce’ or leave your website via the same page they arrived on. This is a solid metric to keep an eye on as it can be used to understand the users’ first impression of your website.
Why use Google Analytics on your WordPress website?
Regardless of whether you’re a professional blogger, business owner, or leveraging the web for a personal endeavor, monitoring your progress is imperative. Some of the most useful things you can monitor via Google Analytics are:
- The effects of changes to your website
- Your website traffic channels and sources
- The types of content users find most engaging
- Behavior flows, or how users navigate around and interact with your site
- How users are accessing your website (device, browser, etc.), and;
- Where your user base is located, just to name a few.
How to create a Google Analytics account
Signing up for Google Analytics couldn’t be easier. It’s free (up to 10 million ‘hits’) so you don’t need to reach for your wallet as no credit card details will be required.
Steps to create a Google Analytics account:
- First, you need to have a Google (or Gmail account).
- You can then head over to Google Analytics and click the ‘Start for free’ button in the top right corner.

- You will then need to enter a username, your site’s name.
- After clicking ‘next’, you can then check or uncheck the boxes that establishes what data you are willing to share with Google Analytics. This is generally used to improve the Google Analytics services. You can read more about it here.
- Click ‘next’. You’ll now need to provide some basic information to identify your websites, or ‘property’, like the website name and URL as well as your industry and timezone.
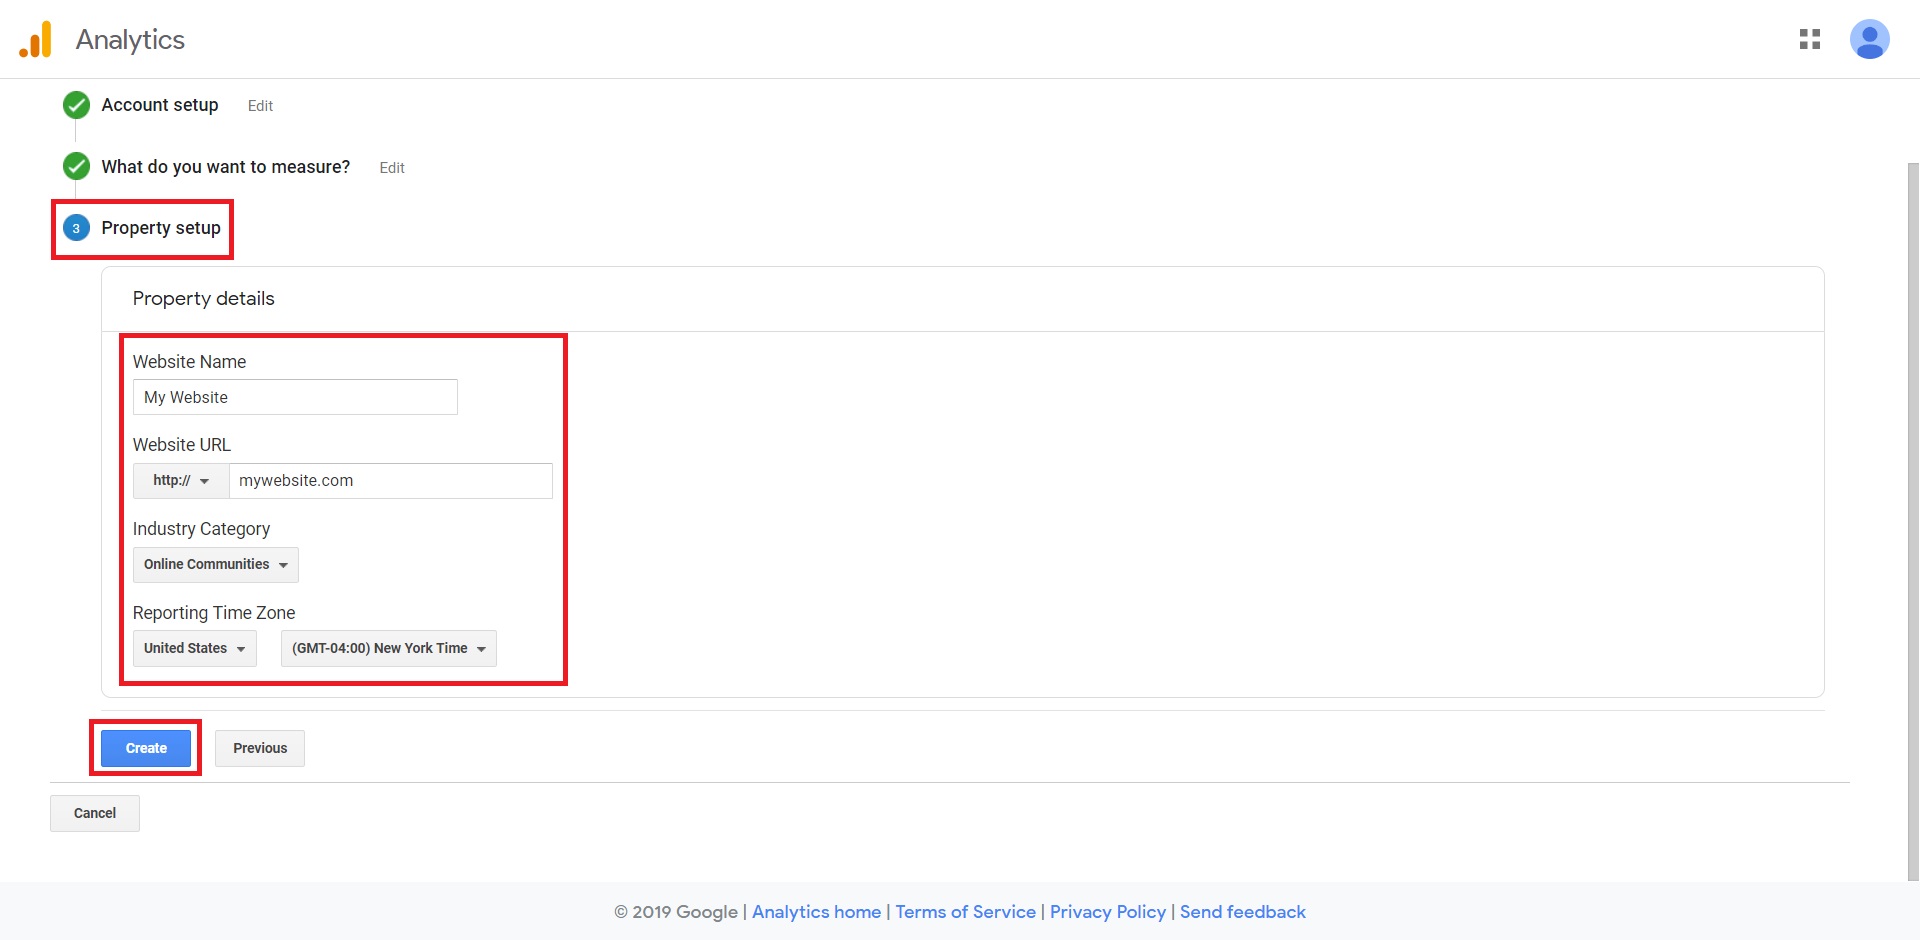
- Click the ‘Create’ button and then accept the Terms of Service and the Google Measurement Controller-Controller Data Protection Terms.
- Congratulations! You are now in your Google Analytics dashboard. Remember to copy your Tracking ID in the middle of the screen for future use.
![]()
![]()
How to install Google Analytics in WordPress using a plugin
Once you have your WordPress website up and running and you’ve created your Google Analytics account, you can add Google Analytics to your site. The first option we’ll explore is how to add Google Analytics to your WordPress website using a plugin. Here, we’ll show you the two most popular plugins you can use.
Install Google Analytics with the Google Analytics for WordPress plugin by MonsterInsights
- If you haven’t done so already, head over to your WordPress admin dashboard.
- In the menu to the left of your screen go to Plugins > Add New.
- In the search bar, type in ‘Google Analytics’ or ‘monsterinsights’ and wait for the results to load. As you will see, the Google Analytics plugin should be among the top results.
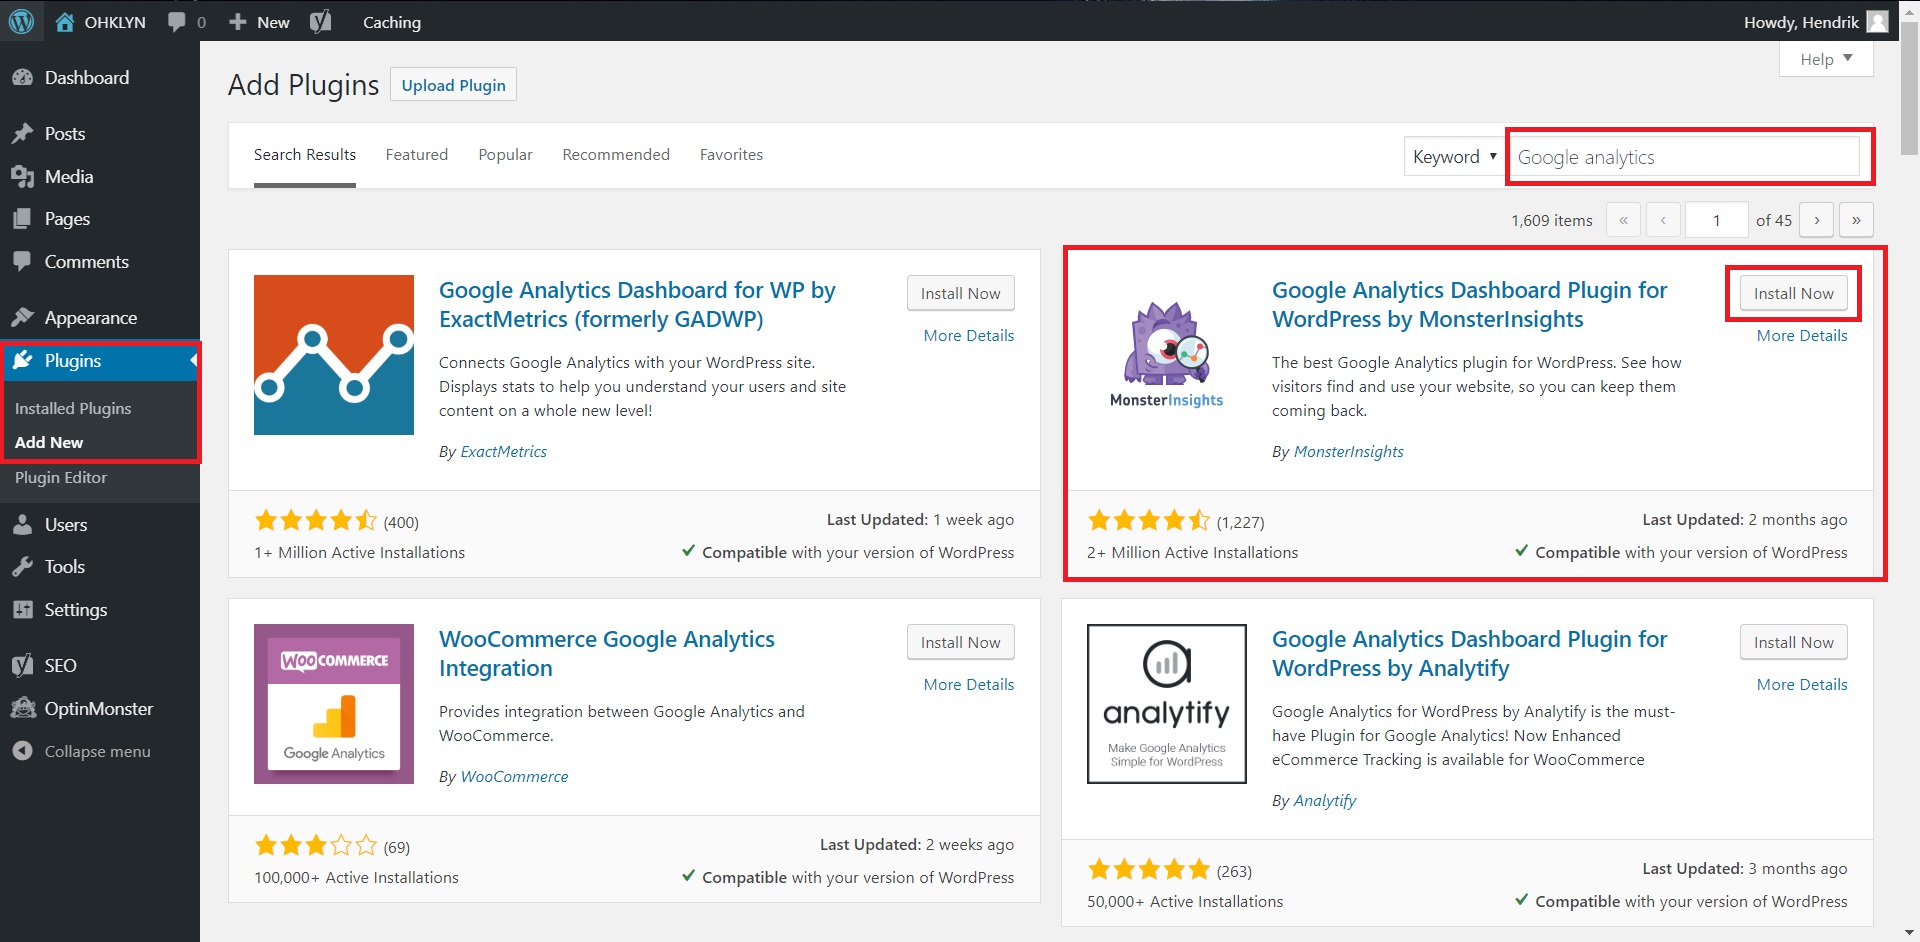
- Hit the “Install” button, wait for the ‘Installing’ action to finish, then hit the ‘Activate’ button.
- That will immediately take you through a wizard to set up your MonsterInsights plugin. In the first step, just select the most appropriate option and click ‘save and continue.’

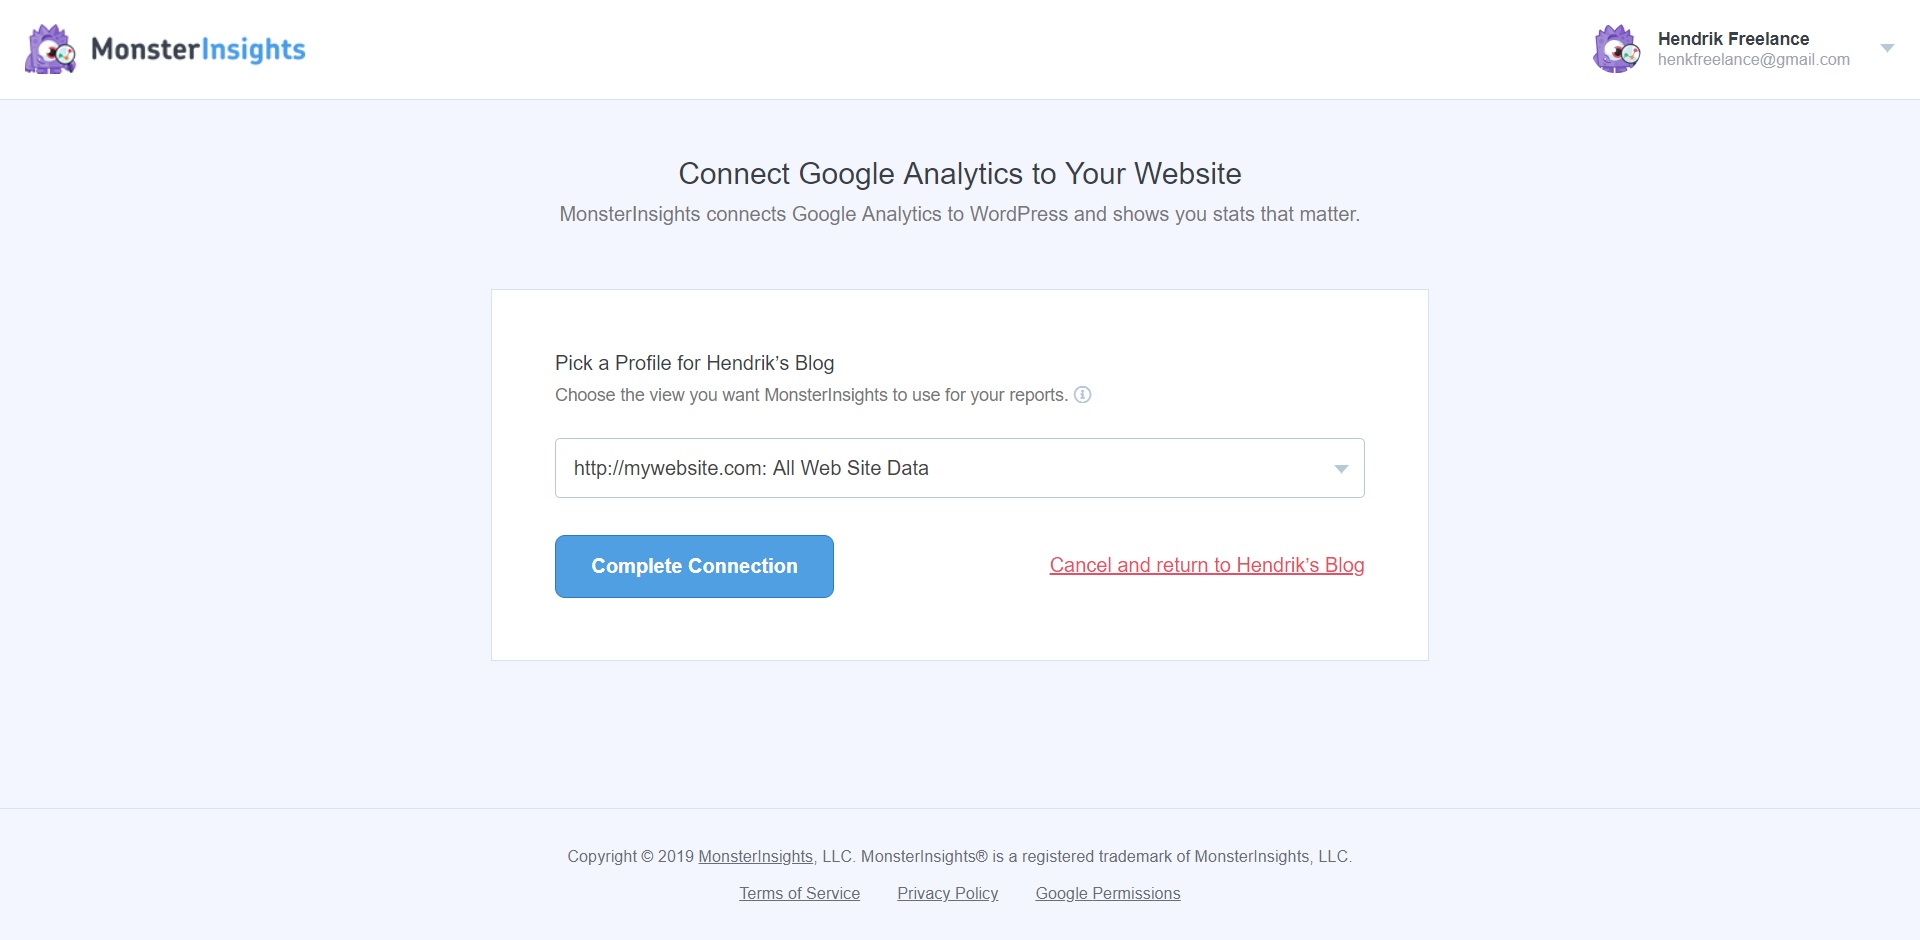
- At the next step, you can choose to upgrade your MonsterInsights account. Below that, you’ll have to connect your Google Analytics account to MonsterInsights. So, click the ‘connect monsterinsights’ button and log in with your Google account.
- Then select the site you want to install Google Analytics on from the dropdown and click ‘complete connection.’ A popup window will show indicating that Google Analytics is finalizing the connection.
- On the next step of the wizard, MonsterInsights will recommend some settings. These should be fine for most people, so you can click ‘save and continue’ to proceed or adjust them according to your preference.
- The same goes for the next step where MonsterInsights will recommend some paid addons.
- On the last step, just click ‘finish setup & exit wizard’ to complete the setup.
- If all went well, that should take you back to the MonsterInsights plugin page. If you want to make sure setup completed correctly, you can check that the Google Authentication code is the same as it is in your Google Analytics dashboard.
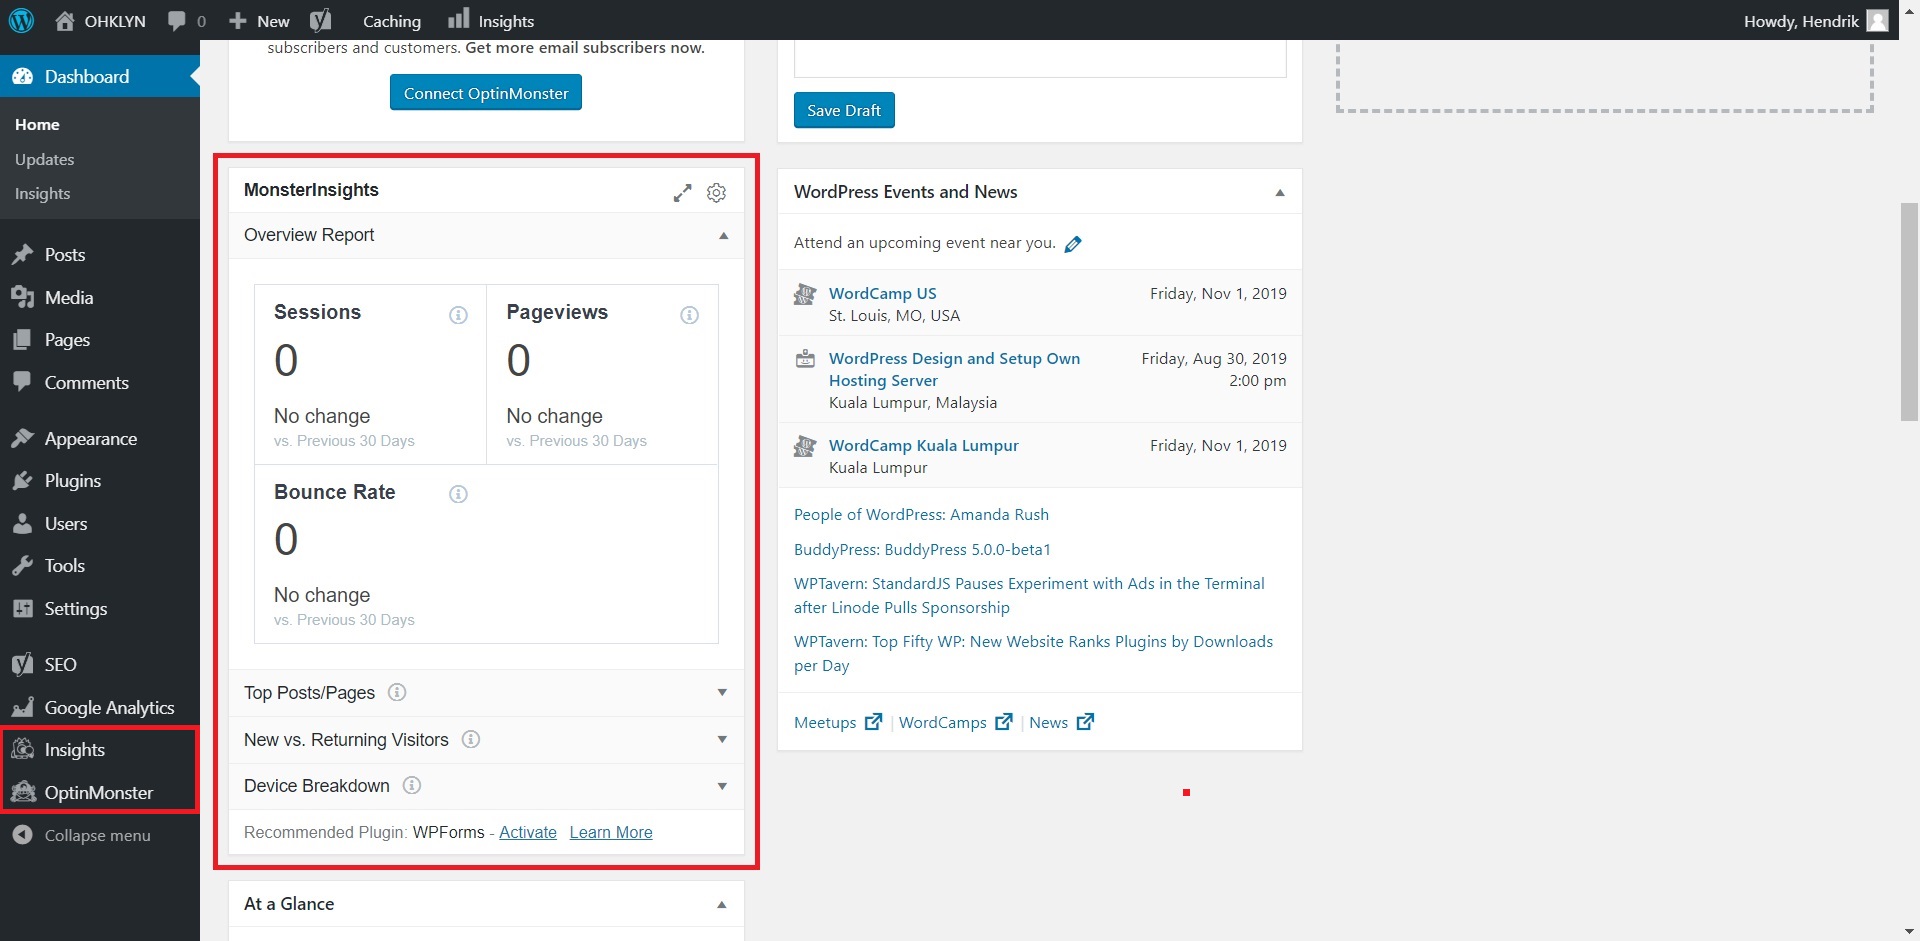
You will now see ‘Insights’ along with some other options below it in the admin menu on the left. Congratulations! You have just successfully installed Google Analytics via the MonsterInsights plugin. Don’t be alarmed if there is no data, the first reports will show after 24 hours of data collection.
Next, we’ll show you how to install Google Analytics using the Google Analytics Dashboard for WP plugin.
How to install Google Analytics with the Google Analytics Dashboard for WP plugin
- Just like before, log into your WordPress admin dashboard and go to Plugins > Add New.
- Type ‘google analytics dashboard’. Once again, it should be among the top result once they load.
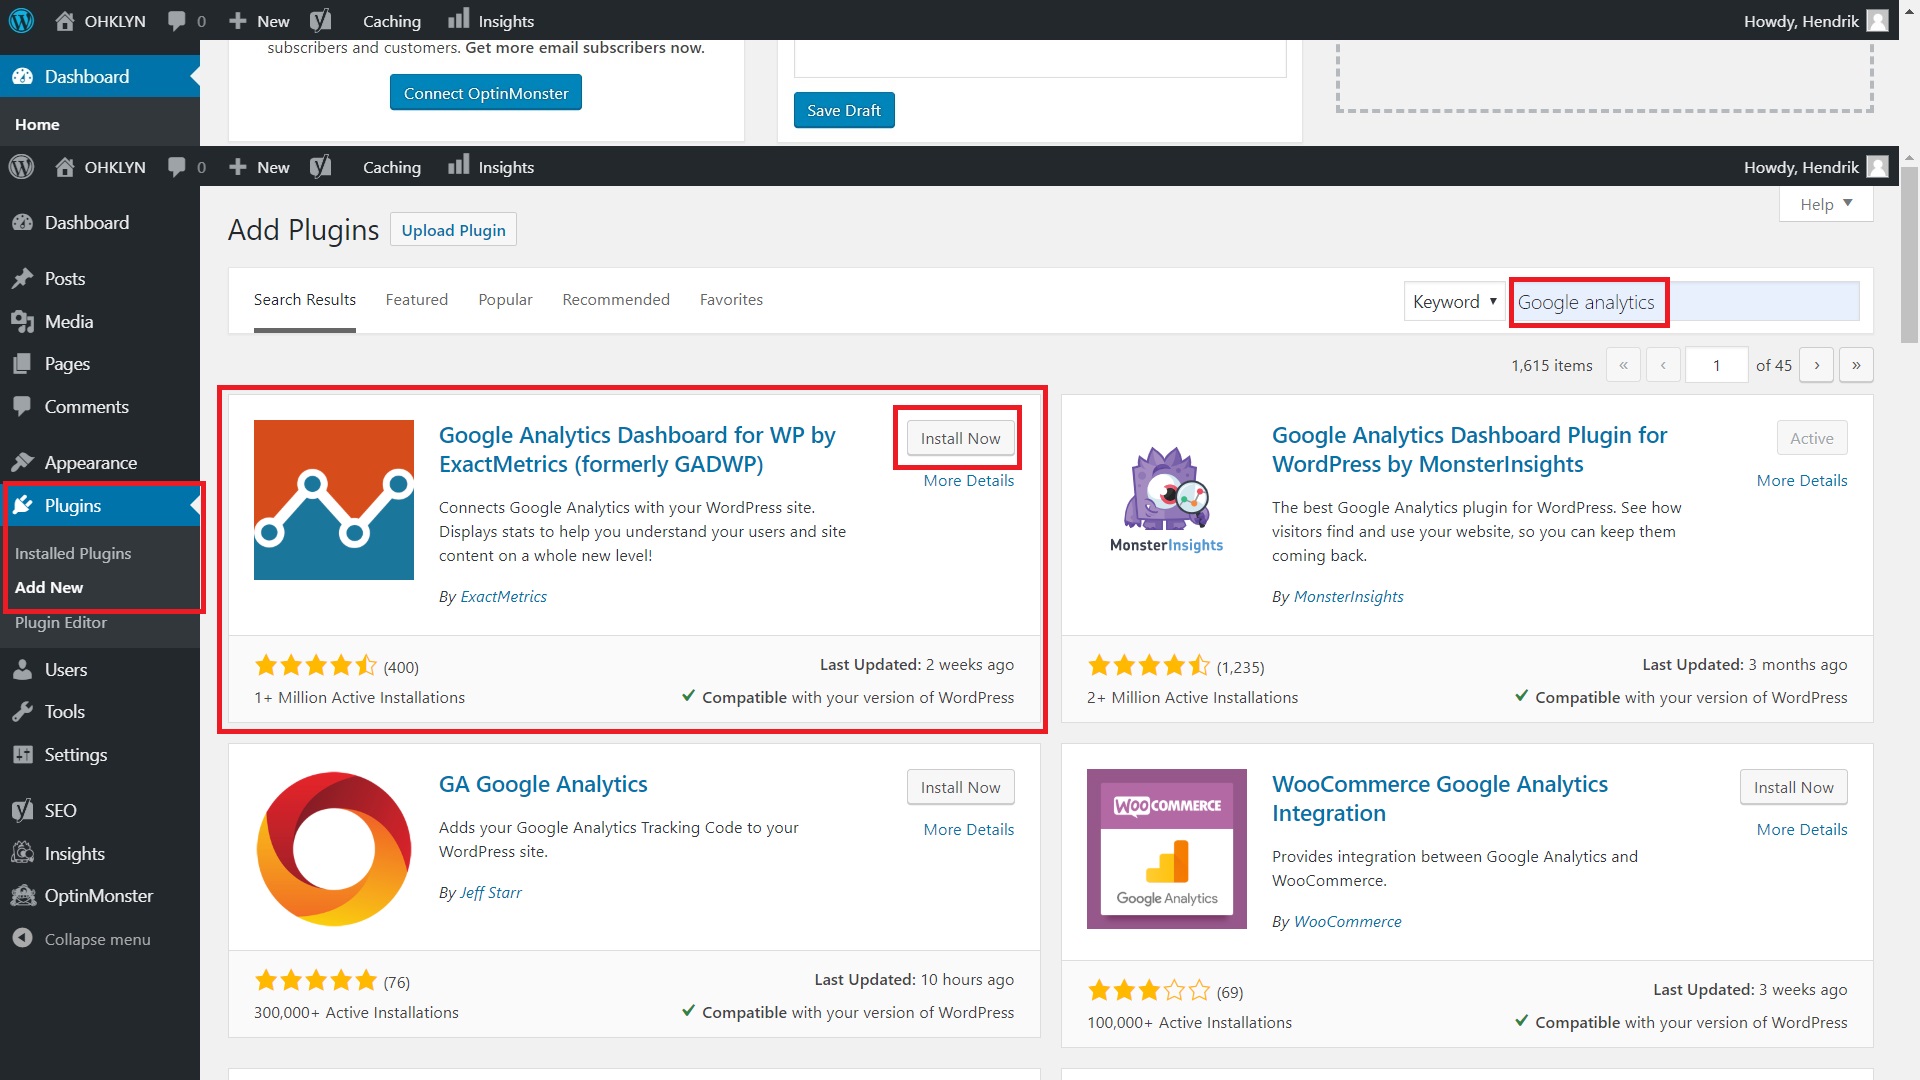
- Click on the ‘Install Now’ button next to the Google Analytics Dashboard for WP plugin, and then ‘Activate’ once it has finished installing.
- There should now be a Google Analytics tab in the admin menu. Hover over it and click on General Settings. From here, we will set up the plugin.
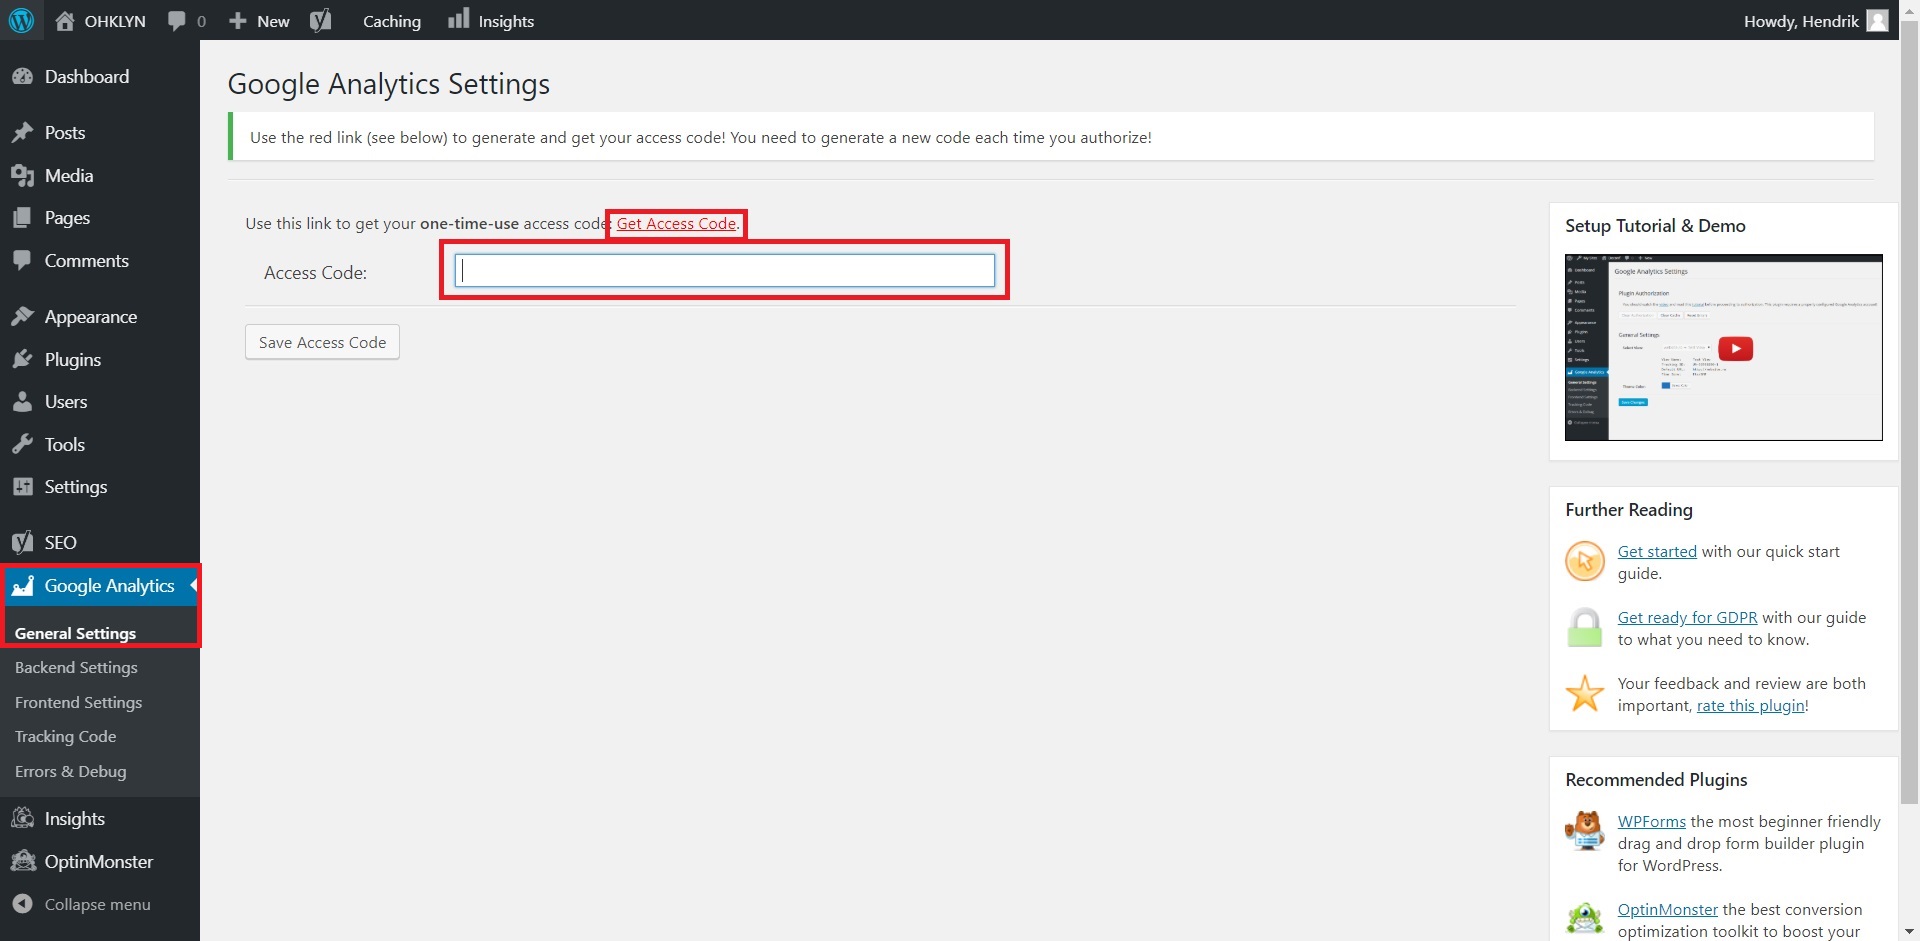
- Click on the ‘Authorize Plugin’ button. Just like before, you will now log into your Google account, authorize it with some permissions, and then be presented with a code that you should copy.
- Paste it into the ‘Access Code’ text field and click ‘Save Access Code’.
- You will now be back at the general settings page. In the middle of the screen, it should load all the information you entered when you signed up for Google Analytics, such as your website name, your Tracking ID, URL, and time zone. Note: if you have multiple websites, you should select the one you are currently working on in the drop-down.
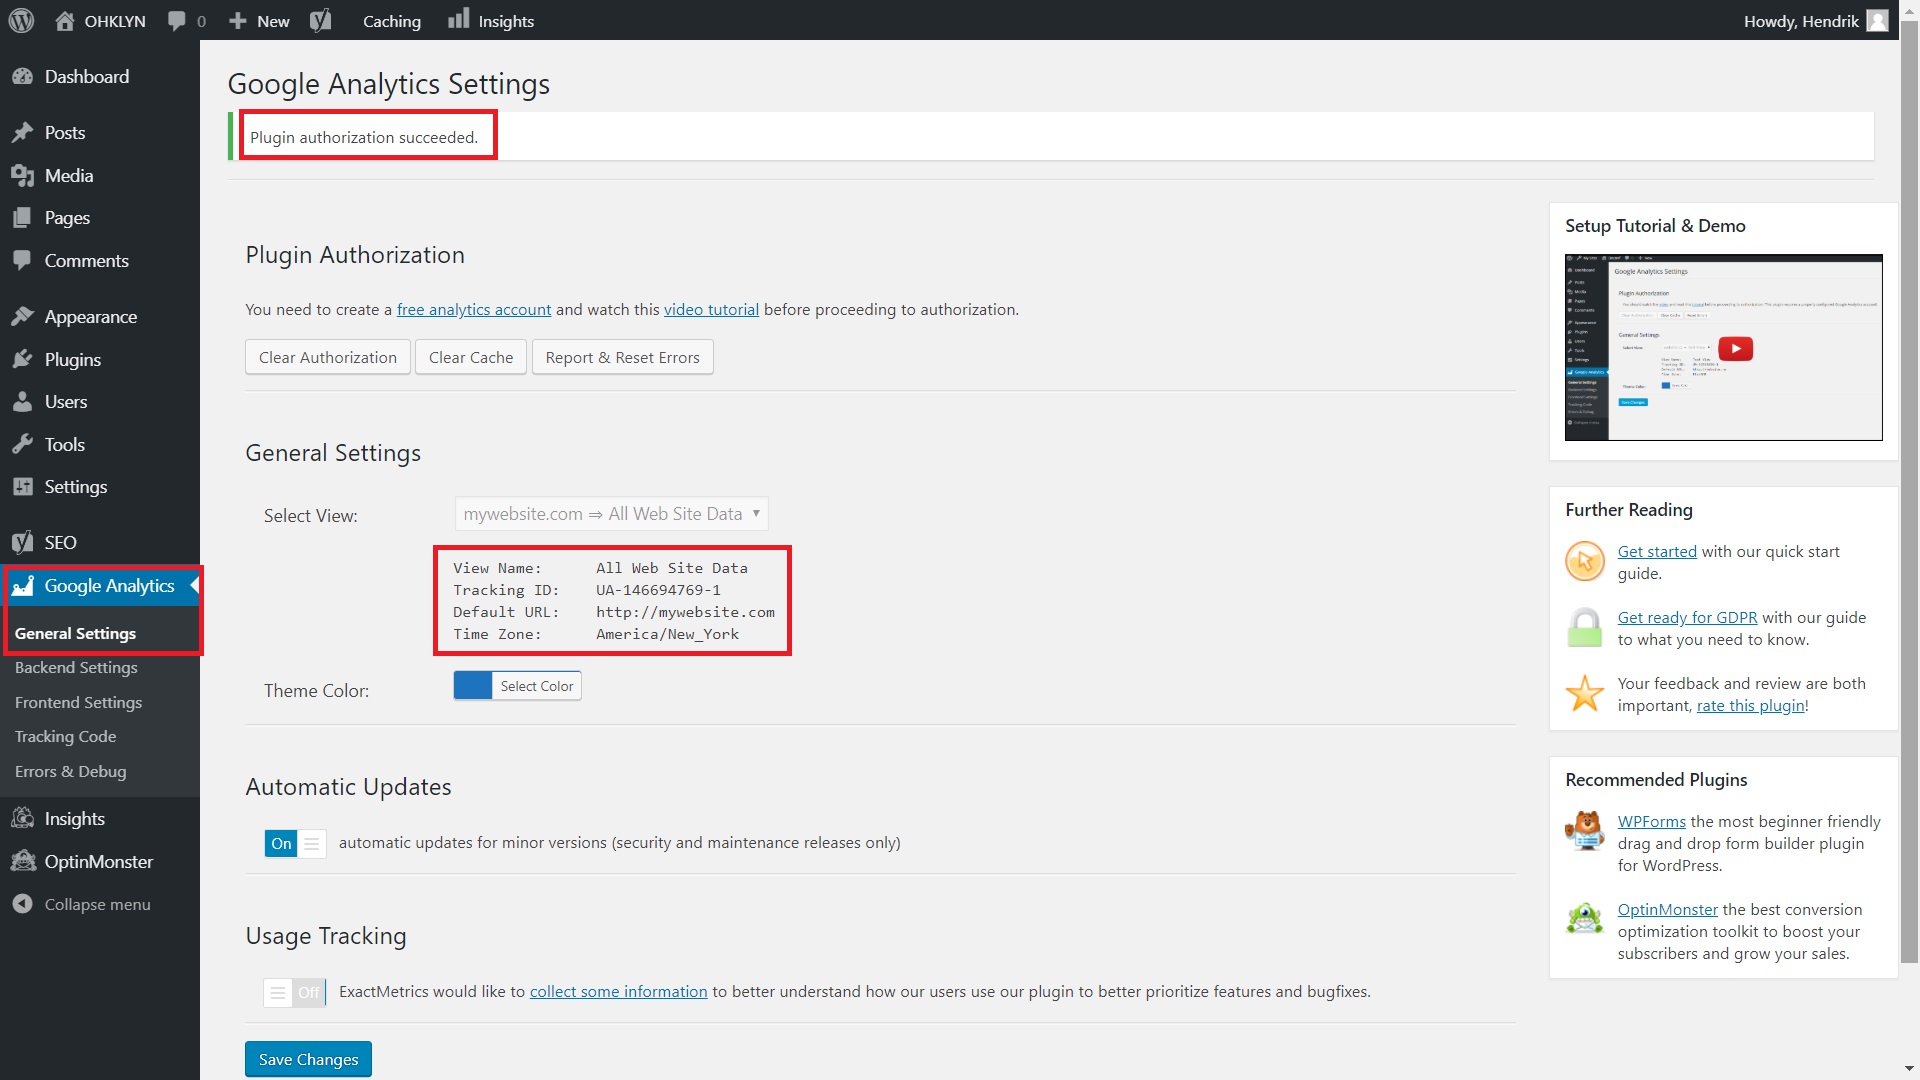
- Click on ‘Save Changes’ and you’re done!
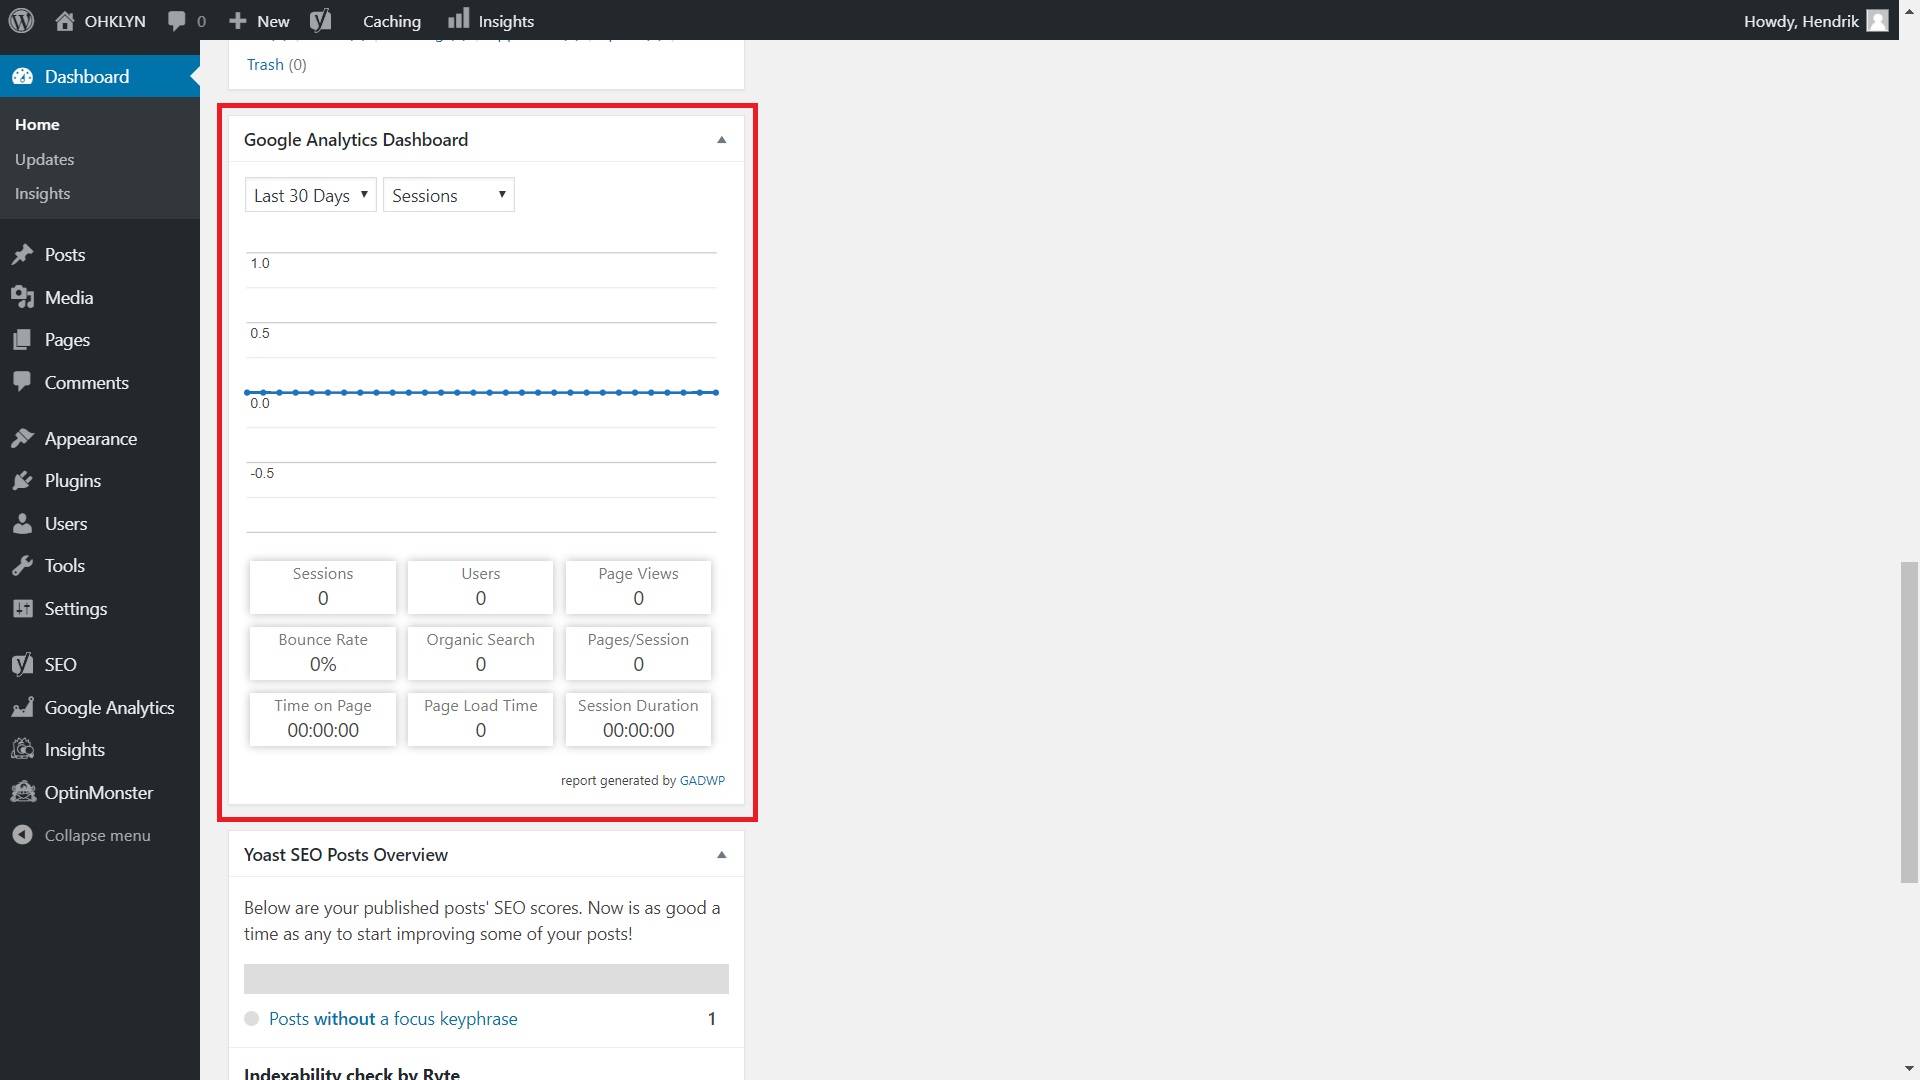
If you navigate to your dashboard, there should now be a new panel named Google Analytics Dashboard that shows your most important metrics. You can collapse, expand or move it around just like your other dashboard panels.
And that’s it. The next thing we’ll show you is how to add your Google Analytics tracking script to your WordPress website via your WordPress theme without needing to use a plugin.
How to install Google Analytics using the code section within your WordPress theme
Depending on what theme you use, the process might look slightly different. We will show you how to do this using Divi and Ultra as these are two very popular themes. We have created free tutorials on how to create a website using these themes that you can access via our Free WordPress Tutorials page.
First of all:
- Log into your Google Analytics account. Make sure that you are currently working with the website that you want to add Google Analytics tracking to.
- In the bottom left of the screen click on ‘Admin’.
- A page full of options will open up. We want the ‘Tracking Info’ option which you will find in the middle of the screen. Expand it and then click on ‘Tracking Code’.
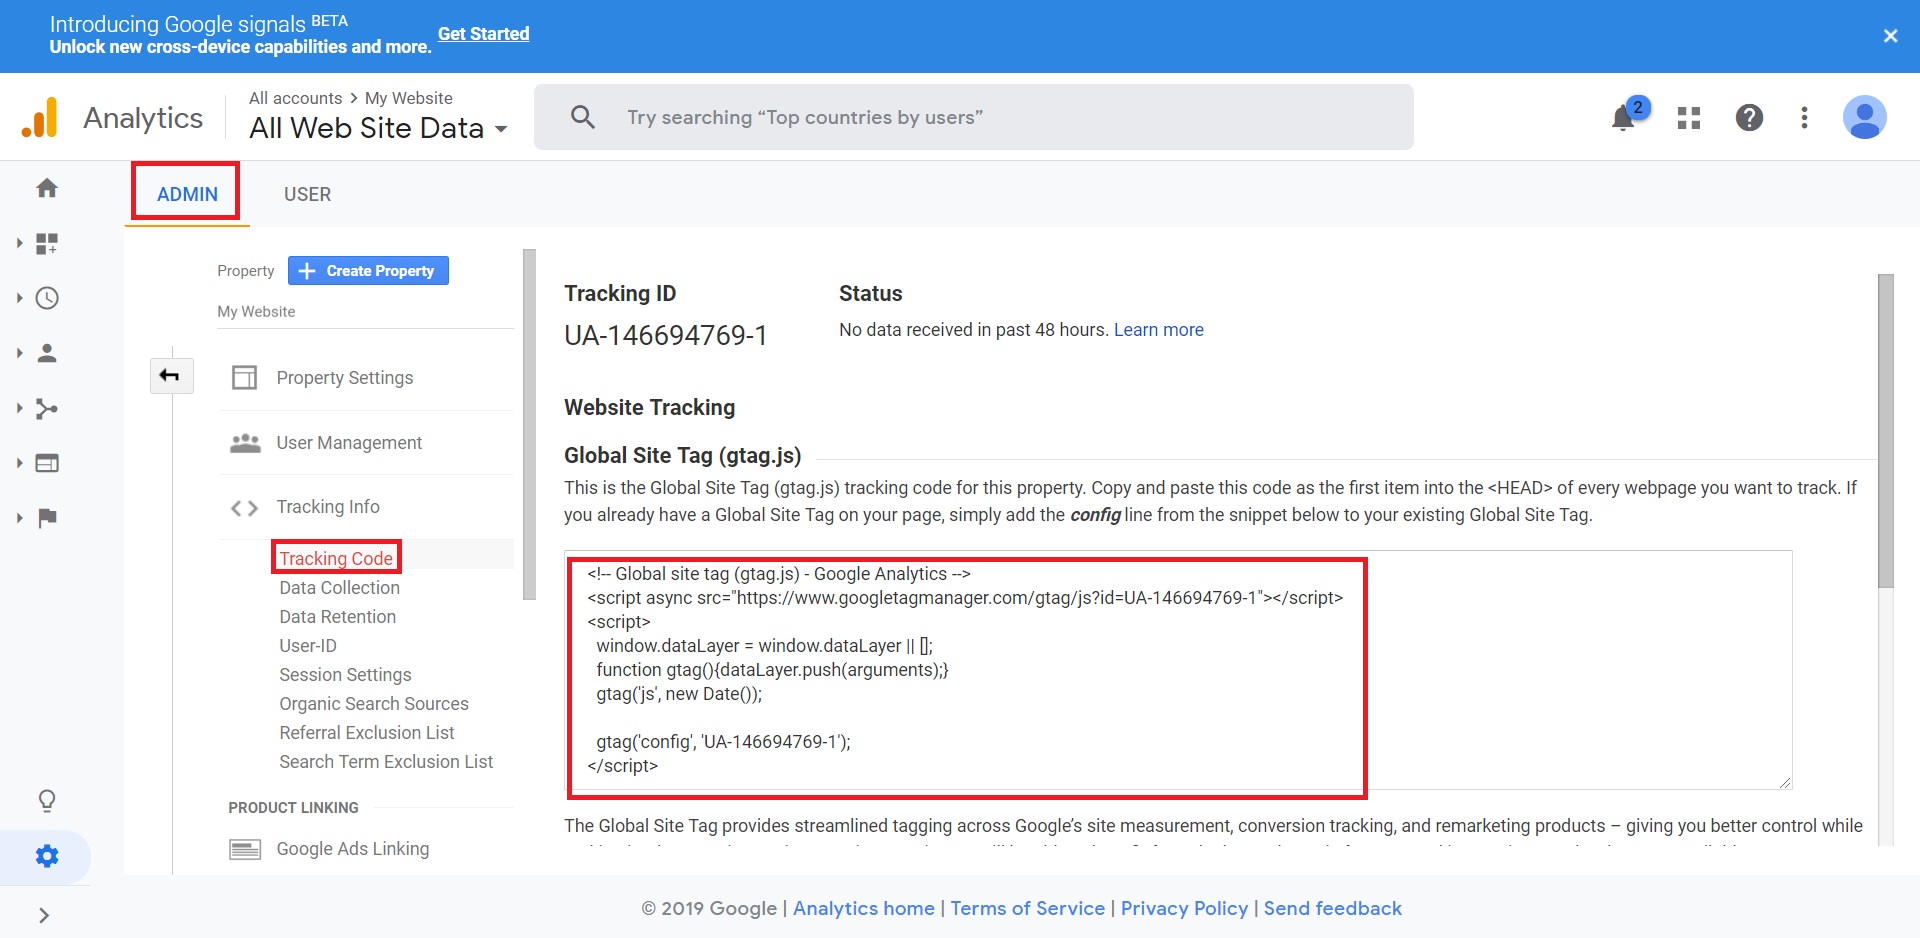
- Now, under the heading ‘Website Tracking’ and ‘Global Site Tag’ (gtag.js) there will be a text box with some script in it. Copy the whole piece of script. Make sure that you copy everything.
- Go back to your WordPress Admin Dashboard.
How to add Google Analytics tracking code using the Divi theme:
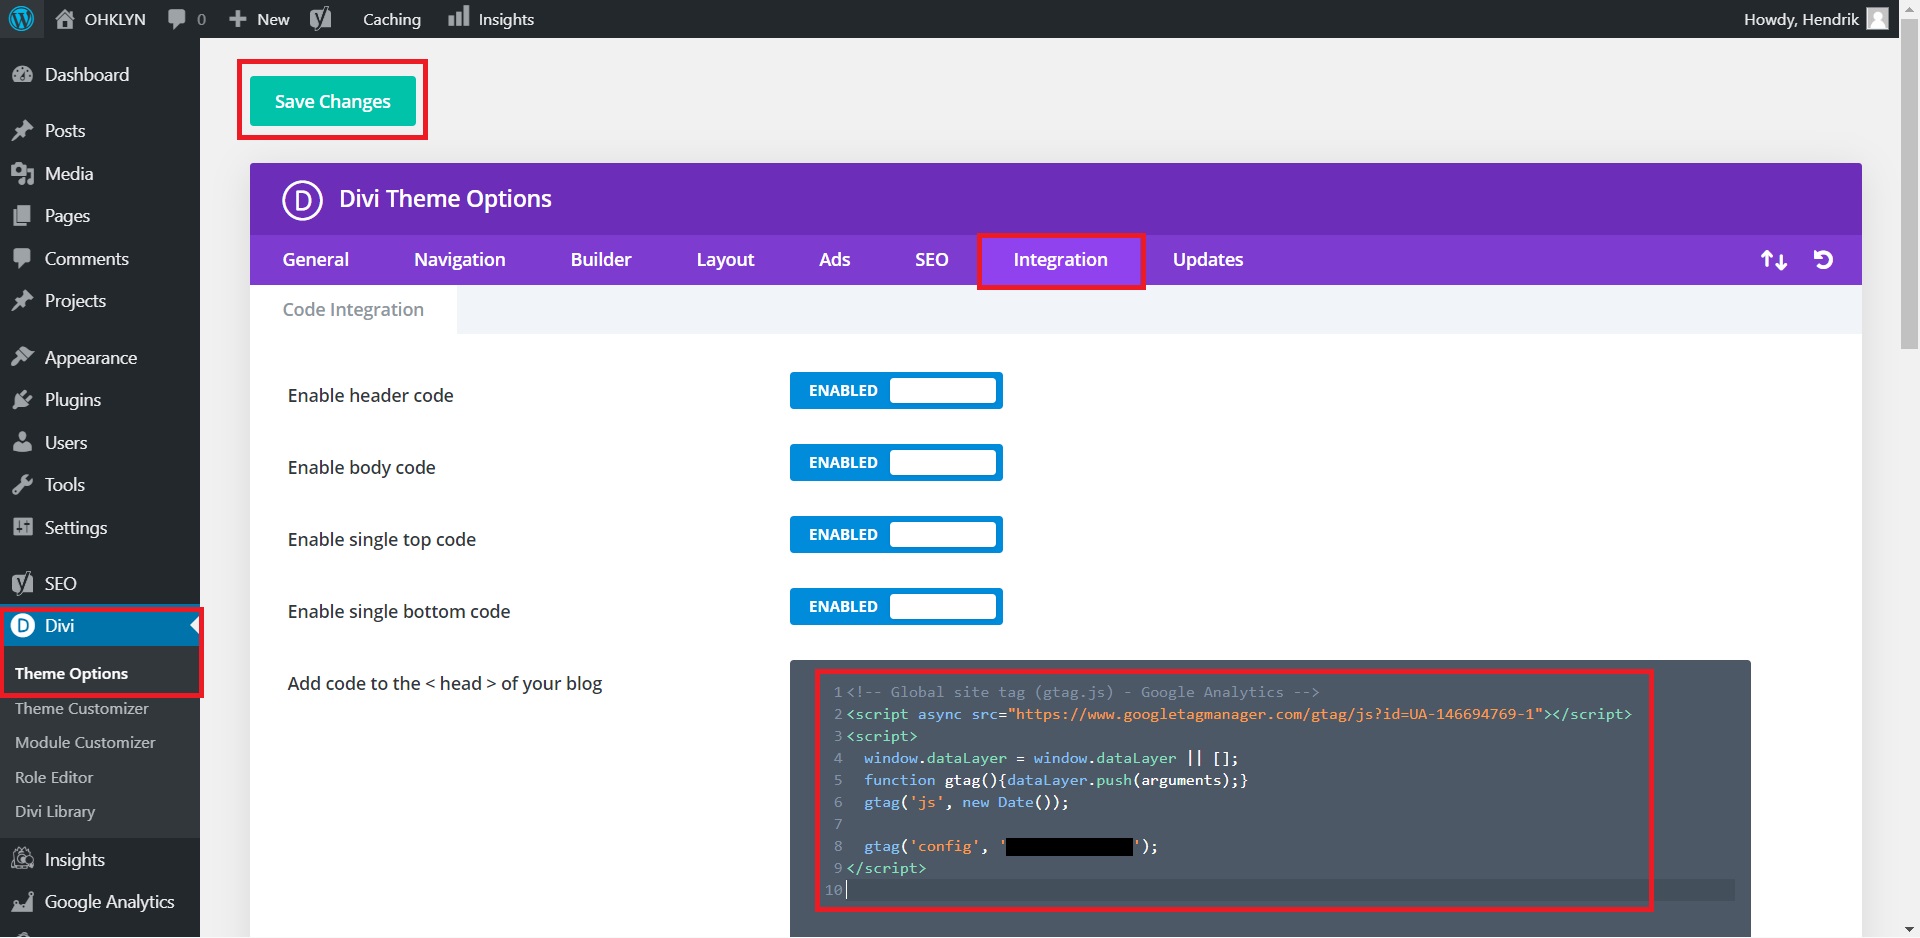
- Select the ‘Divi tab in the admin menu, then navigate to the ‘Integration’ tab.
- There will be a big text box with the label ‘Add code to the < head > of your blog’. Paste the tracking code you copied from Google Analytics into this box.
- Save changes.
How to add Google Analytics tracking code using the Ultra theme:
- Similar to Divi, hover over the ‘Themify Ultra’ tab in the admin menu and select ‘Themify Settings’.
- Under the ‘Settings’ tab, click on the ‘General’ sub-tab.
- Scroll down to the text box labeled ‘Header Code’, then paste the tracking code for Google Analytics here.
- Save changes.
As you can see, both processes are only slightly different. You should be able to replicate it on whichever theme you’re using provided it has a section to add code to the head tag of your website.
How to install Google Analytics via the header.php file of your child theme
Before you attempt this, we recommend you backup your WordPress site just in case something goes wrong. However, if you follow the steps exactly you shouldn’t face any problems.
For the more advanced WordPress user, child themes have many advantages. You can safely modify and edit the code of your child theme without tampering with your theme’s core files, allowing you to update to newer versions of your theme, without losing your changes.
We will present you with two methods to add your Google Analytics tracking script directly to your WordPress theme’s header.php file. The first is for users who have access to the header.php file via the WordPress editor. The second is for those who want access to the header.php file via SFTP using a tool like Filezilla.
Add your Google Analytics tracking code via your WordPress Editor
- From your WordPress dashboard, hover over appearance > Editor.
- Within your child theme, navigate to the header.php file.
- Copy the Google Analytics tracking code, and paste it before the tag. Be cautious not to overwrite any characters or existing code.
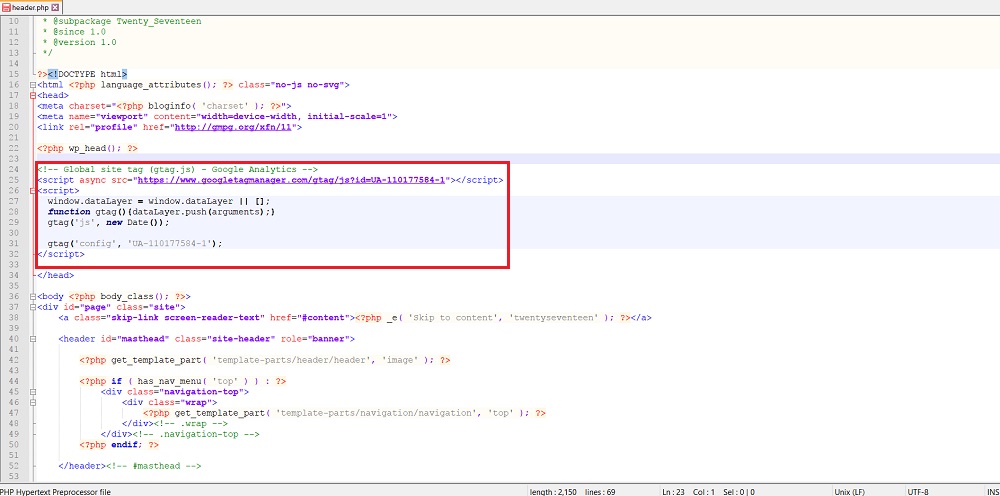
- Then, select ‘update file’, and you’re all set.
Add your Google Analytics tracking code via SFTP using Filezilla:
- Download and install Filezilla.
- Log into your server with your credentials.
- Navigate to the theme directory (it should be exactly the same as above).
- Download the header.php file.
- Copy the Google Analytics tracking code and paste it before the tag and save the file.
- Navigate to the child theme file in your WordPress directory and upload the modified header.php file.
There you have it! No matter which method you choose, you should now have access to the power of Google Analytics on your WordPress site.