In this article, we’ll go through the steps of how to start a travel blog using WordPress. Travel is a liberating experience. Whether you’re vagabonding your way around a country or continent, learning a new language in an isolated town, or meandering through Travel + Leisure’s top 100, you’ve likely got a story to tell, and unique experiences to share with the world.
Capturing these experiences through a unique lens and sharing new perspectives are the core ingredients of a meaningful travel blog. For this tutorial, we’ll be using WordPress to set up our travel blog. You can access discount hosting from Bluehost via the link below.
VIEW THEMEBLUEHOST DISCOUNTLIVE DEMO
Here’s what we’ll cover:
- Before starting a travel blog
- Tips for starting a successful travel blog
- How much does it cost to start a travel blog
- How to start a travel blog (5 simple steps)
- Next steps
Before starting a travel blog
Before getting started, it’s important to take a moment to define your target audience, identify your niche, and consider the things that will make your blog uniquely you, and entice users to engage.
During this process, it would be wise to define the objectives and goals for your blog as this will have a significant impact on the strategy you implore. To assist with this, you may want to consider reading our beginner’s guide to starting a blog, as this post will focus more on the practical steps of how to start a travel blog for 2018 and 2019, rather than the reasons for why you would want to start a blog.
Tips for starting a successful travel blog
How to choose a name for your travel blog
Choosing the right name for your travel blog isn’t a decision you should take lightly as it will ultimately become your brand. However, it isn’t something that should feel labored either. Here are four things to consider:
Is it unique, memorable, and You? Your blog name should be unique, memorable, and most importantly, it should be representative of you. It will be primarily your voice (at least initially) and as such should feel natural or organic.
Choose something you can scale and grow with. Does the name of your blog have room to grow with you? Without a doubt there is value in tailoring your blog to a specific niche, in fact, if you try to speak with too broad an audience, you’ll connect with no one. That being said, try to avoid absolutes, for example, ‘the under 30s blog’, as you may exclude yourself from your own blog sooner than you’d like.
Keep it as short as possible. A short name and domain is often easier to say, share, and will generally perform better in Google’s Search Engine Results Pages (SERPs), which will become more important as you build out your travel blog.
Make sure the domain name is available. Try to choose a name where the .com version of the domain is available as well as the social media handles. A .com domain is the most globally recognized and should be your number one option. Alternatively, try and secure either a niche specific top-level domain or one of the more commonly known domain extensions.
* To check domain availability, follow the link below, hover over ‘Hosting’ in the main menu and select ‘Domain’. Enter the domain name and choose the free domain extension you want. If your domain name is available you will be taken to a page to review and purchase it. Alternatively, if it’s not available you’ll be shown other options or you will need to try something else.
So whether it’s Nomadic Matt, The Points Guy, or The Blonde Abroad, choose something that speaks to your niche and is something you can grow with. As a side note, what these three professional travel blogs have in common, is that they’re built with self-hosted versions of WordPress, which is exactly what you’ll learn how to do in this tutorial.
Best travel blogging courses and resources
If you want to learn a trade or become a professional at anything, the best way is to learn from others who have already walked the path in front of you and have the skills or lifestyle you want. The same is true when starting your travel blog.
If you want to connect with a community of active travel bloggers and learn the ins and out of travel blogging from someone who is living and breathing it, not to mention making a full-time income from travel blogging, then check out the Superstar Blogging courses by Matthew Kipnes (aka Nomadic Matt).
How much does it cost to start a travel blog
For most people the biggest cost of starting a travel blog is time or sweat-equity. Creating great content, learning how to optimize that content, and doing it on a consistent basis is by far the most challenging and costly aspect of getting started.
In terms of the monetary costs, you’ll need a budget of about $100 – 250 to create a professional looking travel blog.
You should allow the following budget when getting started:
- Domain + hosting: $3 – 10 per month (depending on hosting term – discount hosting available)
- Premium WordPress theme: $50 – 100 (view: Best travel blog WordPress Themes)
- Branding and photography assets: variable
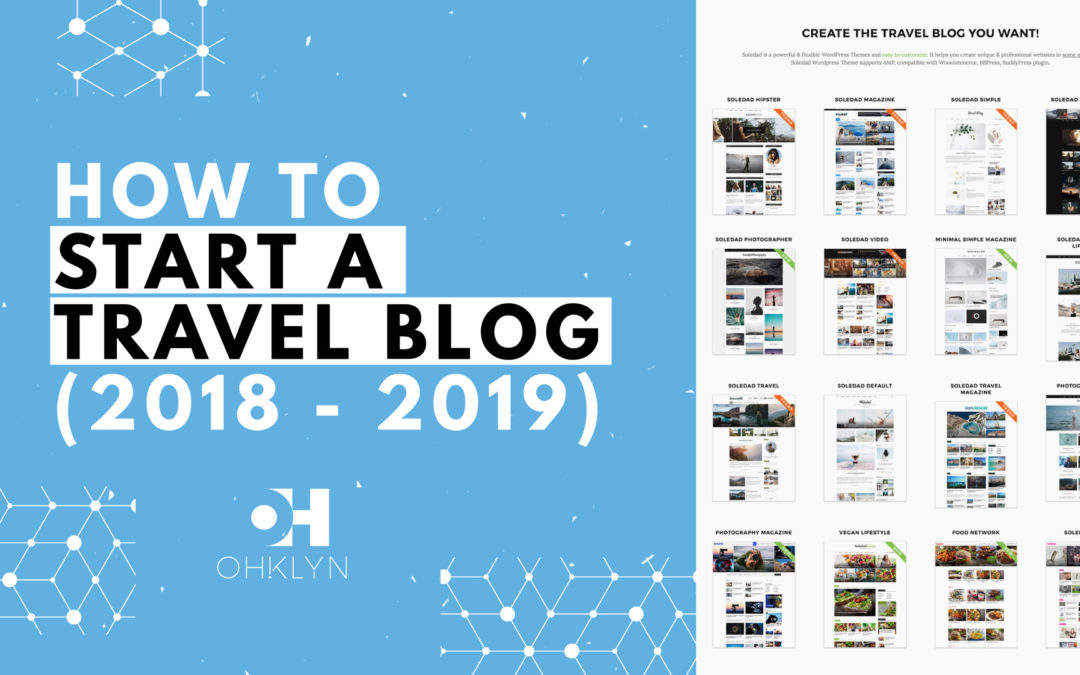
For this travel blog tutorial, we’ll use the Soledad WordPress theme and provide access to discount hosting through Bluehost.
SOLEDAD EXAMPLESBLUEHOST DISCOUNT
How to start a travel blog (5 simple steps)
Step 1: Preparation & planning
One of the biggest mistakes beginners make when starting a travel blog is that they forget to begin with the end in mind. Unlike a journey that can be made more enjoyable with a little spontaneity and loose plans, when it comes to creating a travel blog, this is not the case at all.
Before we start installing WordPress and creating posts it’s important to take a moment to define your target audience, identify your niche, and consider the things that will make your blog uniquely you, and entice users to engage.
What is the goal of your travel blog?
- To grow subscribers to your newsletter
- To grow your social media following
- To make money (via either an online store, affiliates, or advertising)
- Or, perhaps something entirely different
What you will need to start your travel blog
Once you’ve outlined the pages you want to include on your website and put together the rough layout for each page, you’ll then need to start writing the copy, sourcing or designing the images and graphics, and planning the navigational elements.
Go through each page layout, write the content for each section and decide on the media elements you want to use.
Sourcing great images for your website will an important aspect, to assist with this check out our Best royalty free stock photo sites article. Here you will find a list of free high-quality photo sites where you can download images that you can use on your website for free.
From a branding perspective, you will need:
- A logo,
- A Favicon (which is the icon that appears in the browser tab when a user visits your website),
- And your brand color palette, including the hexadecimal color codes. We’ll show you how to customize your website with these colors later in this tutorial.
There are a number of great tools like paletton.com, Adobe color, or color-hex.com that can be useful.
If you need help with copywriting or graphic design, consider using a third-party platform like:
Intro to blog and user experience (UX) design
User experience design is the process of optimizing the layout for your blog and ultimately how users engage with your blog to help achieve your objectives, be it newsletter signups, sales, etc.
The site architecture for your blog will consist of the following:
- Static pages – these are pages such as your about page, contact page, or privacy policy.
- Posts – these will be the individual blog post that will make up the bulk of your blog’s content.
- Category or archive pages – which is how you organize your individual blog posts. Each post will be grouped or assigned to a category or multiple categories.
The other components of your blog will include a sidebar (if you decide to include one), a global footer, and your menu or navigation.
For this tutorial, we’ll use the Soledad theme by PenciDesign. This is a premium WordPress theme and features a number of layouts for you to choose from that have all been optimized from a UX perspective. You can view the various layouts below.
Outline the pages, posts, and categories you want to include on your site. It’s often a good idea to draw this out, so you can visualize what you’re about to create.
Before you start digging into writing blog posts, you may want to do some keyword research to understand the types of articles and information people are searching for. If you’ve got a huge social following and pushing content to an already engaged audience, this is less important, however, if you’re trying to build a following and gain traffic to your blog it will be smart to do some keyword research.
There are a few ways of doing this, the most popular of is the Google Keyword Planner. You do need to set up a free AdWords account to use this tool. Alternatively, you can use the suggested search function built into Google by typing what you want to write about, or what you think potential site visitors would be interested in into the Google search box. Obviously, the queries that are more popular will be featured first.
There are also professional tools that you can leverage. Our favorite is SEMRush. It’s not the cheapest, but in our opinion, it’s the best for keyword and competitor research.
Ok, so there’s a lot to consider. Hopefully, you’re still with us and you can see the value in why it’s a good idea to think about all those things before jumping into starting your travel blog.
Step 2: Register your domain, set up hosting, & install WordPress
If you haven’t already, the first step is to register your domain, set up your website hosting account, and install WordPress for your travel blog. So we’re all on the same page, let us quickly explain what they are.
Your domain, or URL – is the web address for your website, and is what users will type into their browsers to access your site. For OHKLYN it’s OHKLYN.com. Pick something that works for you.
Hosting, is what allows your website to be accessible to users 24/7. It’s the process of storing the content and data for your website on a web server and serving it to users.
For this tutorial, we’ll walk you through getting started with Bluehost, as we believe it’s the best option for beginners.
Ok, so let’s go through the steps for setting up hosting for your website and registering your free domain.
Steps to register your domain & set up hosting:
- Head to the bluehost website (massive hosting discount up to 54% + FREE domain). The free Bluehost domain extensions included are (.com, .online, .site, .website, .space, .tech, .store, .net, .org, .info, .co, .us, .biz, .club).
Note: If you want a specific top level domain (TLD) or country specific domain not listed above, you will need to purchase it through a domain registrar like GoDaddy or CrazyDomains. You will also need to change the domain nameservers or (DNS) records to point at Bluehost’s servers. Here are the steps on how to change domain nameservers to point at bluehost.
- Select ‘get started now’ for the plan you want (shared hosting will be fine for most users & you can always upgrade later).
- Choose the hosting plan that’s right for you, hit ‘select’.
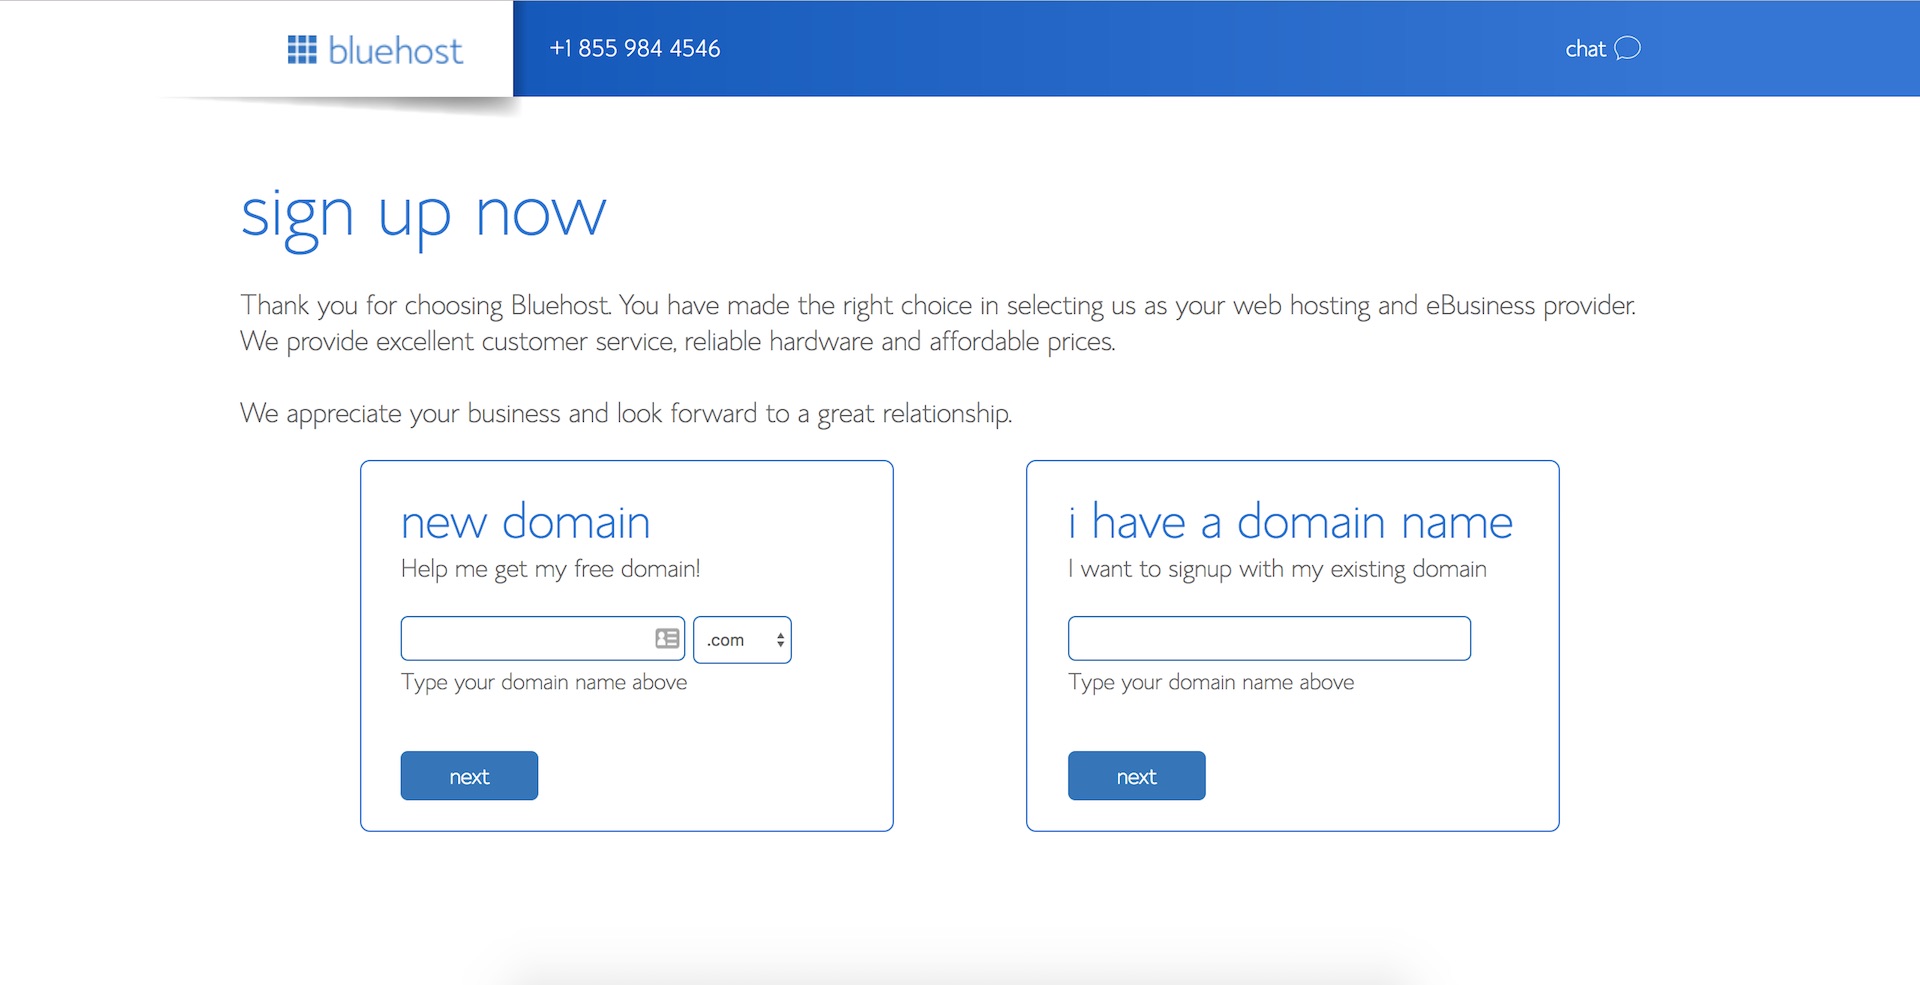
- Either use your existing domain, or type in the domain that you want (it’s free), then hit ‘next’.
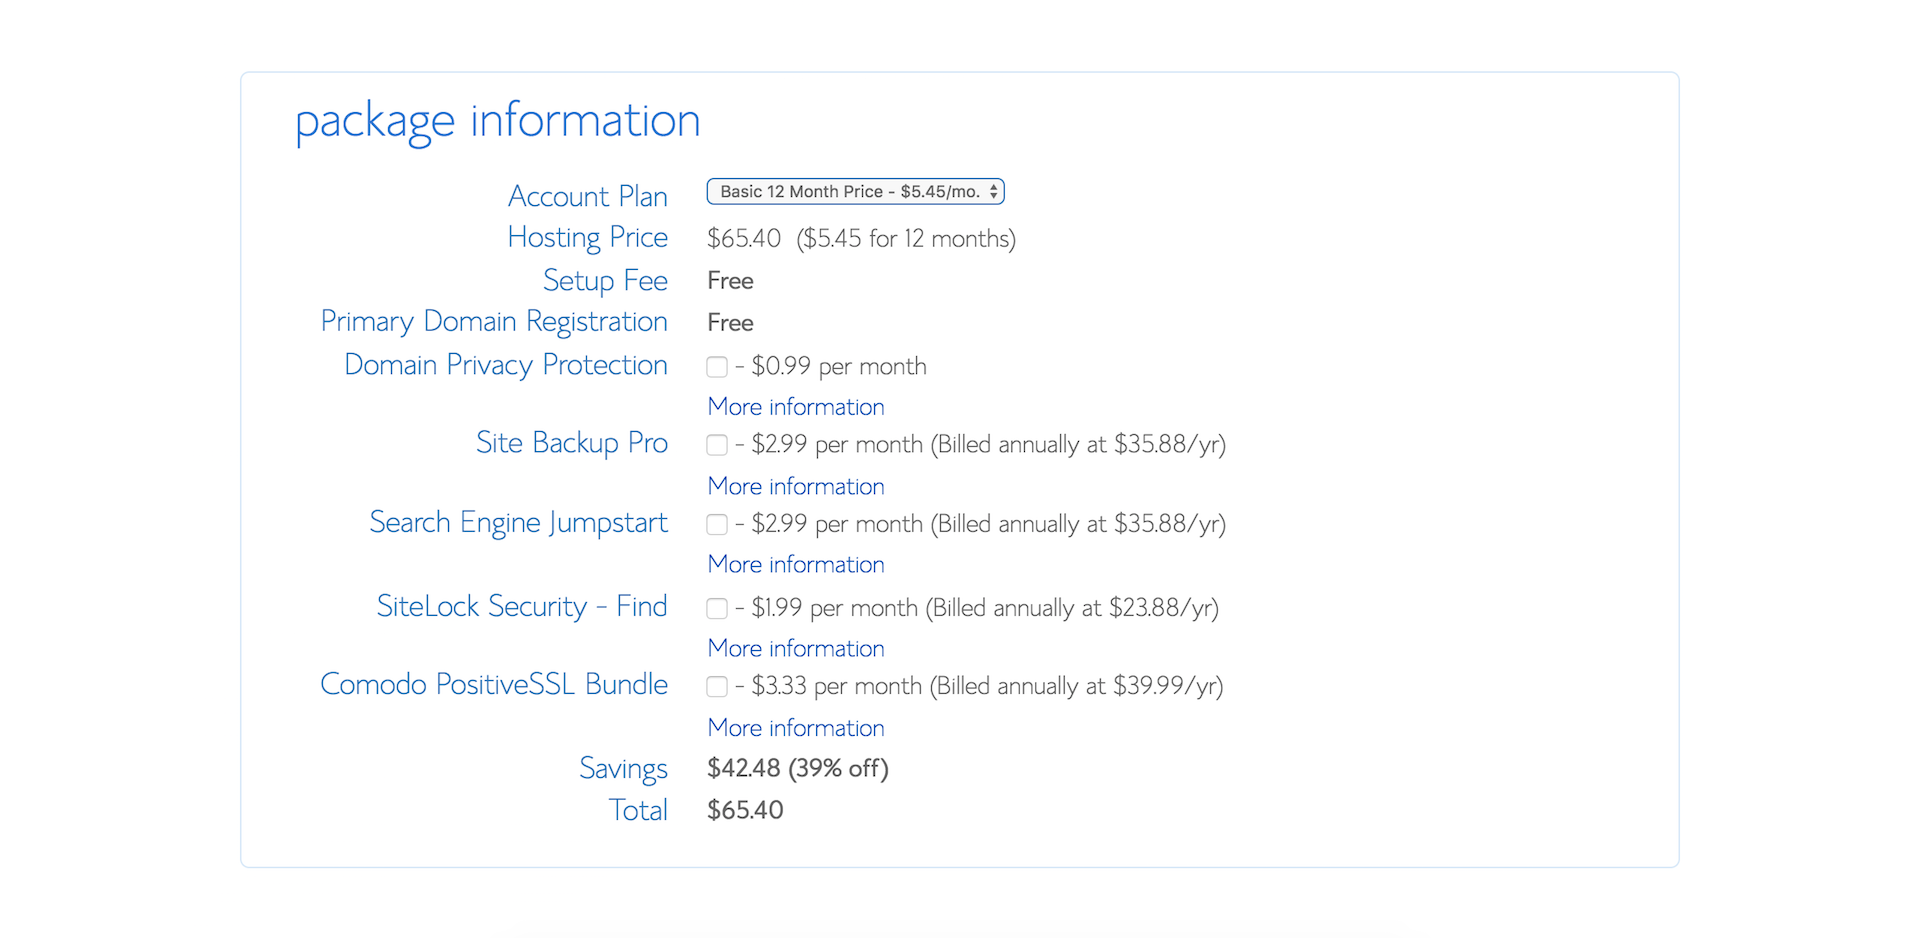
- Choose your desired hosting term and domain add-on preferences. We recommend selecting ‘domain privacy protection’ so that the personal information associated with your domain, isn’t publicly available (optional).
- Once you’ve chosen your desired options, enter your personal information, payment details, review the terms of use, and click ‘submit’ to move on to the installing WordPress.

Steps to install WordPress:
One of the reasons we love Bluehost is their easy to use One-click WordPress installation feature. In September 2017, Bluehost made the process of getting started with WordPress even easier. For new domains, WordPress is automatically installed for you so you can start building your site right away.
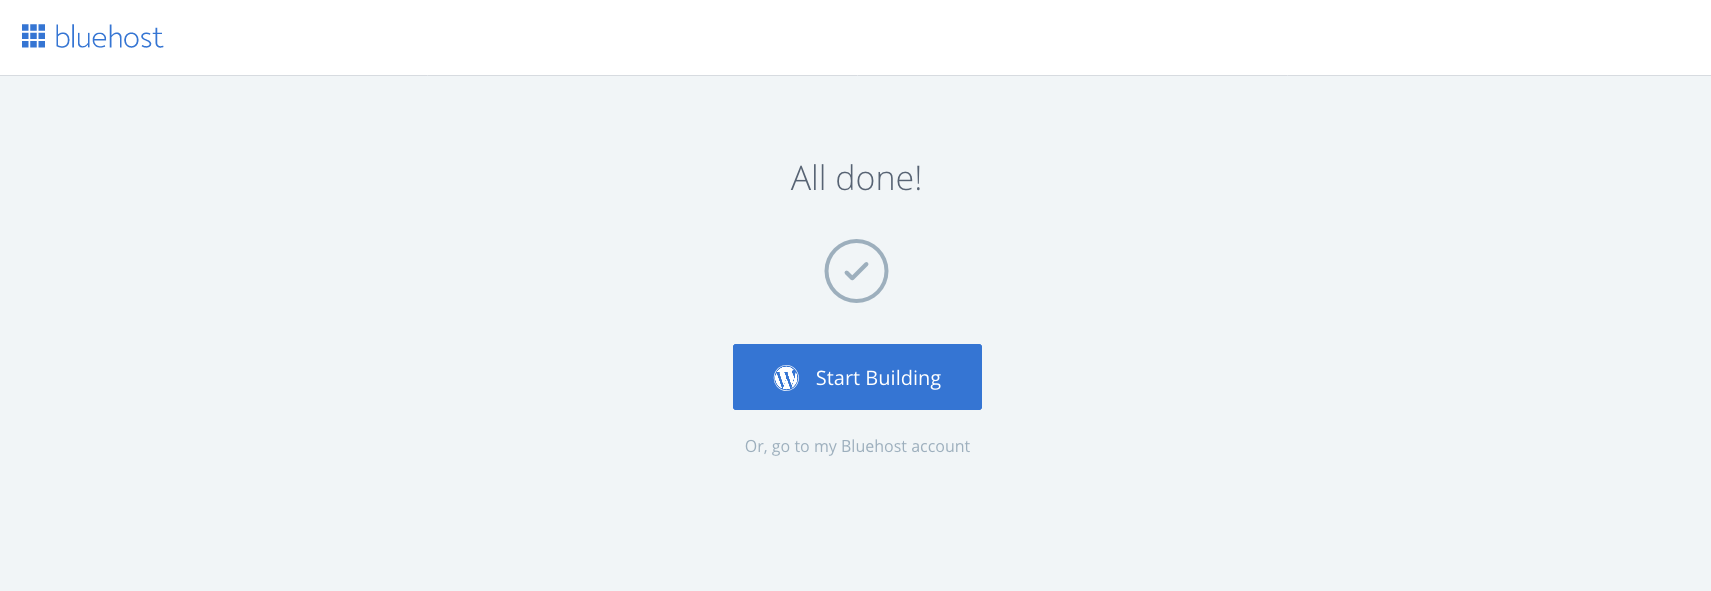
- When you see the ‘Congratulations’ message, click on login.
- You will be sent a verification email to the nominated email address for the account, which you will need to confirm.
- You can then set your password for your hosting account.
- Once you’ve done that, you will then be given the option to either ‘Start Building’, which will take you to the backend of your WordPress dashboard, or you can select to go to your Bluehost account.
Install WordPress for an existing domain via Bluehost
If you’ve purchased your domain elsewhere, you will need to change the DNS records for your domain via the domain registrar where you purchased your domain. Check out one of our detailed tutorials that walk you through this process:
- How to change GoDaddy nameservers to point at Bluehost
- How to change Domain Name Server (DNS) records to point at Bluehost
Congratulations! You’ve officially started your travel blog! It’s not much at the moment, but you’re a lot closer than you realize.
As part of this process, we’ll provide a link to our article on how to set up your free SSL certificate which will encrypt the data on your blog. This is best practice as it improves the security on your blog, allows you to take payments on your site, and will improve your Google rankings.
If you’re new to WordPress, we’d recommend reviewing our How to use WordPress article which is a free introduction to WordPress tutorial for beginners.
Ok, we’ve covered preparation, as well as registering your domain, setting up hosting, and installing WordPress. We can now move on to the step number three.
Step 3: WordPress fundamentals for beginners
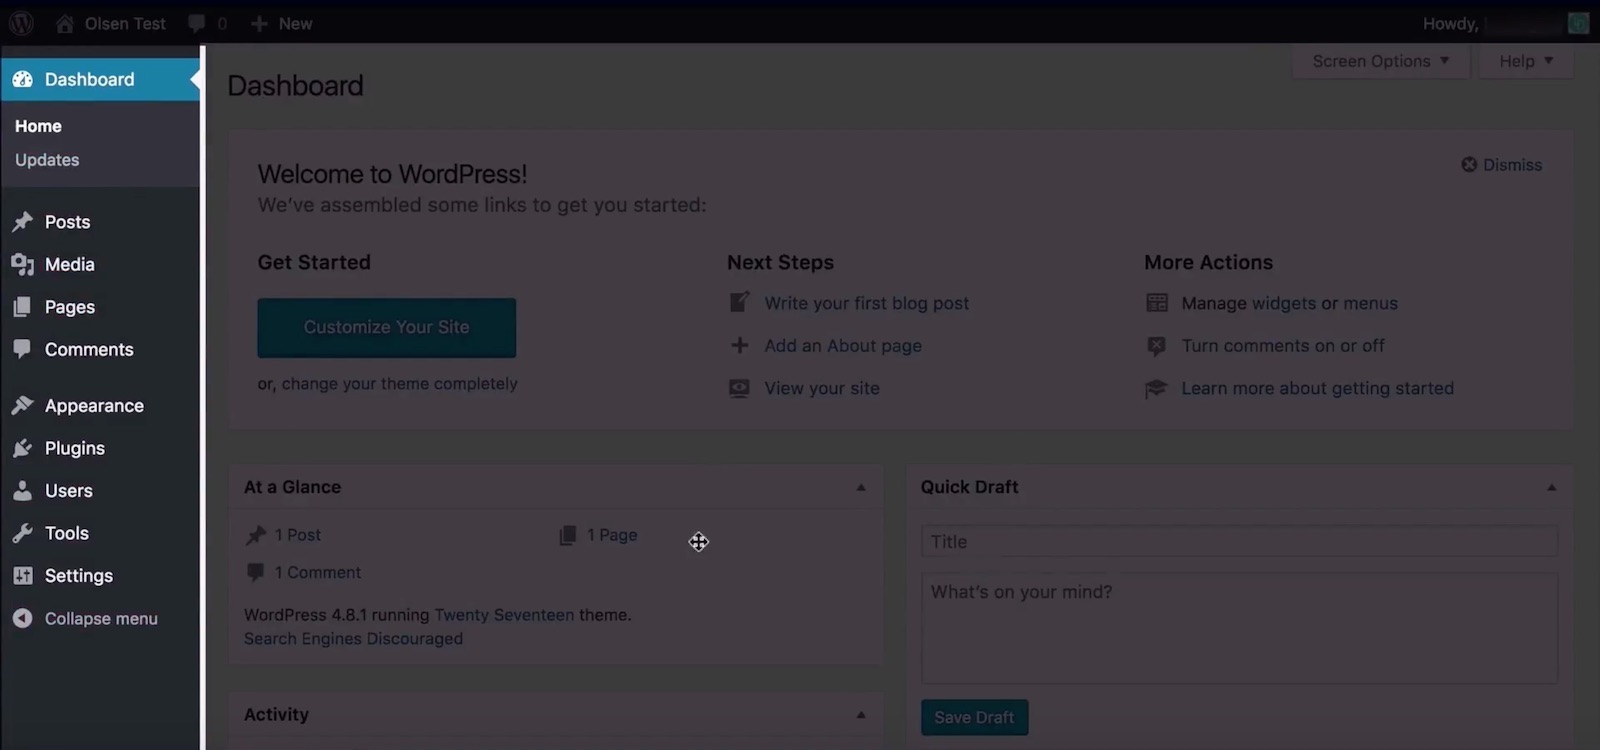
Whenever you want to log into the backend of your WordPress blog, enter your domain and add /wp-admin to the end (i.e example.com/wp-admin). Then enter your username and password that you set up in the prior step. You’ll then be taken to your WordPress dashboard.
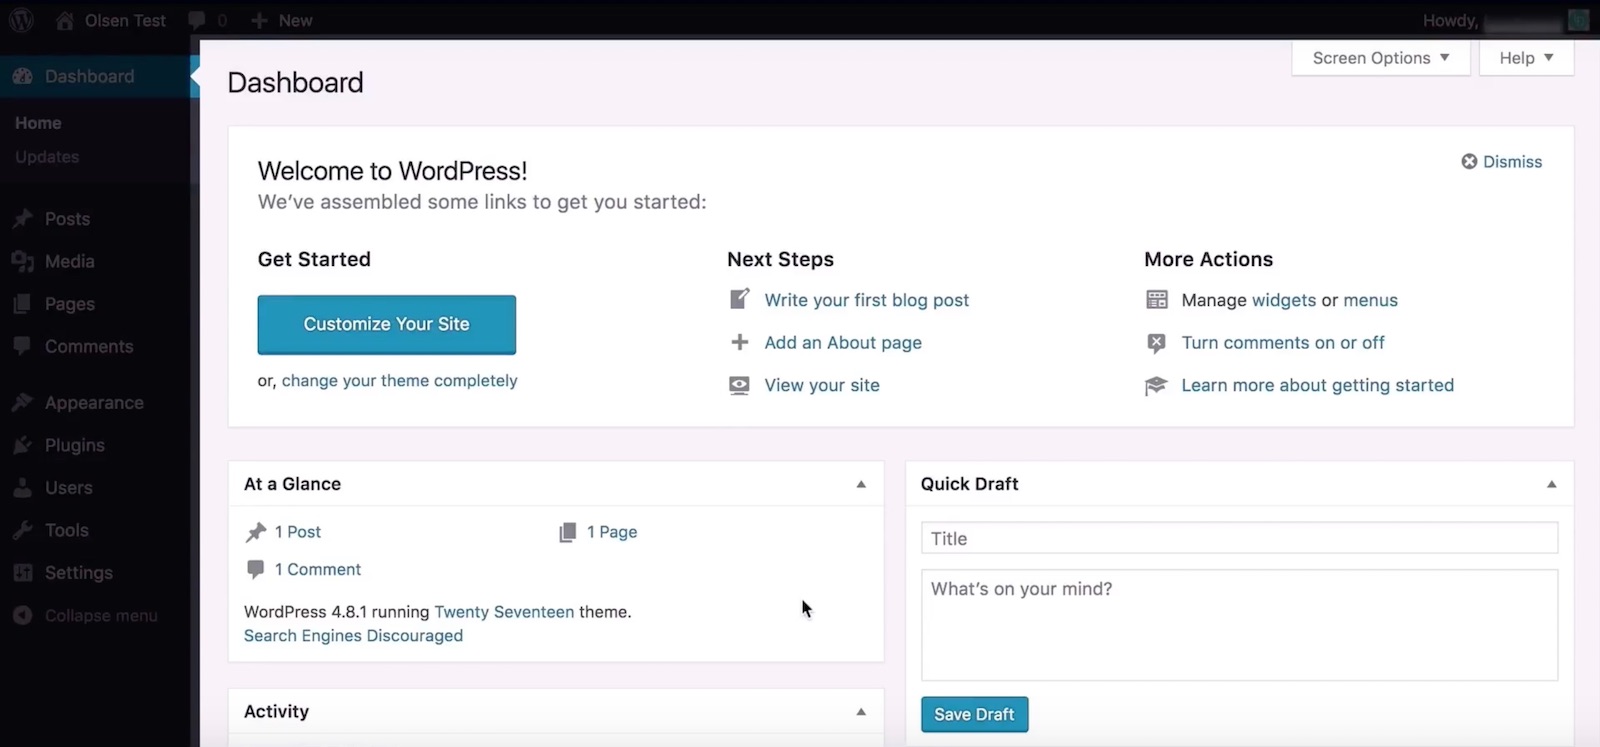
The WordPress dashboard or admin panel is broken down into 3 main sections: at the top, we have the WordPress toolbar, the menu or admin menu is located on the left-hand side, and the main admin area is in the middle, where we’ll do most of our work.
We’ll give you a brief overview of each section now – however, for a more detailed overview, watch our free how to use WordPress tutorial, which is an introduction to WordPress for Beginners. This is intended to get you up to speed on the fundamentals of how WordPress works in about an hour.
WordPress toolbar
The WordPress toolbar at the top is dynamic and adjusts the available options depending on which page you’re on, and if you’re viewing the page from the front or backend.

WordPress admin menu
The Admin menu located to the left of your dashboard is separated into 3 main sections, these are: The Dashboard section, the Content Management section, and the Site Administration section.
- The Dashboard section provides easy access to the Dashboard, updates, and additional plugin features.
- The Content Management section is where you create and manage Posts, Pages, Media items, Comments and additional plugin features.
- The Site Administration section is where you configure the design and appearance settings for your website (including selecting the active theme for your website, creating and managing menus, widgets, and customizing your website’s theme). It’s also where we manage plugins, users, control global WordPress settings, and activated theme and plugin extensions like SEO, Social sharing, theme specific settings, and security.
WordPress admin panel
Lastly, the main Admin area serves as our primary workspace, and adjusts depending on what’s selected from the admin menu.
We’ll go through some practical examples for each of these in the coming sections once we upload our theme and start working with content.
Permalink settings
One thing we recommend doing before we move on is updating the permalink structure for your website. This will impact how your URL strings will be created for pages, posts, etc.
To do this:
- Hover over ‘settings’ in the admin menu, then select ‘permalinks’.
- The default option, leverages a more journal approach featuring the date in the permalink. However, the more common option and what we’d recommend from an SEO and UX perspective is post name. So we’ll select that option.
- Then save changes.
Managing users on your travel blog
If you want to update your user profile or add users to your blog, you can do this by hovering over ‘users’ in the admin menu on the left, and selecting from the options there.
Once again, for a detailed walkthrough of WordPress, we recommend watching our how to use WordPress tutorial.
Step 4: Choose & upload your WordPress theme
A WordPress theme is a group of files that work with the underlying WordPress software to enhance the design and functionality of your WordPress website. For a more detailed overview, check out our What is a WordPress theme article.
For this tutorial, we’ll use our top rated travel blog theme – Soledad by PenciDesign. To access the theme (and any discounts when they’re available), follow the link below.
If you want to use an alternate theme, that’s ok – you’ll still be able to follow along. We’ve created a list of the best WordPress themes for travel blogs which you can access it here.
How to create an Envato account and download the Soledad theme
- Follow the link above to the theme page, then click ‘Buy Theme’ to purchase a copy of the Soledad WordPress theme for a once off fee.
- Go to checkout to finalize your purchase.
- If you haven’t got a ThemeForest account, you will need to create one.
- Add your billing information.
- Then select your payment method.
- Once you’ve done that, you will then be able to download the theme files.
- From within your profile, head to ‘downloads’.
- Next to the Soledad theme, click on ‘download’ and select ‘all files and documentation’.
Once you’ve downloaded the theme packet, unzip the ThemeForest file. Within there, you’ll see soledad.zip which is the WordPress theme file. Leave this unzipped as we’ll upload this to WordPress directly. There is also a file called soledad-child.zip which you can use if you want to use a child theme. To use a child theme, you will need to upload the soledad.zip file first, and then the soledad-child.zip. For more info on what a child theme is and if you should use one, check out our article here.
The last thing we’ll draw your attention to is the ‘documentation’ folder which includes an index.html file. If you open this file, it will take you through to the online theme documentation and video tutorials for Soledad. If you decide to go with a different premium theme, they will most likely have something similar.
Upload and install the Soledad WordPress theme
- From your WordPress dashboard, hover over appearance in the admin menu on the left, and select ‘themes’.
- From here, select ‘Add new’.
- Then click, ‘Upload theme’.
- Select ‘choose file’.
- Navigate to the .zip file you downloaded earlier, and select ‘Open’. In our case, it’s the soledad.zip file. If you’re using a different theme, find the theme.zip file.
- Click ‘Install now’. This will start the process to upload and install.
- Once the theme is successfully installed, click ‘activate’, and your new theme will now be live on your website.
- If you want to install the child theme, follow the same process.
The first thing we need to do is install and activate any plugins that are required by the WordPress theme we’ve just installed. In this case, we’ll see a notification at the top of the page. To do this:
- Click on ‘begin installing plugin’.
- We’ll bulk select the required plugins and click ‘Install’.
- That will install the required plugins, this may take a minute.
- We’ll check the status, then click on the option to ‘Return to Required Plugins Installer’.
- To activate the plugins we’ve just installed, bulk select the plugins and select ‘Activate’.
- Once any required plugins are activated, we can return to the dashboard. You’ll notice that a few new tabs have been created in the admin menu on the left.
- As per the theme documentation, before we install the demo content, we need to make sure the ‘Your homepage displays’ is set to show ‘Your latest posts’. To do this, from your WordPress dashboard, hover over settings in the admin menu and select ‘Reading’.
- From there, confirm that the settings are correct and save changes if required. If you’re using a different theme, be sure to follow the theme documentation to ensure you install the theme and plugins correctly.
Like many premium WordPress themes, Soledad is compatible with Visual Composer which is a drag and drop page builder plugin. This isn’t a required plugin, however, it is included with this theme. If you want to use a visual page builder, then you will need to upload and install this plugin.
To do this:
- Open the folder that you unzipped before.
- Then head to the plugins folder.
- In here, you’ll find the file called ‘visual_composer.zip’. This is the plugin that we’ll upload via your WordPress dashboard. There is no need to unzip this file.
How to upload and install a plugin:
- From your WordPress dashboard hover over ‘plugins’ and choose ‘Add new’.
- Select ‘Upload plugin’.
- Then click ‘Choose file’, and navigate to the ‘visual_composer.zip’. file and select ‘Open’.
- Then click ‘Install now’.
- Once it’s finished uploading, select ‘Activate plugin’.
And that’s it, you’ll now be able to use visual composer to create custom page layouts. In the documentation guide here, there’s a video on how to use visual composer.
Ok – let’s move on to customizing your blog.
Step 5: Customize your travel blog
By now your WordPress travel blog will be set up correctly with your WordPress theme installed along with any required plugins. We can now start customizing your travel blog to suit your style.
In this section we’ll cover the following:
- How to import the demo content via the one-click demo content importer.
- How to upload your logo and branding elements.
- How to update the theme settings.
- How to create pages, posts, and categories.
- How to update the menu and navigation.
- How to update the sidebar.
- How to update the footer.
- How to delete the demo content you don’t want to use.
The first thing we’ll do is bring in the demo content from the live preview that resonates most with you.
How to import the demo content
As per the theme documentation, there are two options for importing the demo content. The first option is to import the full demo content, the second is to import the customization settings only. If it’s a new blog, then you can use either option. Because we want to bring in all the demo content, we’ll use option one.
- From your WordPress dashboard, hover over ‘appearance’ and select ‘Import demo data’. If you don’t see this option, make sure you’ve installed the required plugins.
- From there, scroll through and select the demo example that you want to import. In our case, we’ll scroll down to the travel option, then select ‘Import’ to start the process.
- Once you see the ‘Import completed!’ message, hover over your site name in the toolbar at the top left and select ‘visit site’. You’ll see that the demo content is all imported, and you’re now very close to having your very own travel blog.
How to upload your logo and branding elements
One of the things we like about this theme is that the customization options are built into the native WordPress theme customizer. While we’re not going to go through every theme setting, we’ll cover the ones that will be important to most people, and for everything else, there’s the theme documentation and videos.
How to upload your logo
- From your WordPress dashboard, hover over ‘appearance’ and select ‘customize’.
- To upload our logo, navigate to the ‘logo and header options’ tab.
- You’ll notice that this theme supports a number of logo types and sizes which gives you more control over the appearance of your logo on various devices. You can also set a maximum width for your logo, as well as add padding or space to the top and bottom. Select ‘change image’
- You can either select an image to use as your logo or upload your logo via either dragging your logo in, or by selecting ‘upload files’, clicking on ‘select files’, and uploading your logo that way.
- To set your logo, select ‘choose image’.
- Repeat the process to update the various sizing options for your logo, or remove the other options.
For simplicity, we’ll remove the alternate size logos by clicking remove and setting our max logo width to half the width of our original logo size. Given our logo file is 600px wide, we’ll set a max logo width of 300px, which will suit this design and avoid our logo pixelating or appearing larger than we want.
How to upload your favicon
- From your WordPress dashboard, hover over ‘appearance’ and select ‘customize’.
- Then navigate to the ‘general options’ tab.
- Where it says ‘upload favicon’, click ‘select image’.
- Either select your favicon from your media library or upload your favicon file
- Once your favicon is there, give it an alt text, and then select ‘choose image’.
- Remember to publish changes
Explore the theme settings within the customizer
This is where you’ll be able to make significant changes to the appearance of your blog. For example, if you want to set a background color, image or texture for your blog, you’ll be able to do that here. You can also amend the homepage layout with respect to the posts that are featured and the general layout style.
In regards to the other homepage layout options, you’ll control the slider at the top in the ‘featured slider options’ tab, and the feature boxes via the ‘homepage options’ tab.
How to add your brand colors
- From your WordPress dashboard, hover over ‘appearance’ and select ‘customize’.
- Scroll down to the bottom of the theme customizer. You’ll notice that there is a tab called ‘Colors general’ and a number of other color related tabs below that. Here is where you’ll have full control over all the colors featured on your blog. Simply click into the various options and add the hexidecimal color code for your brand or choose a color from the color picker.
How to update the other theme settings
So far we’ve looked at the General options, Homepage Options, and the Logo and Header options. We’re not going to go into all of the theme settings tabs, however, we’ll cover those that are the most important. These are located in the theme customizer which you can access from your WordPress dashboard by hovering over ‘appearances’ and selecting ‘customize’.
Top bar options
Here, you can opt to enable the top bar for your site which can be used to highlight featured posts, as well as links to your social media profiles.
Social Media Options
Here, you will add the full URL links (including the HTTP or HTTPS part of the URL) for each of your social media profiles. The theme will use these values to link to your social accounts in all the sections where social links or icons can be added. Hashtags as you can see here, are used as placeholders, so remember to remove these for the social accounts you don’t want to feature in your social media sections.
Featured Slider Options
Here, you can either enable or disable the slider as well as if you want this to feature on all pages, which in this case, would include all posts as well. We would recommend leaving lazy load images enabled as it will reduce the initial page load time.
Featured Video Background Options
Here, you can add a featured video using a YouTube URL that will be added below the navigation by enabling this option. As it says, videos aren’t supported on mobile and tablet, so you’ll need to add a default image for mobile and tablet.
Standard and Classic Layouts Options
This tab allows you to control the elements on your pages or archive pages, where you’ve specified one of the Standard or Classic layouts.
Other Layouts Options
Here you’ll have similar options to those in the ‘Standard and Classic Layouts Options’, however, this is used for the layouts that utilize Grid, Masonry, List, or Boxed layouts.
Single Post Options
This tab gives you full control over the settings for individual posts. Some of these options will look similar to those on the last two tabs with the addition of more post-specific options such as options related to captioning, blockquotes, comments, as well as the ability to add Google Adsense code, just to name a few.
In addition to the main styling options we covered, there are also the following tabs:
- Page options, for static pages.
- Footer options which control the appearance of the footer.
- 404-page options, which is for the page that users land on when they enter in a URL that can’t be found.
- Portfolio options are for those wanting to include a portfolio on their site.
- WooCommerce options are there if you want to include a store as part of your blog. For this, you’ll need to install the free WooCommerce plugin first.
- There are also a number of other customization options which may not be as relevant for this tutorial, but feel free to explore these as you go through.
Anytime you make changes to your theme settings via the theme customizer, remember to click ‘publish’ to commit your changes.
Next, we’ll move on to how to create pages and posts in WordPress.
How to create pages, posts, and categories
How to create a new page:
- From your WordPress dashboard, hover over ‘pages’ in the admin menu on the left. To view all the pages on your website, click on ‘all pages’
- Alternatively to create a new page, click ‘add new’. You could also hover over the ‘+ new’ option at the top of the page and select ‘page’, or, from the All pages tab, click on the ‘Add new’ button at the top
- The first thing you’ll want to do is give your page a name. If you’ve selected ‘post name’ as your permalink structure, this will be used to create the URL for this page.
- If you’re new to WordPress, we recommend watching our How to Use WordPress tutorial, where we cover the default WordPress options available when creating pages
- On the right-hand side, you can select if you want to assign a parent page. This will impact the site hierarchy as well as permalink structure.
For those wanting to create custom page layouts using Visual Composer, here is a link to a full tutorial on how to use this page builder.
How to set the homepage for your WordPress blog
- Hover over ‘Settings’ in the admin menu and click on ‘reading’.
- Under the ‘Your homepage displays’ option, you can choose between ‘A static page’ and then selecting the page you want as your homepage from the dropdown, or ‘Your latest posts’.
- In our case, we’ll select the default ‘Your latest posts’ option. Remember to save your changes.
How to create posts and categories
You’ll create blog posts the same way you create pages in WordPress, the only difference is that you’ll need to set up categories first.
How to add blog categories
- From your WordPress dashboard, hover over posts, and select categories
- Enter in the category name
- And selecting ‘add new category’
- Repeat this process for all the categories you want to include in your blog
How to create a blog post
Once you’ve created your categories, to create a new blog post:
- Hover over posts in the admin menu and select ‘add new’
- You’ll add a title
- And your content
- Select the category for the post on the right-hand side
- Assign a feature image by clicking on the ‘set feature image’ option on the right-hand side
- And either uploading an image or selecting one from the media library
- Then, preview or publish your post
For those new to creating blog posts in WordPress, follow one of the links below to a detailed tutorial on how to do it. The first option uses the classic editor and the other features the new Gutenberg editor.
- How to create a WordPress blog post:
- Using the classic WordPress post editor.
- Using the new Gutenberg post editor.
How to update the menu and navigation
By now, you should have roughly created the pages, posts, and categories for your travel blog. Don’t be concerned if you’re not 100% sure on the exact structure. What we’ll do now is create the menu structure for your blog so you can easily navigate around your blog while you continue to finalize your layouts and content.
Menus in WordPress are created and managed in the dedicated menus section which you can access by hovering over ‘appearance’ in the admin menu, and selecting ‘menus’.
If you imported the demo content, you’ll be able to select one of the pre-created menus from the dropdown lists, by choosing the menu you want, and hitting ‘select’.
On the left, you have the available content that you can add to your menu, such as:
- Pages
- Posts
- Custom links
- Categories, etc.
To add more options, click on the ‘screen options’ tab at the top and check the boxes next to the elements you want to add to your menu. Under screen options, you can also enable the ability to set the link target for a menu item, which means whether the link opens in a new tab or not, as well as assign CSS classes.
However, if you’re interested in learning some HTML and CSS fundamentals for WordPress, register for one of our courses at courses.ohklyn.com
How to create a new menu
- Click on ‘create a new menu’
- Enter a name for the menu (this is for your reference)
- Then select ‘create menu’
- At the bottom of the page, select where you want this specific menu to be displayed. For example, the ‘Primary Menu’.
How to add menu items to your menu
- Select the elements from the left, then click ‘add to menu’.
- You can amend the order by clicking on the menu item and dragging it into position.
- To set these as mega menus and feature the posts and categories in the navigation, click on the dropdown arrow for the menu item. In the dropdown where it says ‘not mega menu’, select the category you want to feature. If you don’t want to feature a mega menu, then leave this set to ‘not mega menu’.
- Then click ‘save menu’.
How to update your WordPress sidebar
The sidebar in WordPress is referred to as a widget enabled area and allows you to set a global sidebar that appears on all pages, posts, or archive pages – where a sidebar is enabled.
What’s great about the Soledad theme is that you’re able to apply a unique sidebar to the homepage, category or archive pages, individual posts, and static pages via the theme customizer.
Updating the sidebar widget area
From your WordPress dashboard, hover over ‘appearance’ and select ‘widgets’. On the left, you have all the available widgets and on the right, are the widget enabled areas.
With the Soledad theme, there are a number of widget enabled areas. In terms of sidebars there’s the primary sidebar area and a number of custom sidebar areas that you can use to assign to individual posts and archive pages.
If you imported the demo content, there will be a number of widgets added to the various sidebars and other widget areas.
How to add a widget to the sidebar, or any widget enabled area
- Click on the widget on the left.
- Select the widget enabled area you want to add the widget to and select ‘add widget’.
- Once the widget has been added, you can drag it into place.
- Click on the widget to amend its settings.
- Once you’ve updated the widget, hit ‘save’.
How to delete a widget
- To delete a widget, click on the widget.
- Then select ‘delete’.
Ok, so that’s a crash course on widgets, there are theme specific widgets that reference ‘soledad’ in the name as well as the standard WordPress widgets.
Add a newsletter signup to your travel blog
If you want to integrate your MailChimp account you’ll just need to ensure the ‘MailChimp for WordPress’ plugin is installed. If it is, you’ll see the ‘MailChimp for WP’ tab in the admin menu, navigate to this tab. To connect your MailChimp account with your blog:
- Login to your MailChimp account.
- Once you’ve got your list setup, navigate to your account settings, under the menu in the top left.
- In the extras tab, select ‘API keys’.
- Then create an API key by clicking on ‘create a key’.
- Copy the API key, then navigate back to the MailChimp for WP tab in your WordPress dashboard.
- Where it says API key, paste in the API key you just created, then save changes.
- The status should then change to ‘Connected’.
Create a new list that you want subscribers to be added to. Here is a tutorial on how to do it.
If you want to use something else like ConvertKit or Active Campaign, just add a HTML module to your sidebar, then add the embed code to a HTML widget.
We recommend investing some time in going through all the widget options and settings available, removing widgets you don’t want and adding the elements you want. In the theme documentation, there’s a section on widgets, that explains the Soledad specific widgets, and guides you through how to get the most from them.
Ok, so your blog should be starting to take shape. There’s a bit of a learning curve, so try not to feel too overwhelmed. Stick with it for a few weeks and you’ll be through the steepest part of the learning curve. Remember to post any questions or comments via the comments section in YouTube, we’ll personally respond to every comment.
How to update the footer
There are three components to managing the appearance of your footer. These are the footer menu, the footer widget areas, and your footer layout options available via the theme customizer. Let’s explore all three.
How to update the footer menu
First is the footer menu. Like the primary navigation we created earlier, you are able to create a footer menu in the same way. The only difference is that once you’ve created your new menu, select ‘Footer Menu’ under the ‘Menu Settings’ at the bottom.
Note: You will need to enable the footer menu via the ‘footer options’ tab in the theme customizer.
How to update the footer layout and content
Depending on the demo content you imported, the layout structure of your footer will be different. However, the fundamentals will be the same. Within the ‘footer options’ tab you can adjust the number of columns you want to be displayed.
Similarly to the sidebar, you’ll manage the content that’s in the footer columns via the footer widgets, which you can update by hovering over ‘appearances’ and selecting ‘widgets’. If you have a two column layout, only the first two footer widget areas will be displayed. If you have three columns, three will be displayed.
If you don’t want the instagram feed at the bottom, you can disable this via the widgets panel by opening the ‘Footer Instagram’ widget area and deleting the instagram slider widget. Similarly, you can remove the newsletter signup or edit its contents via the ‘Footer Signup’ widget area.
How to update the footer text and copyright information
- Navigate back to the ‘footer options’ tab within the customizer.
- Scroll to the bottom and you’re able to update or remove the copyright information via the ‘Footer Copyright Text’ input box.
- Once you’re happy with how the footer of your blog is looking, remember to publish your changes.
How to delete the demo content you don’t want to use
If you have followed along, you will have customized a significant portion of your content, including creating new pages, posts, categories, menus, updating the sidebar and footer, etc. If you’ve done that, or once you finish doing that, you’ll then need to go through and delete any of the demo content that’s still remaining.
How to delete posts or pages
- Go to either the all posts, or all pages tab.
- Hover over the page or post you want to delete.
- Then select ‘trash’.
- This will move the post or page to the trash tab, but not permanently delete it.
- To permanently delete content, navigate to the trash tab.
- Then, hover over the title and select ‘delete permanently’.
Go through and delete any of the posts and pages that you don’t want to repurpose for your blog.
Next is any categories or tags that have been created that you don’t want to use. We deleted our categories earlier, however, we will need to delete any tags we’re not using.
How to delete categories or tags
- Hover over posts in the admin menu and select categories or tags.
- You can either hover over the tag or category name and select ‘delete’.
- Or check the box to bulk select tags or categories.
- Then, under the ‘bulk actions’ dropdown, select ‘delete’ and click ‘apply’.
How to delete comments in WordPress
- Choose comments from the admin menu.
- Then, select the comments you want to remove.
- Select ‘move to trash’.
- Once again, to permanently delete these, go to the trash folder and permanently delete them there.
Adding a contact form to your travel blog
If you decide that you want to use a contact form on your blog for people to reach out, then you can either embed a form or leverage your favorite contact form plugin. Soledad, supports Contact form 7 and is what they have included on their demo contact page.
Contact Form 7 uses a shortcode to embed the contact form. For those unfamiliar with Contact form 7, here’s a link to a tutorial on how to use it.
Next steps
Once you’ve got your travel blog looking the way you want, and you’re ready to launch your site there’s a few good practices that you should follow to ensure you get the best results.
If you want your blog to be searchable via search engines like Google, then you will need to index your blog. To learn how to do this, watch our video on how to add your website to Google Search. In this video we’ll show you step by step how to add your blog to google search.
Similarly, if you want to monitor traffic and user behaviour on your blog, then you will want to install Google Analytics. Yes, we’ve created a video on how to add Google analytics to your blog as well.
And, that wraps up our how to start a travel blog tutorial using WordPress. We hope you got value from this tutorial and are on your way to launching your new travel blog.