
In this article we’ll show you how to change GoDaddy nameservers to point at Bluehost.
If you have purchased your website or blog domain through GoDaddy and want to host that domain on a different hosting provider like bluehost, then you will need to change the nameservers to point at Bluehost:
- ns1.bluehost.com
- ns2.bluehost.com
Steps to change GoDaddy nameservers to point at Bluehost
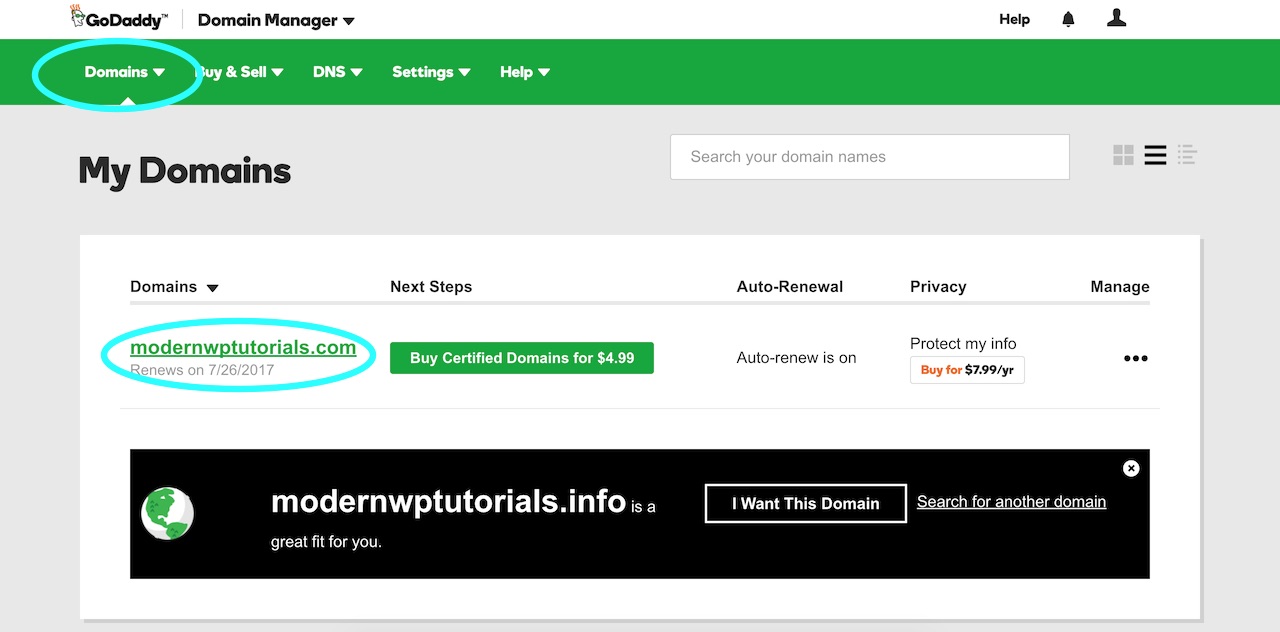
Step 1 – Navigate to the domains section
From your GoDaddy dashboard, navigate to the section where you manage your domains and select the domain you want to update the Domain Name Server (DNS) records for.
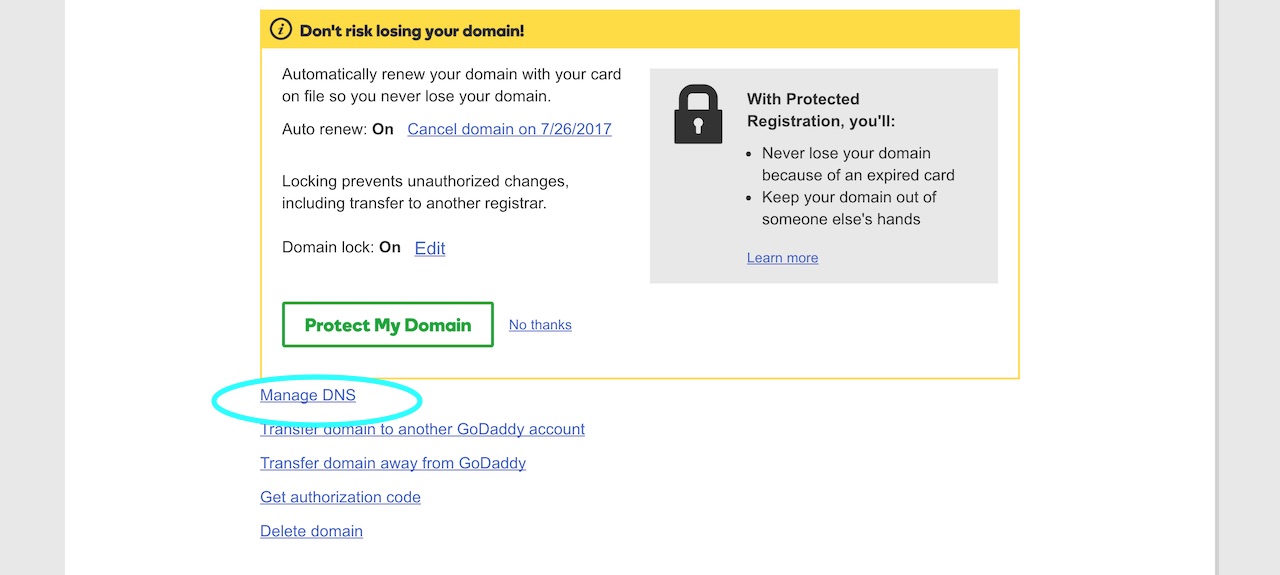
Step 2 – Select the ‘Manage DNS’ option for your domain
Once you’ve selected your domain, scroll down to the section and select the ‘Manage DNS’ option.
Step 3 – Find the nameserver section and modify the record
Navigate to the nameserver section for your specific domain and modify the records to the following:
- ns1.bluehost.com
- ns1.bluehost.com


Confirm the change, and that’s all you need to do on the domain registrar side. The next step is to log in to your Bluehost dashboard and add the domain to your hosting account (if you haven’t do so already).
Step 5 – Login to your Bluehost dashboard and navigate to the domain section
Log in to your Bluehost dashboard. From there, under the ‘Domain’ tab at the top, select ‘assign’. This will take you to the section where you will enter the domain name that you just changed the nameservers for.
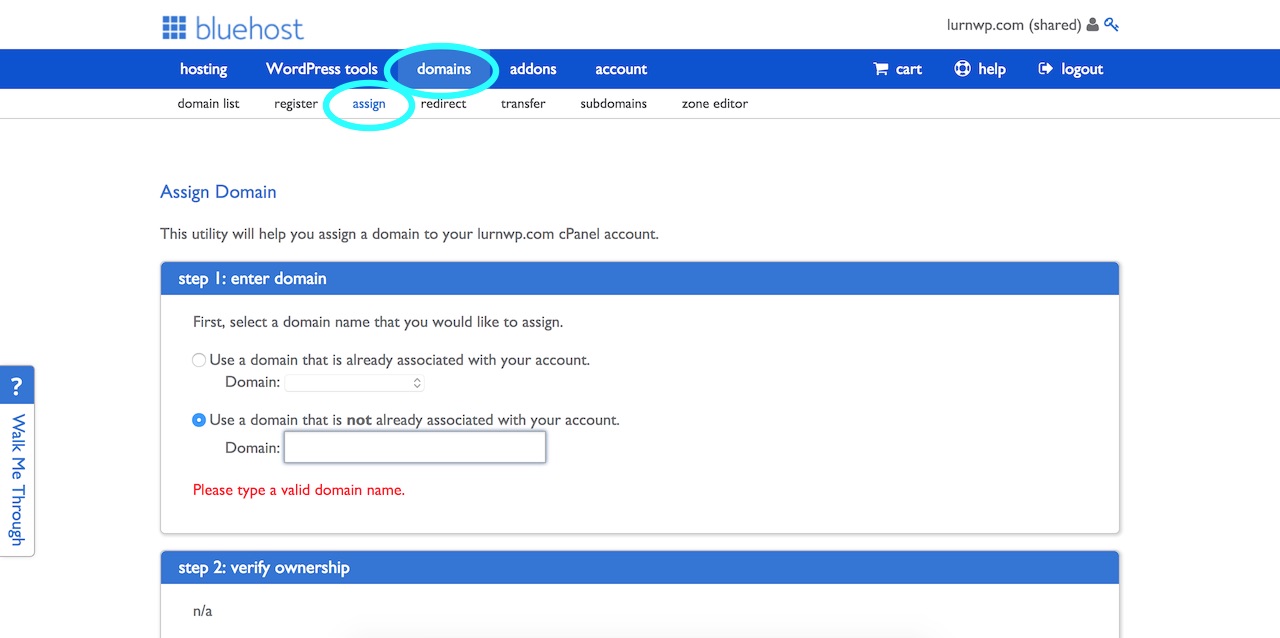
Step 6 – Assign the domain to your Bluehost account
From the ‘Assign a Domain’ section, follow the steps outline.
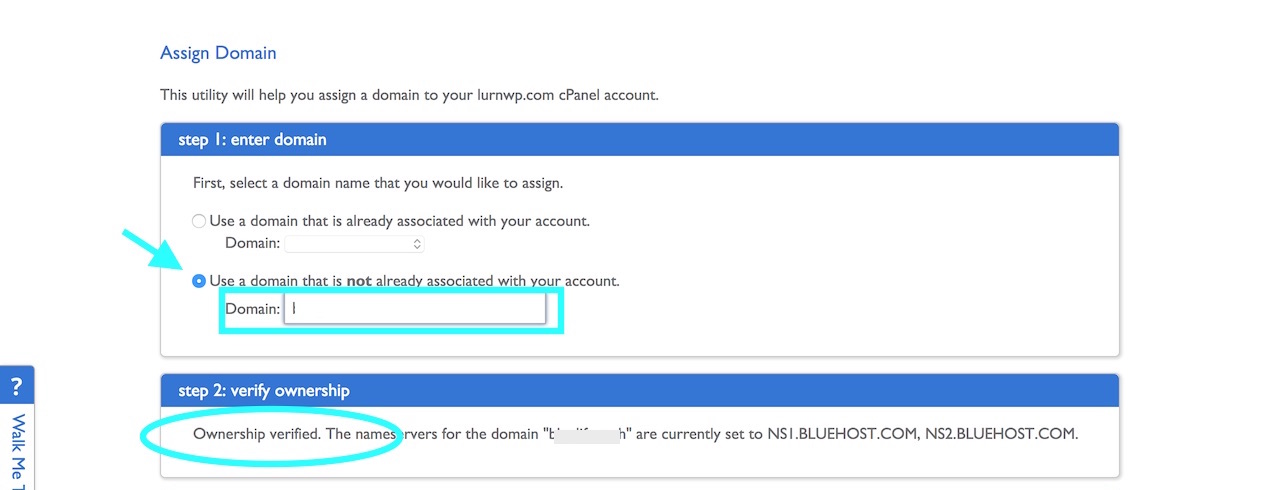
- Enter your domain into ‘Use a domain that is not already associated with your account’ box.
- If you’ve changed your nameservers, you will receive the ‘Ownership verified’ message as per the image below.
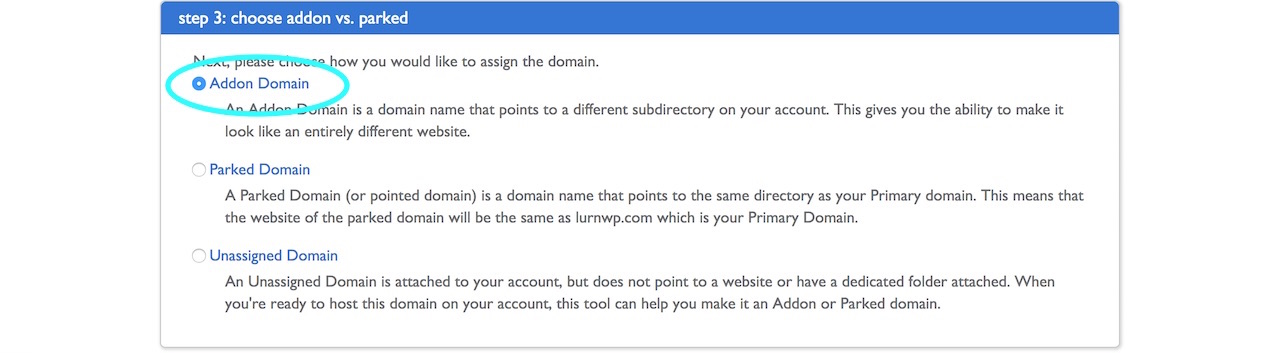
- Leave the ‘Addon Domain’ option checked in step 3.
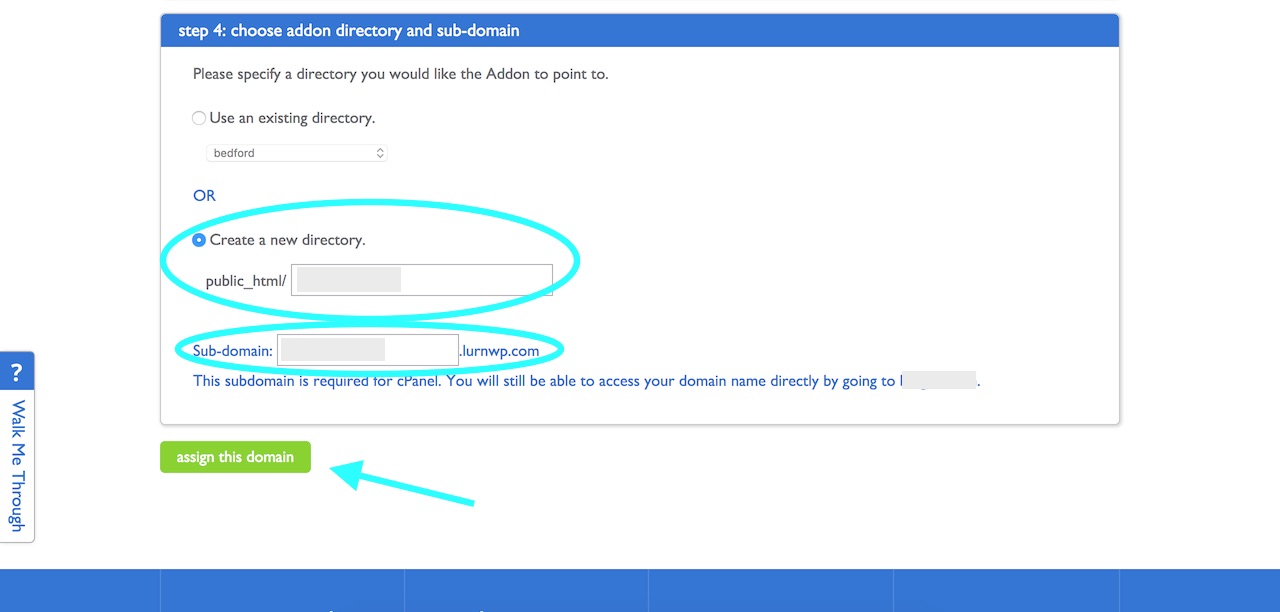
- Leave the ‘Create a new directory option’, and default sub-domain option selected in step 4.
- Select ‘Assign domain’.
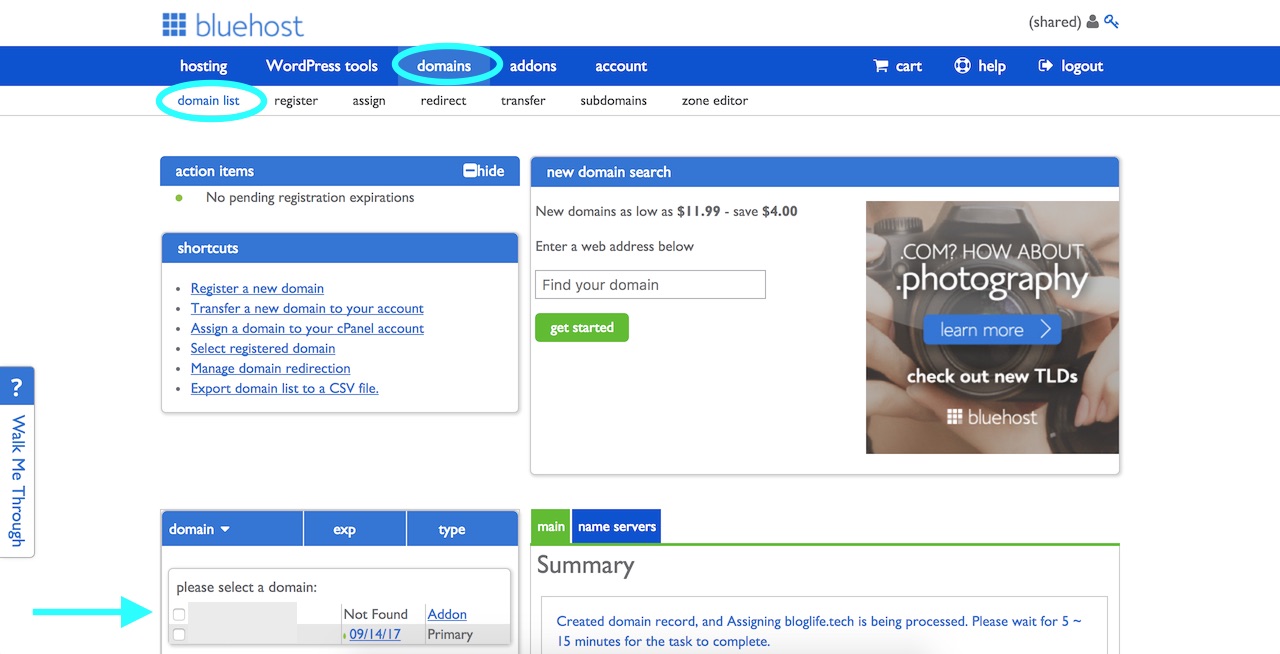
You’re all set! Once the domain has been assigned, you will be taken to domain management of your Bluehost dashboard, and if you scroll to the domains list section, you will see that your domain is now associated with your hosting account.
If you go to the front end of your website by entering your domain name into the browser, you should see an image similar to the one below. When you see this, you’ll know that the nameservers have been updated, if it’s a brand new domain it may take up to 24-48hrs to propagate, which is the process of updating dns information across the web.

Congratulations, you have successfully changed your GoDaddy nameservers to point to Bluehost. The next step is to install WordPress or your preferred web platform and get on building your website or blog.